
Turned Furniture
See how to enter and the rules here – www.awgb.co.uk/show-tell/show-tell-rules/
The winner for May is Katie Abbott
Dave Wraight
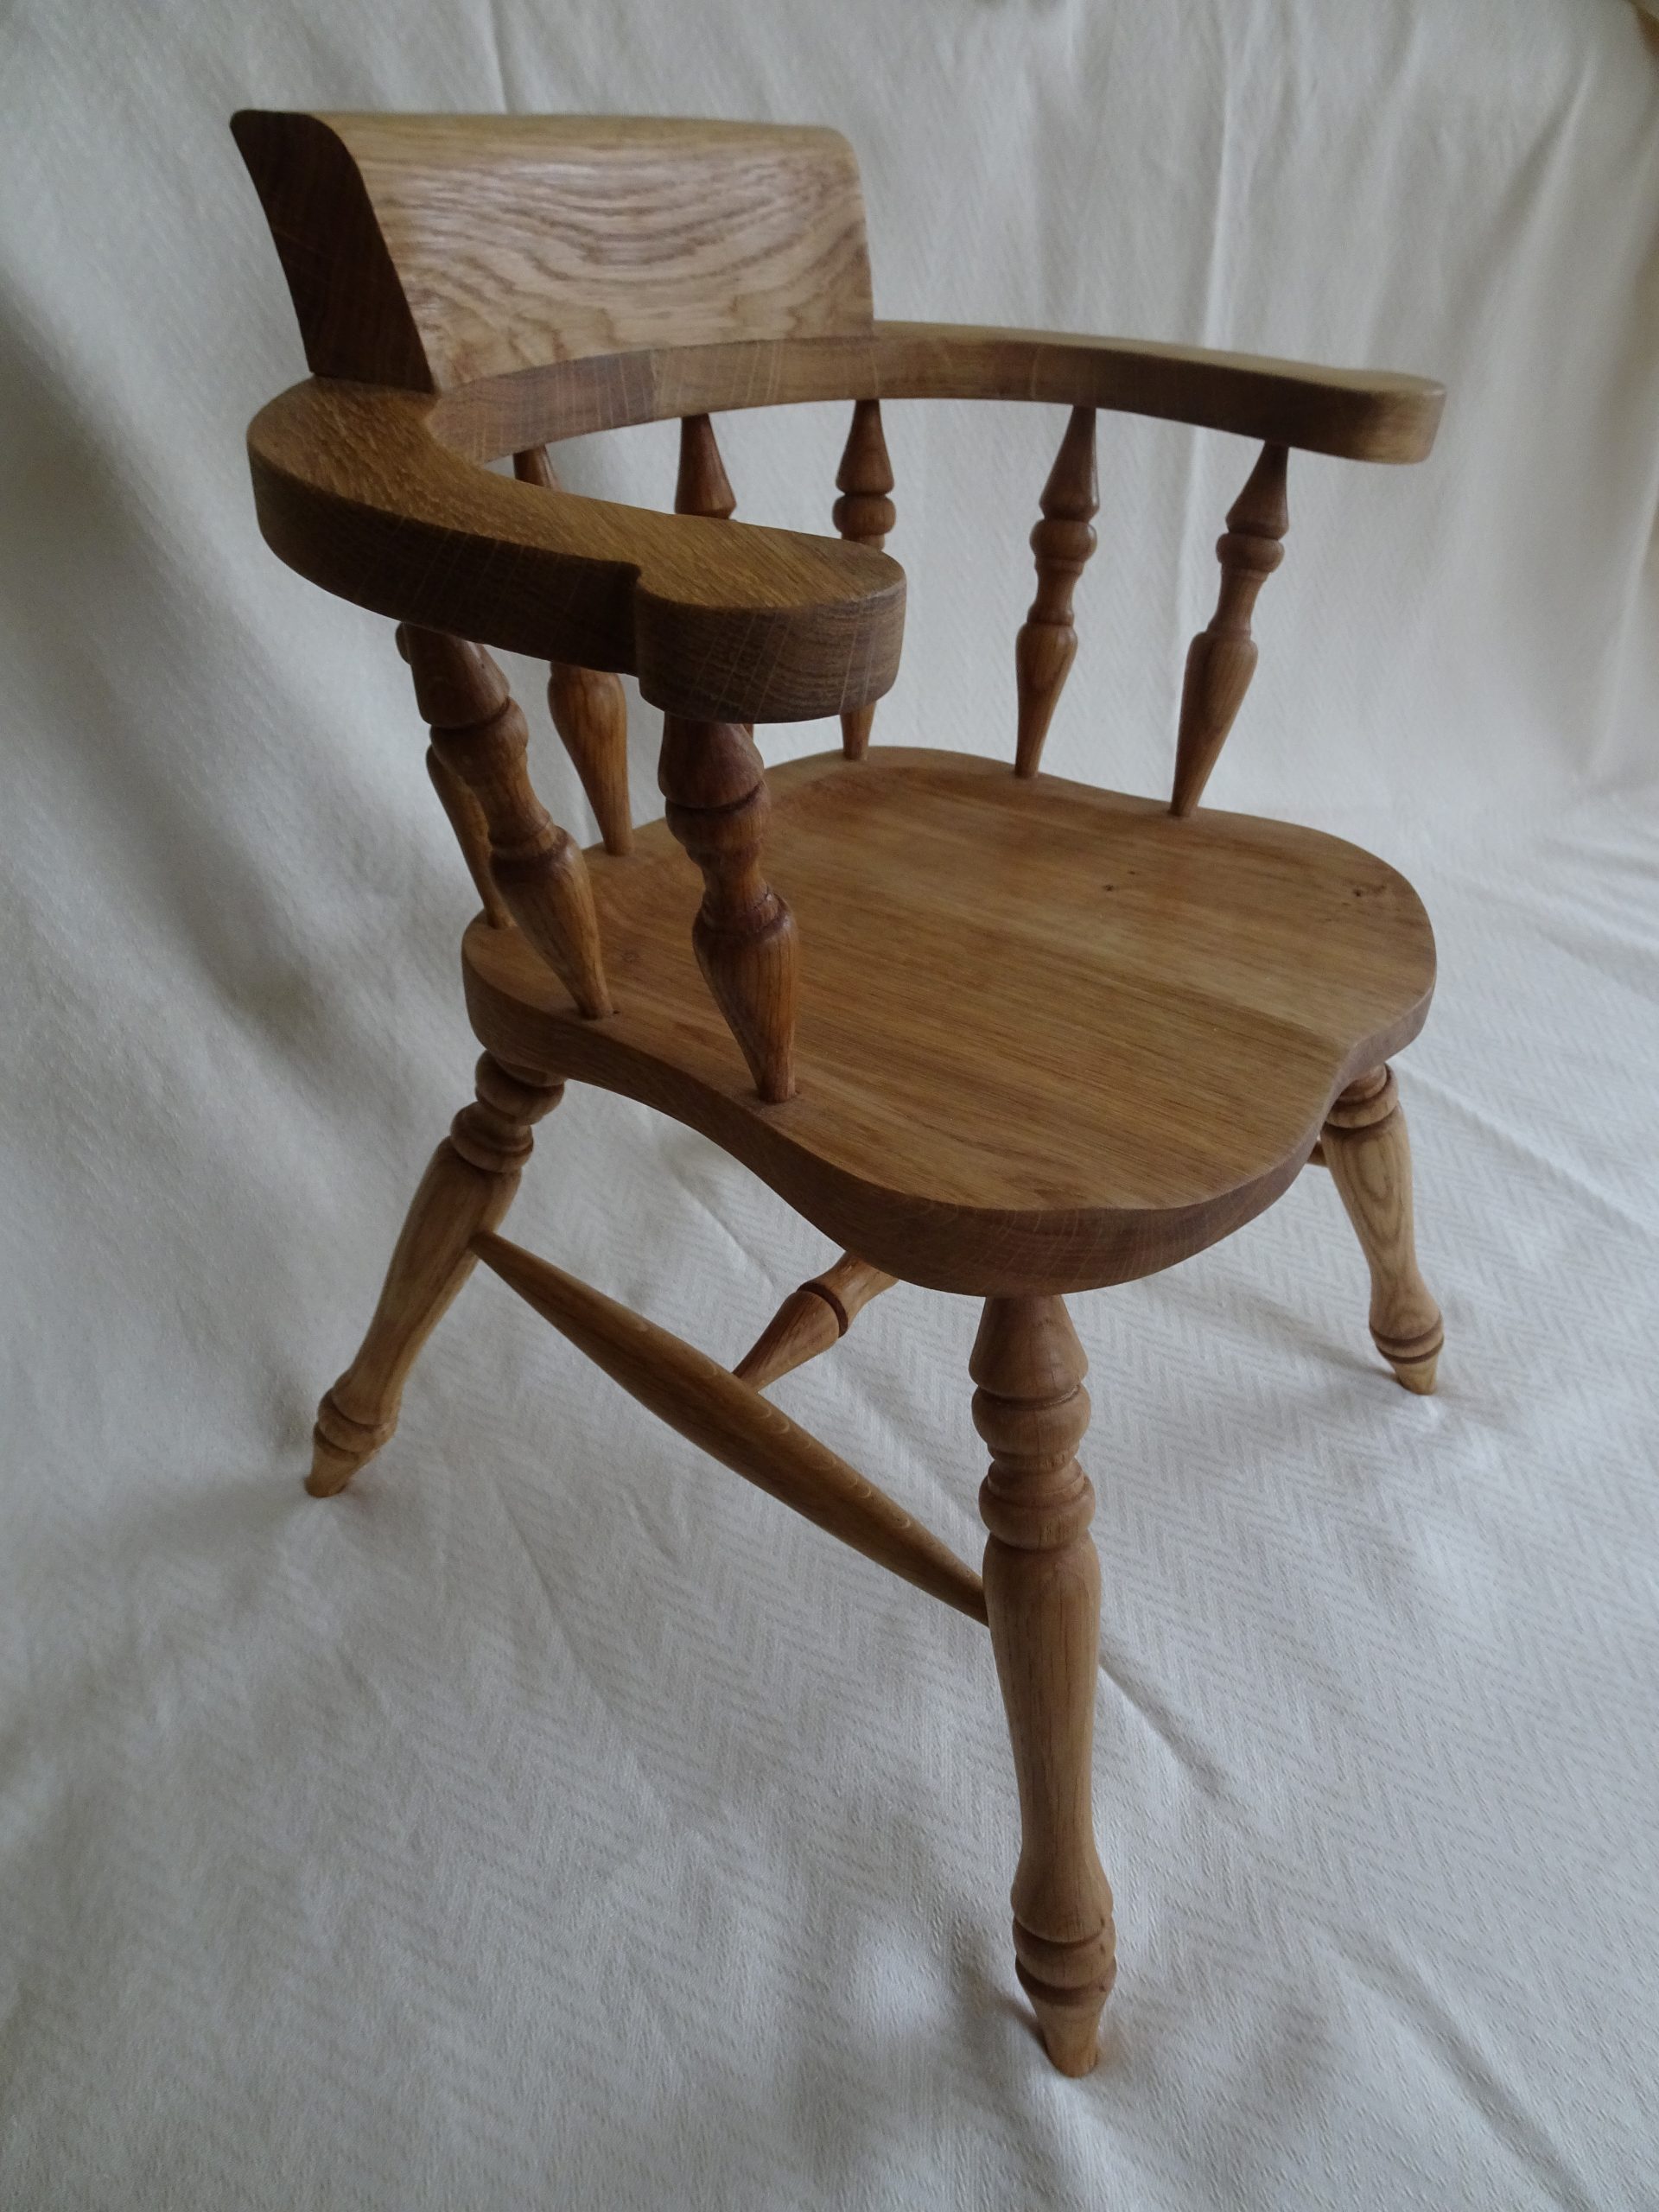
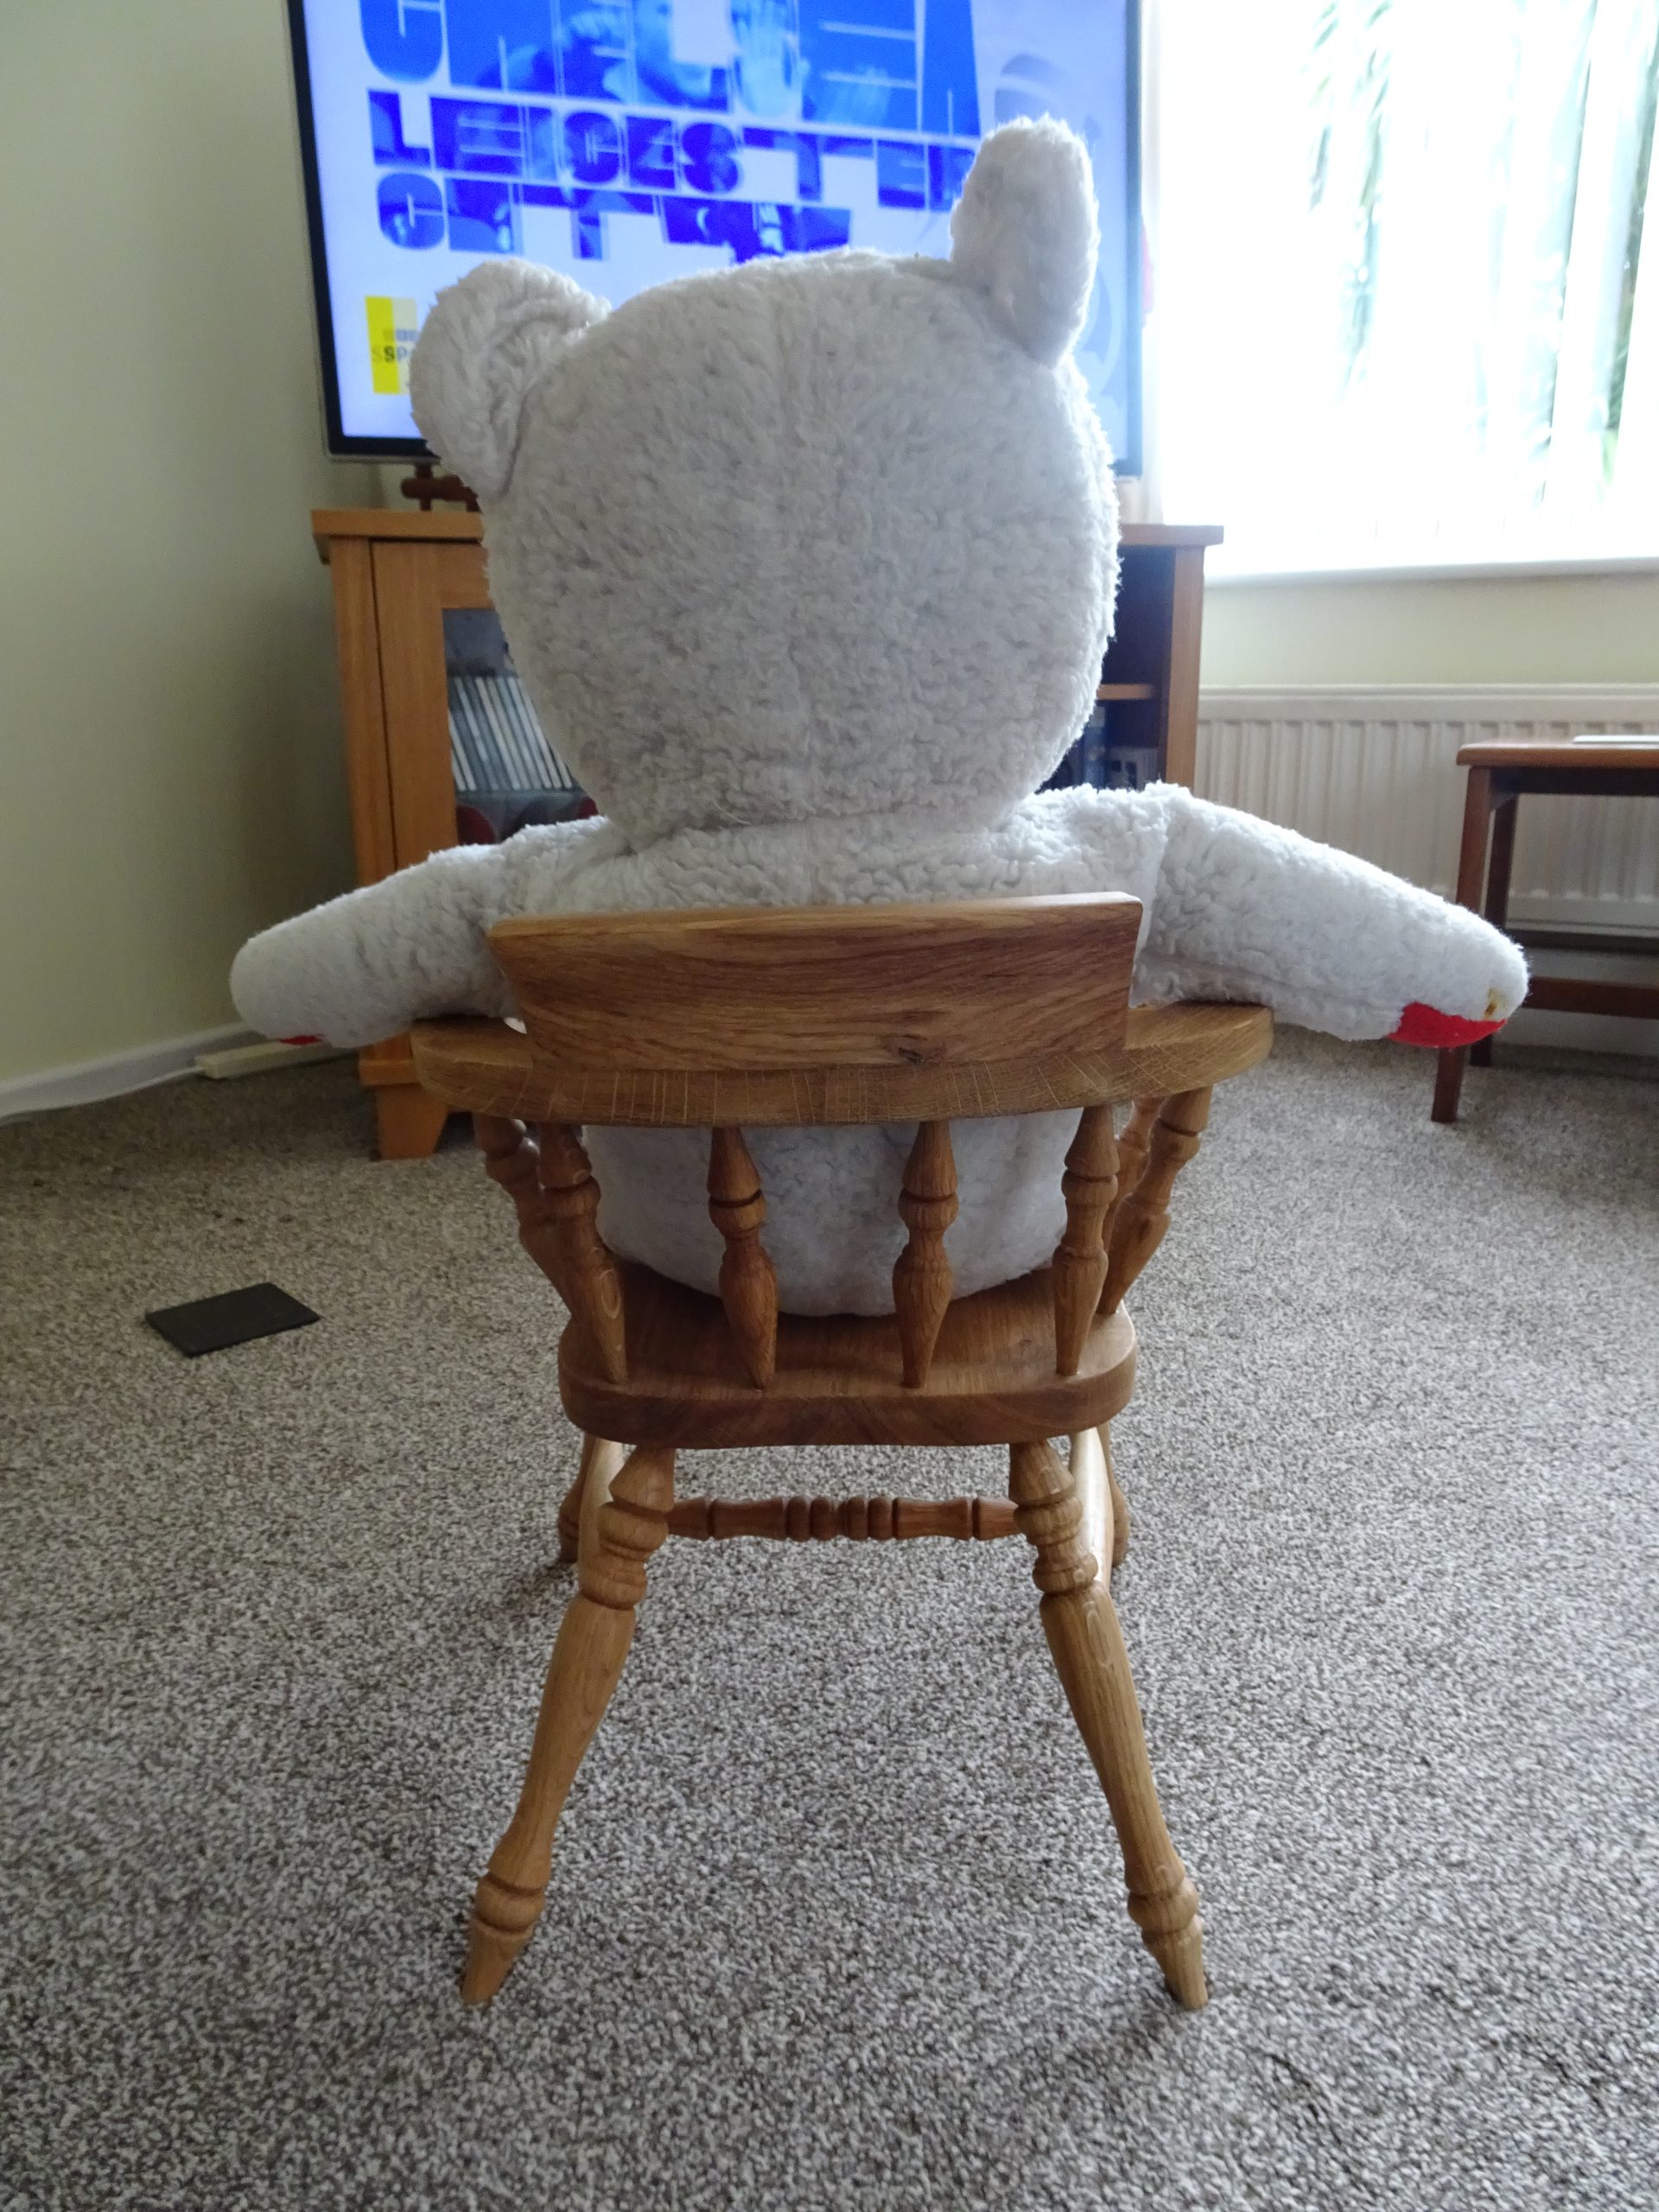
Big Ted was given to my son when he was first born, so this is a chair for him and also in memory of my Dad.
Some 30 years ago my dad made two Smokers Bow chairs, one for me and one for my sister. Dad was a carpenter/joiner, then fireman and he took up woodturning when he retired. When he passed away in 2008, I took over his workshop and tools, started woodturning and decided that at some point in the future I would, like him, make at least one chair.
That took until 2018 when I was fortunate enough to spend a week at Axminster Tools and made a Windsor chair. While on the course, I perused a book by Jack Hill ‘Country Chair Making’ and decided that a rocking chair would be my next project. I made two – one for me and a ¾ sized one for the grandchildren. These featured on the AWGB forum. https://www.awgb.co.uk/awgb-turnings/
I did have some ash left over so decided to invest in some extended bed bars so I could make the legs of a bar stool. The two full sized chairs and stool get used every day, whilst the ¾ chair is used to hold teddies, while waiting for the grandchildren to come back when covid restrictions allow.
Earlier this year, my local woodturning club, Dorset Woodturners, had a lockdown challenge – make something from a pen blank that isn’t a pen. I carefully cut an oak pen blank into thin strips and made a 1/12 scale rocking chair which was well received by club members. Must admit that some cheating went on with some of the joints – more glue than joint! Having read about the AWGB challenge for May I decided one more chair was on the cards!
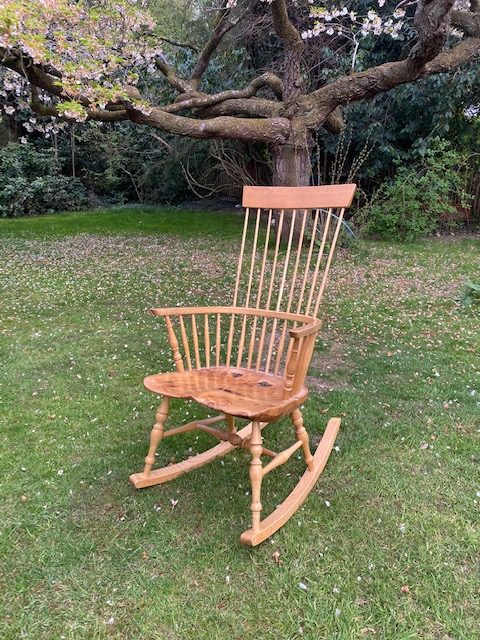
The decision now was which chair – books by Jack Hill sit on my bookcase, (Found in NT bookshops) so I had plenty of choice. As a tribute to my dad, I decided on the Smokers Bow, I needed to decide on wood and size. I do have a lot of wood, but it is mostly blanks, so was quite limited and lockdown was in place. Looking at the wood I had, EU oak was the choice. I had enough of a plank left from a previous project to cut two pieces and glue them together to make the seat of a half-sized chair.
Next task, draw some half-size plans and make some templates for the seat and arms. Measurements angles and sizes all worked out to keep in scale as much as possible. Oak for all the turned parts would come from oak that was originally sold as firewood! This was cut and sized ready for turning plus extras because this was never the best quality! The final size of the chair would be 43cm high at the back and 35cm across the arms.
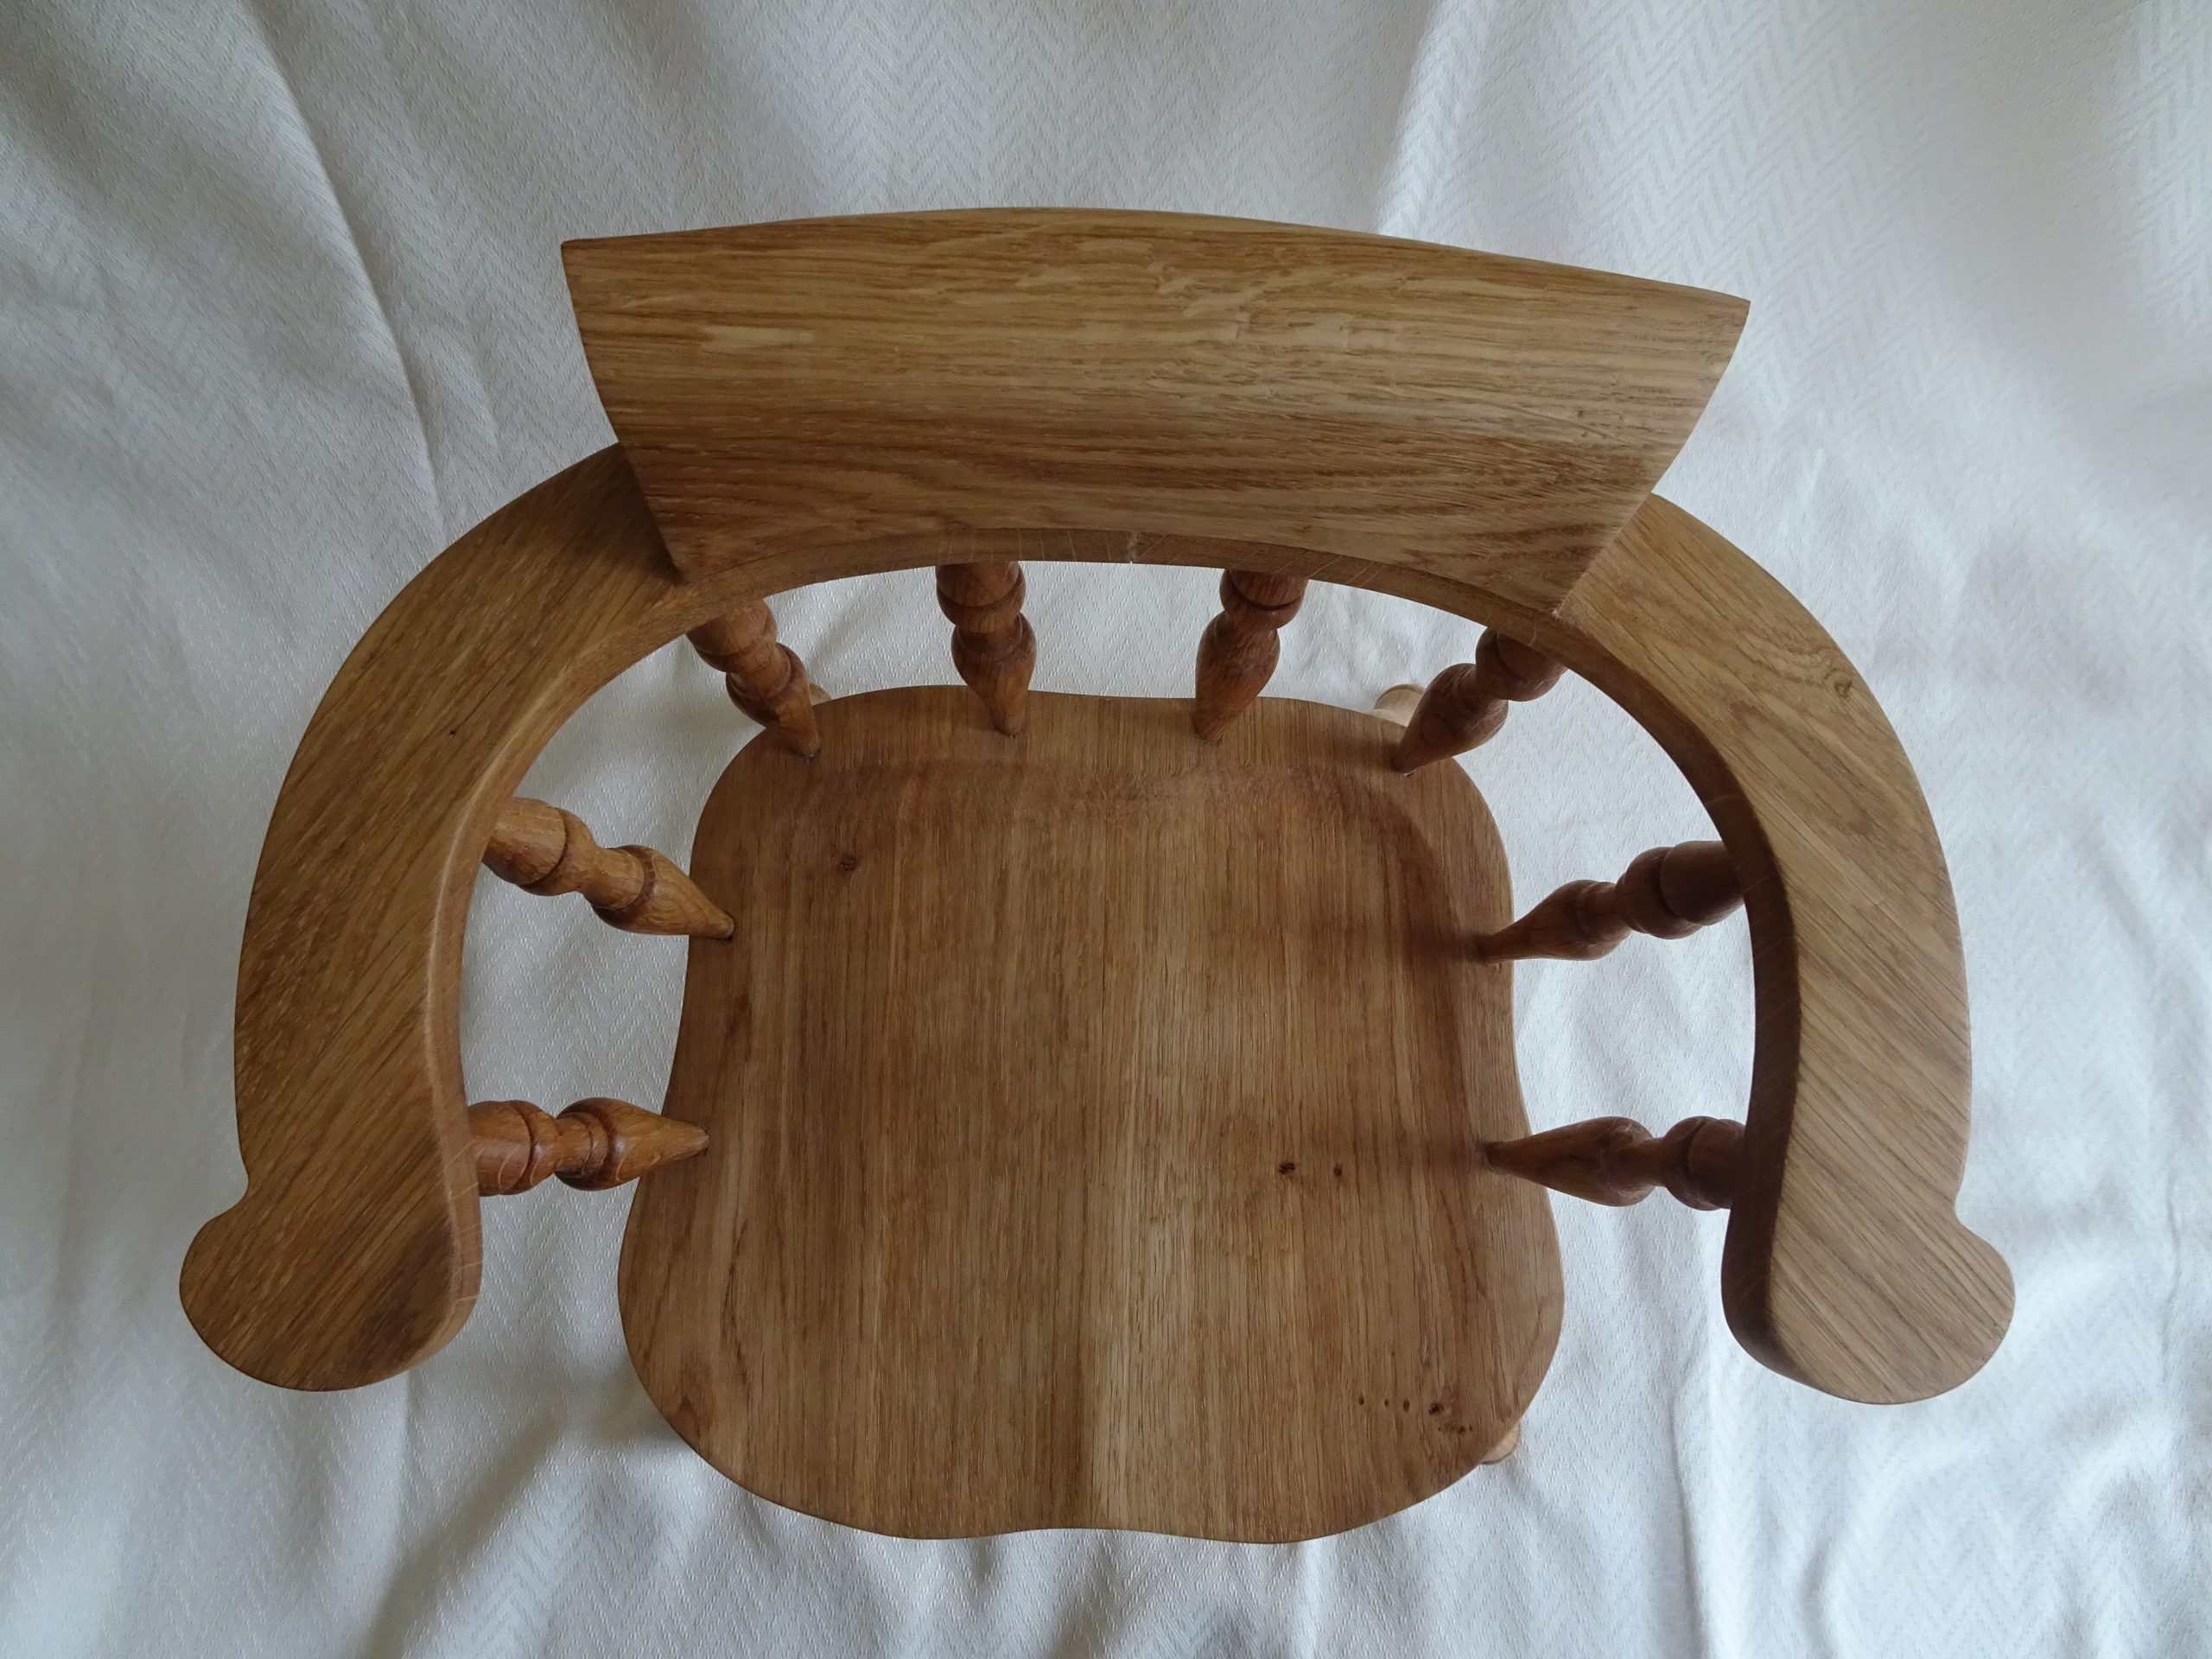
The seat was glued, left for a few days, then the outline shape cut on the bandsaw. Legs and arm sockets now had to be drilled at the correct angles making use of the hinge board and angle blocks which had been gathering dust under the work bench. Shaping of the seat was completed using a series of heavy-duty sanding discs and cabinet scrapers before final sanding.
Having previously decided on the shaping of the legs with some trial turning, the four legs and three stretchers were turned and finished to 400 grit on the lathe, making every effort to achieve four legs the same as well as a pair of side stretchers and the cross stretcher. Making use of the hinge board, the holes for side stretchers were drilled as well as holes in the side stretchers. Jack Hill has two cross stretchers on his Smokers Bow but I decided that since this chair was unlikely to be used by a child (safety reasons) – one would be sufficient. A trial assembly showed some adjustments needed to be made on the length of the cross stretcher. Once this adjustment was made, the seat and legs were glued up using ‘Titebond 2’.
Eight spindles were turned, (I had decided not to make different arm stumps) and the two sides of arms cut and shaped. The back scroll was cut and shaped with a temporary fix to the arms. This looked wrong so had to be re-sized not once but twice. The height of the chair was now reduced to 40cm. The underside of the arms was drilled to take the spindles and then the arms were glued and screwed to the back scroll. The final glue-up really needed two pairs of hands but was achieved without too much bother apart from too much glue (I never learn). Everything was held in place with some long straps. The chair was now left for the glue to dry.
Based on the experience with my previous chairs I had decided to use an oil base for the start of the final finish. Three coats of Danish oil were applied, leaving to soak in and dry between coats. This was then rubbed down with Chestnut Nyweb. Finally, a coat of microcrystaline wax was applied and polished.
It is satisfying to see the final project as it sits alongside the other chairs. The Show and Tell for May suggests that this could be the start of a heritage collection. I think that If I put my dad’s chairs alongside mine we do have a heritage collection but I’m thinking that perhaps one more chair would make me happy – if I found a nice piece of figured elm for a seat – but please don’t tell my wife – she says we have enough chairs!
Anyway, if you feel inclined to make a chair – go for it. The only really difficult things are getting the angles of the legs and stretchers holes correct. There are articles out there, notably the books by Jack Hill and in a recent woodturning magazine(No:291) by Colwin Way.
Anyway Dad – if you are looking down I hope I have made you proud and Big Ted doesn’t have to share with any others! When all this Covid lark is over, Big Ted and the chair are off to the USA to my son and his young family.
Roger Rout
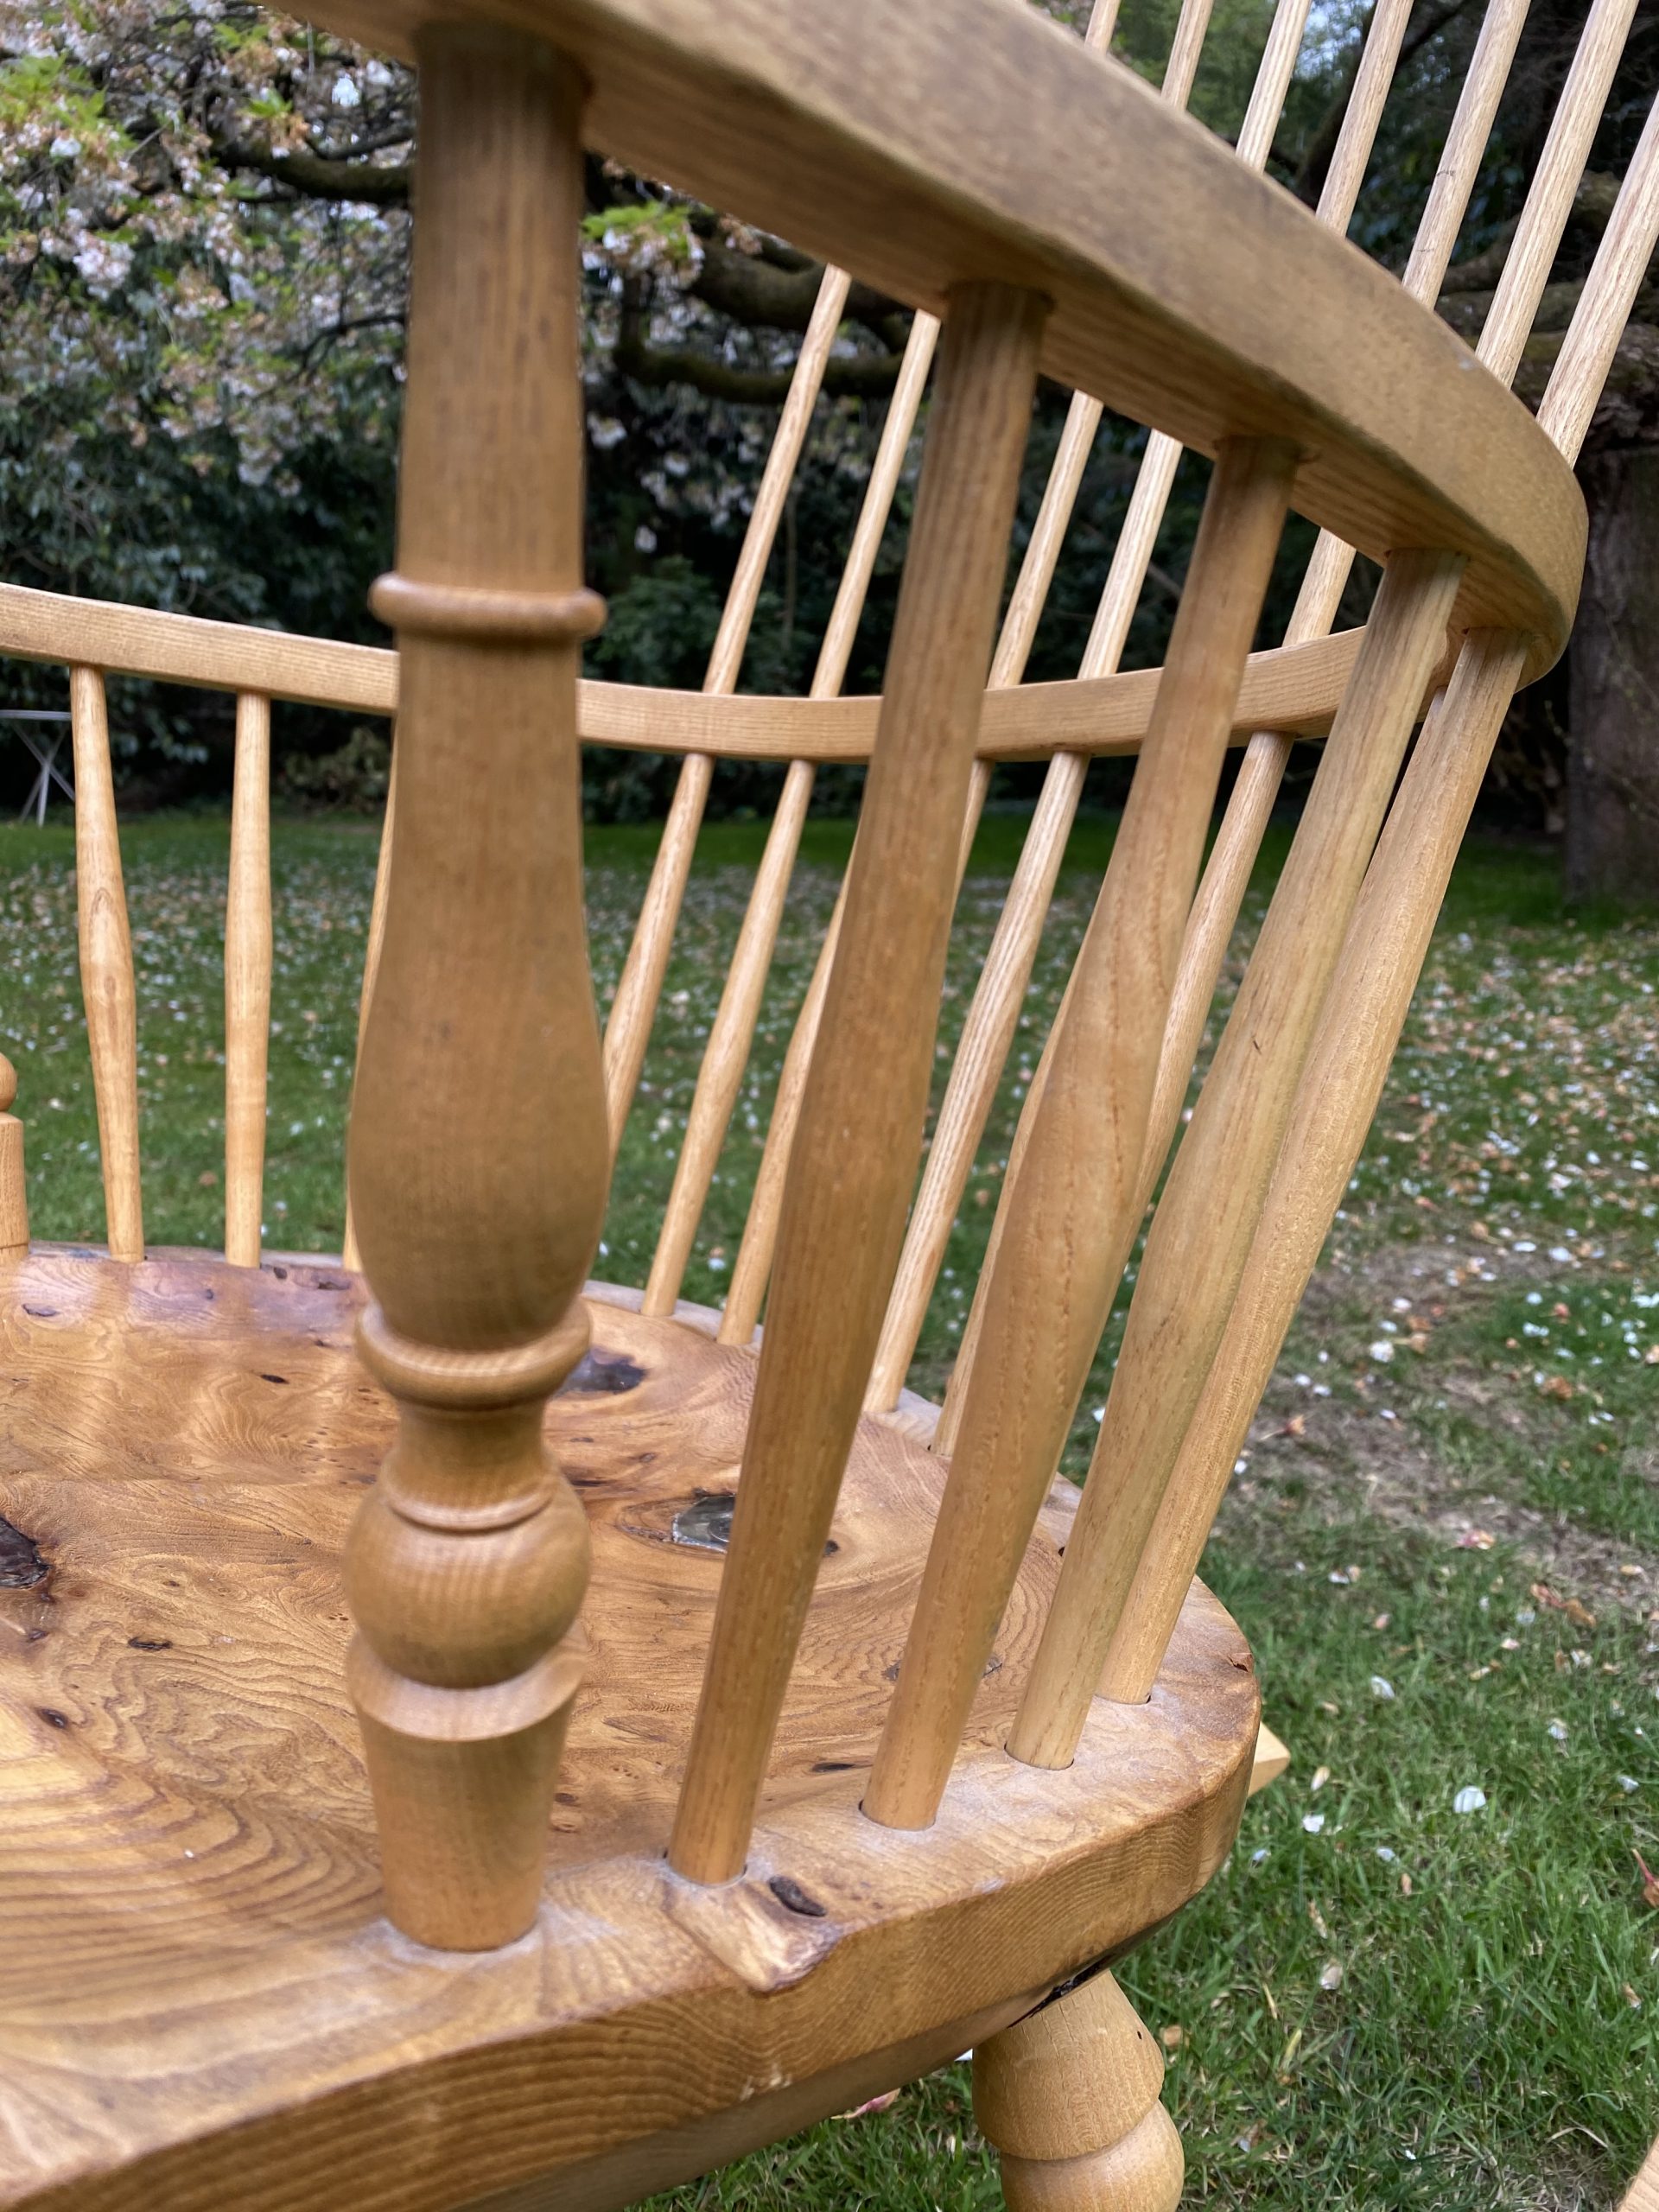
About 3 years ago I acquired a large a large Elm Tree which was 54” in diameter. A friend using a Still chainsaw and Alaskan Mill, spent weeks converting it into planks for use in woodturning and woodworking.
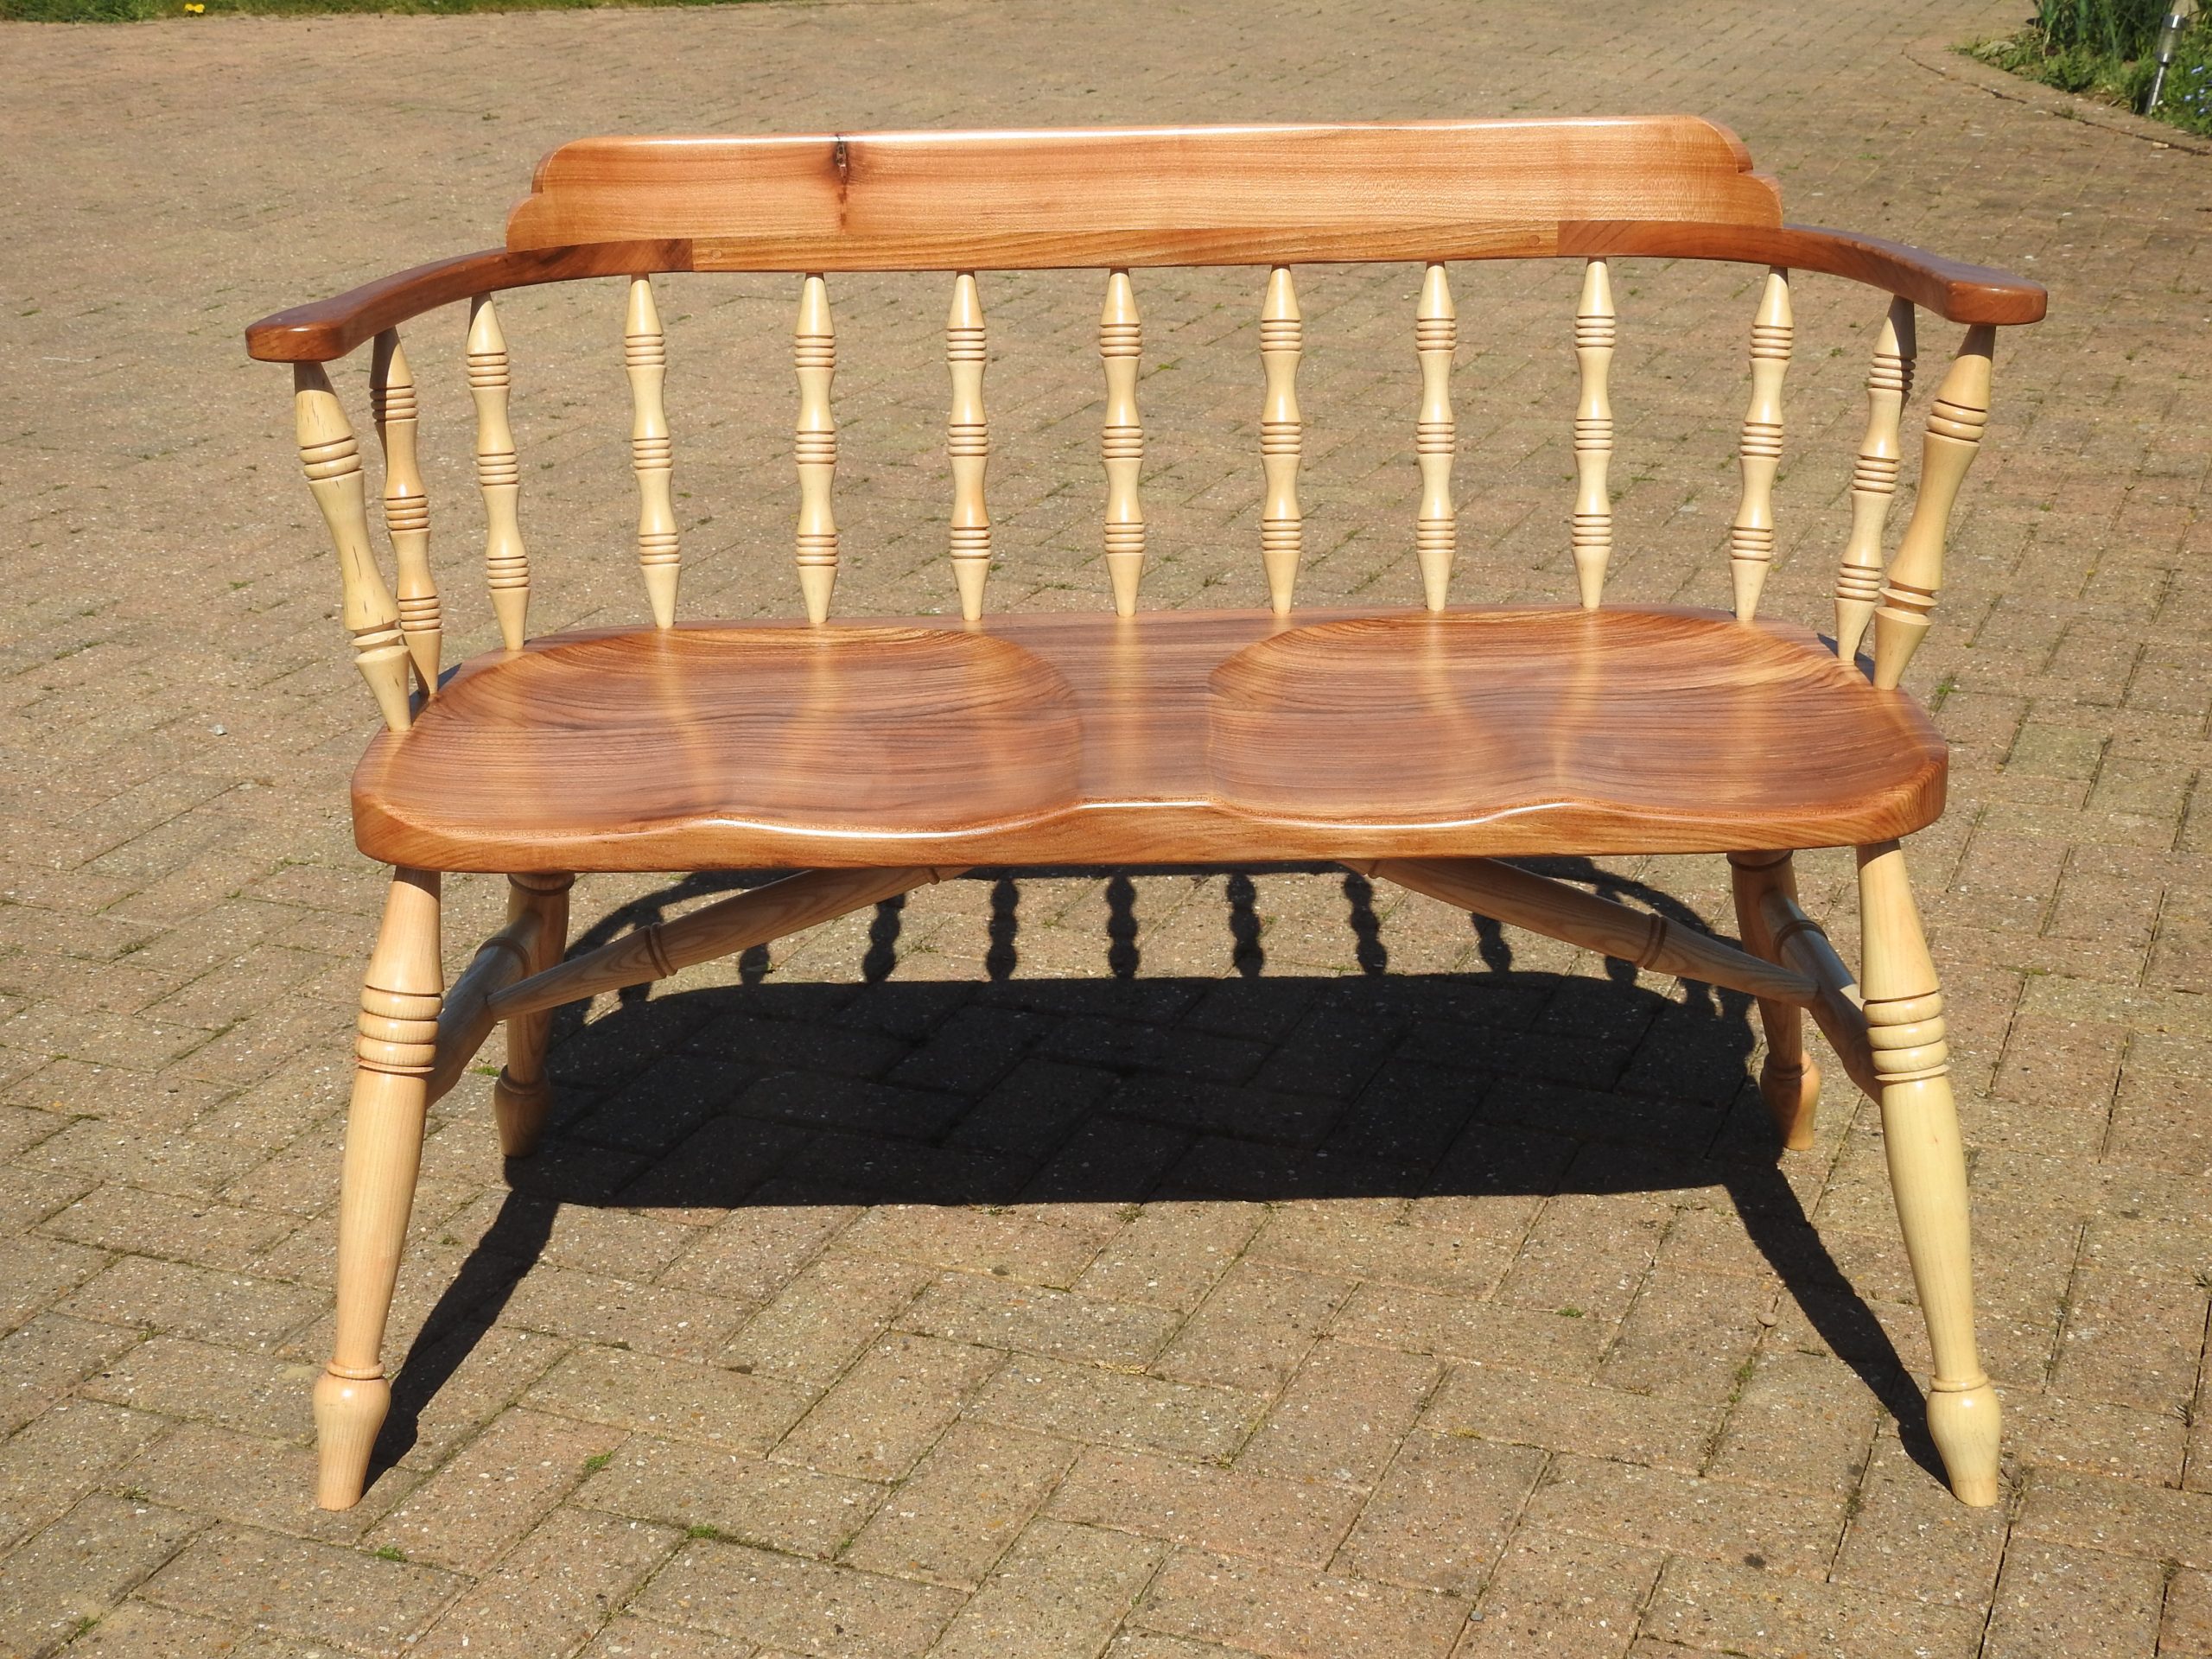
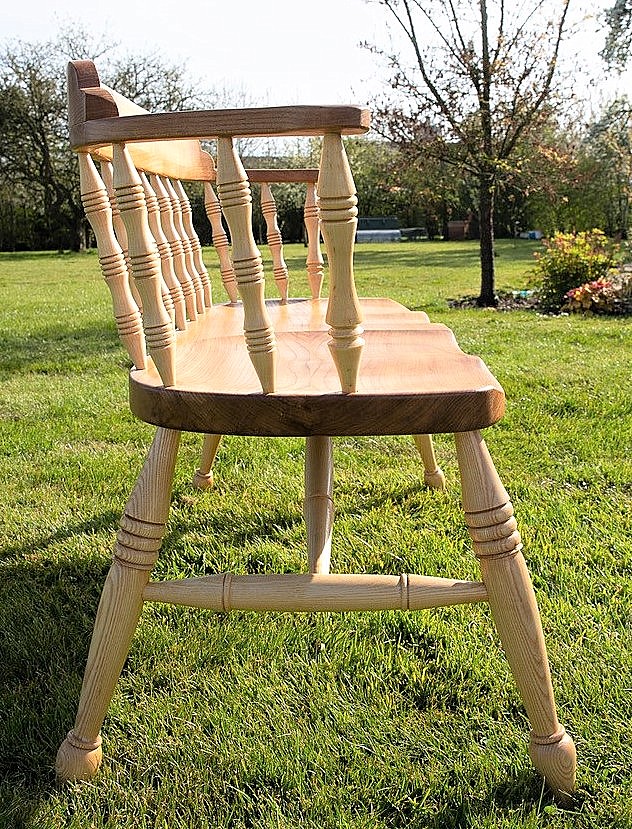
One of the projects I made was a kitchen table and 6 Windsor chairs with seats of Elm, and Ash for legs, spindles and bows. My daughter after seeing the completed kitchen table and chairs was keen on having me make her a two seater Windsor Sofa, as she is taking over the running of the family farm. I thought this would be a nice way to say, thank you. My inspiration for this project came from viewing work done by Mendlesham Chairs. The seat for the sofa was made up of the two pieces of Elm which were joined together using dominos. The seats were scalloped out using a range of tools, including spokeshaves, cabinet scrapers and lots of abrasives.
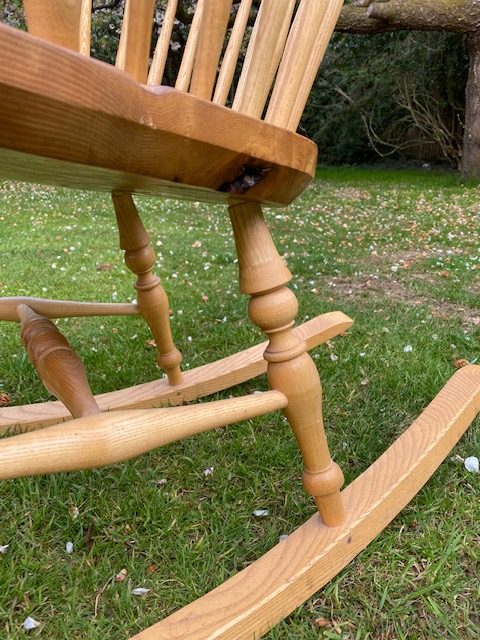
The legs are Ash, and the back spindles were turned from Sycamore also acquired from the local area. Most of these type of seats would have a crinoline stretcher fitted, but I decided to put my own slant on it and fitted two straight stretchers, which met at a point on the underside. (see Photo AWGB 10995 (2))
The back rest was made last of all from Elm again and turned out to be the most difficult part to get right. The whole piece was sanded and finished with three coats of Rustins Danish Oil. The daughter is well pleased
Philip Davis
links – “Martock and District Woodturners”, which is my local club. https://www.madturners.co.uk/home.php the gallery where I show “A2 Gallery” in Wells Somerset https://a2gallery.co.uk/ and Facebook group https://www.facebook.com/groups/302881050691346
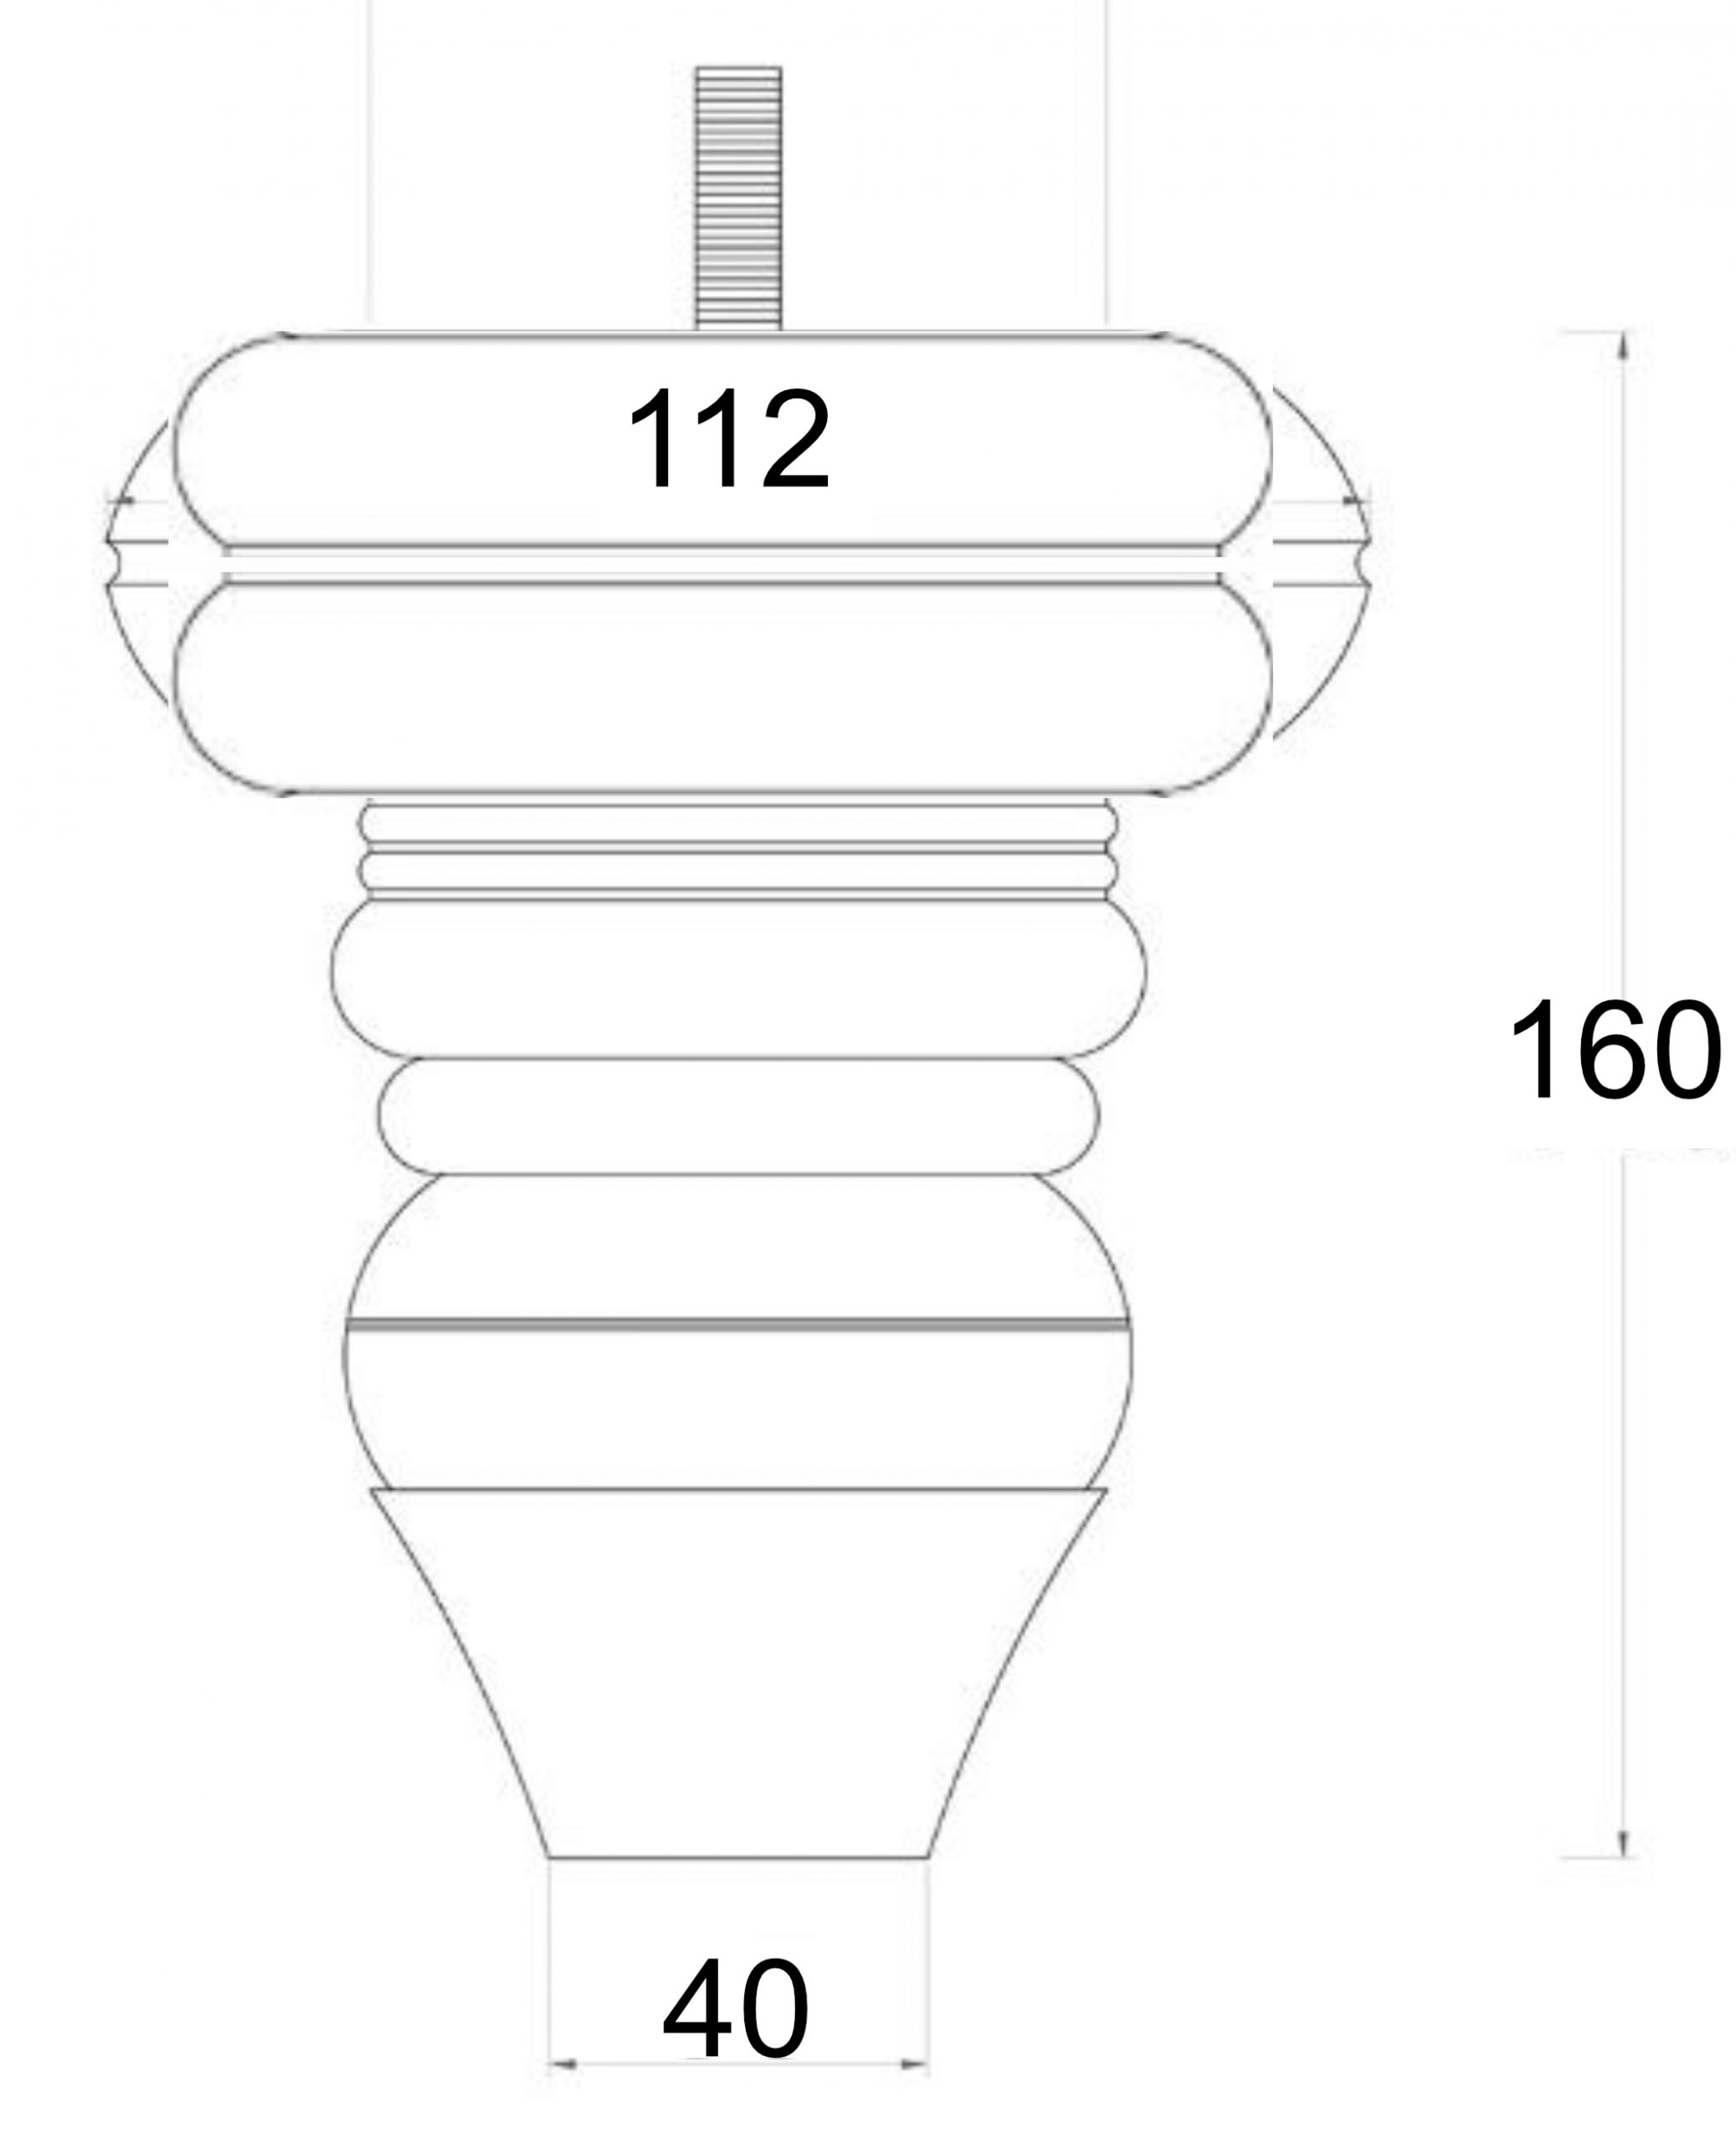
Last August I received a request to make a pair of reproduction legs for a sofa under restoration. The customer supplied the initial drawing. The first thing was to insert the drawing into a document where I could manipulate the image to produce an accurate print to the three given dimensions. From this I could obtain all the necessary dimensions without trying to scale. An awkward process especially if the original image had distorted.
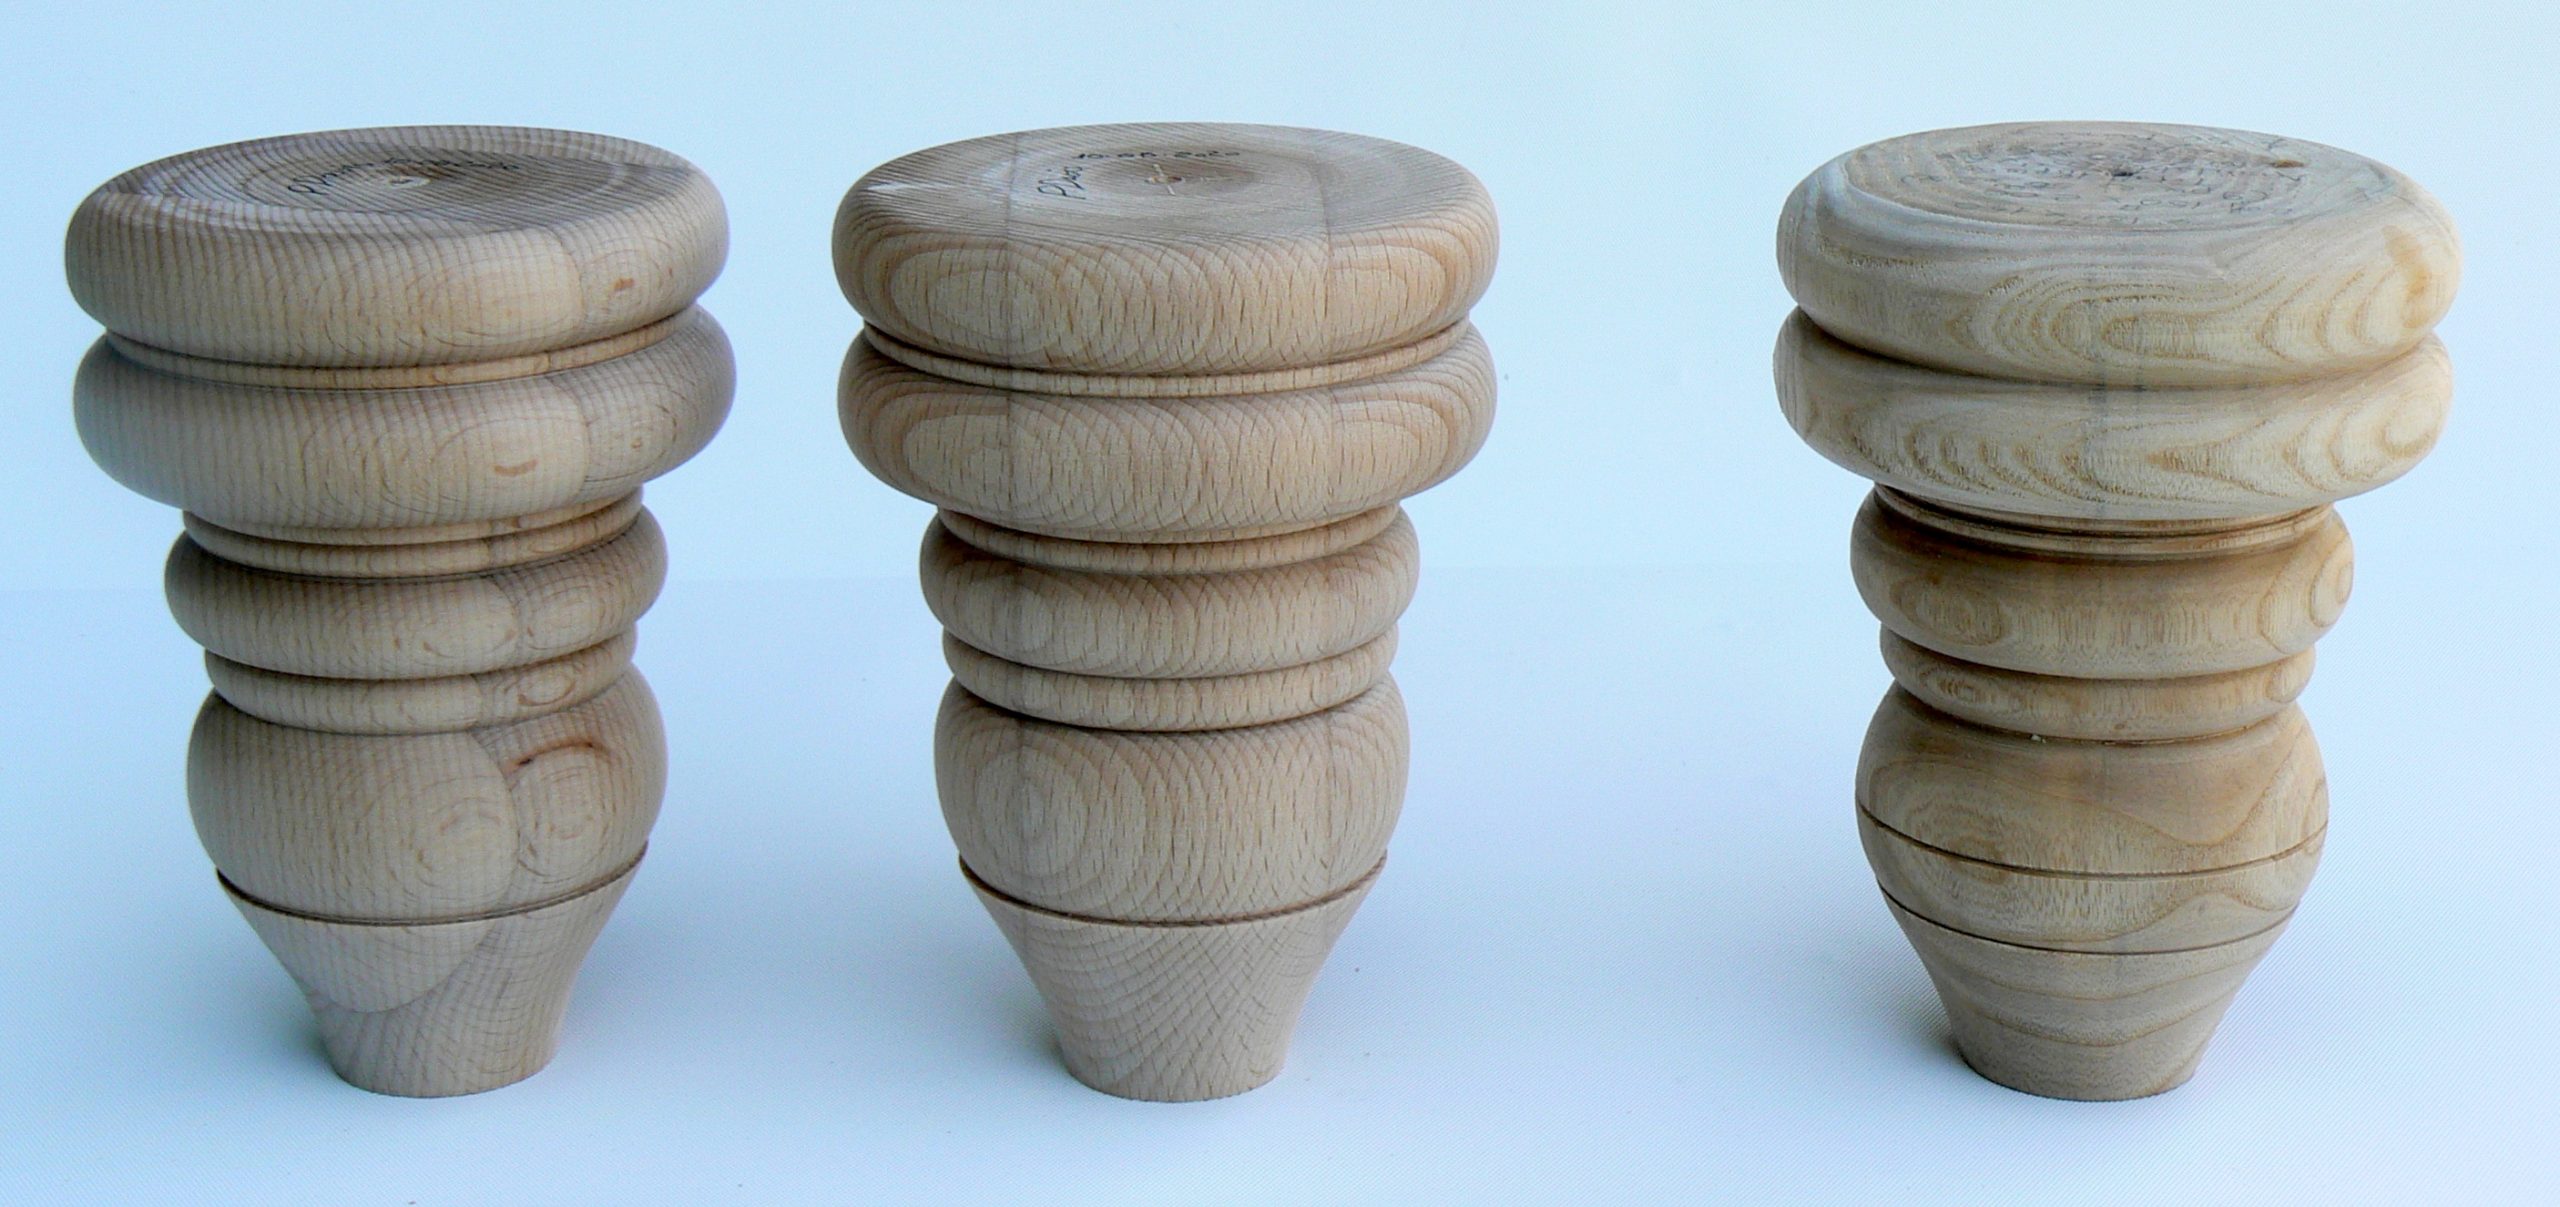
I made the prototype from an ash log of a convenient size, of which I have a good quantity, well seasoned. Discussion ensued and the final design agreed upon. Beech was a natural choice being close grained to take a crisp finish, strong and hard wearing.
First problem to obtain well seasoned wood large enough for the project. Not surprisingly, impossible as one piece; we were able to source a good piece of kiln dried timber 500mm long x 120 wide x 50 thick, without knots or other serious blemishes.
Before gluing, the individual pieces were flattened by hand, because of the less than perfect surface. At least I did not have to do the outer surface, which would disappear in the turning. Using a water proof glue, to be on the safe side (some old houses can be damp), they were very firmly clamped, to ensure a tight joint and left to dry.
Turning was made a bit difficult particularly by the closeness of the beads. A 9mm spindle gouge sharpened at 30º did most, but the small one between the 2 top large beads needed some very delicate work with the toe of my skew. Of course any deviation from the plan had to be mirrored in the other.
Finally satisfied with what I had produced, I went with trepidation to get the customers approval. Est voila! They were so pleased that I got a bonus!!!
The finish was done by the restorer, so I can’t take credit for that, but what a fine job he did. The fact that the legs stand 6 ft apart means that any critic would have to get down on hands and knees with a vernier caliper to find the small differences of hand crafted goods.
Ken Webb
While on a short break in Bournemouth in 1987 I chanced upon a ‘woodturning school’, and if my memory serves me right it was run by Frank Paine. Sadly it was closed at the time, but a year later after purchasing a Craft Supplies catalogue from WH Smiths, my wife, my son and I found ourselves on 2-day course with Jamie Walwin in Millers Dale. The woodturning adventure had begun.
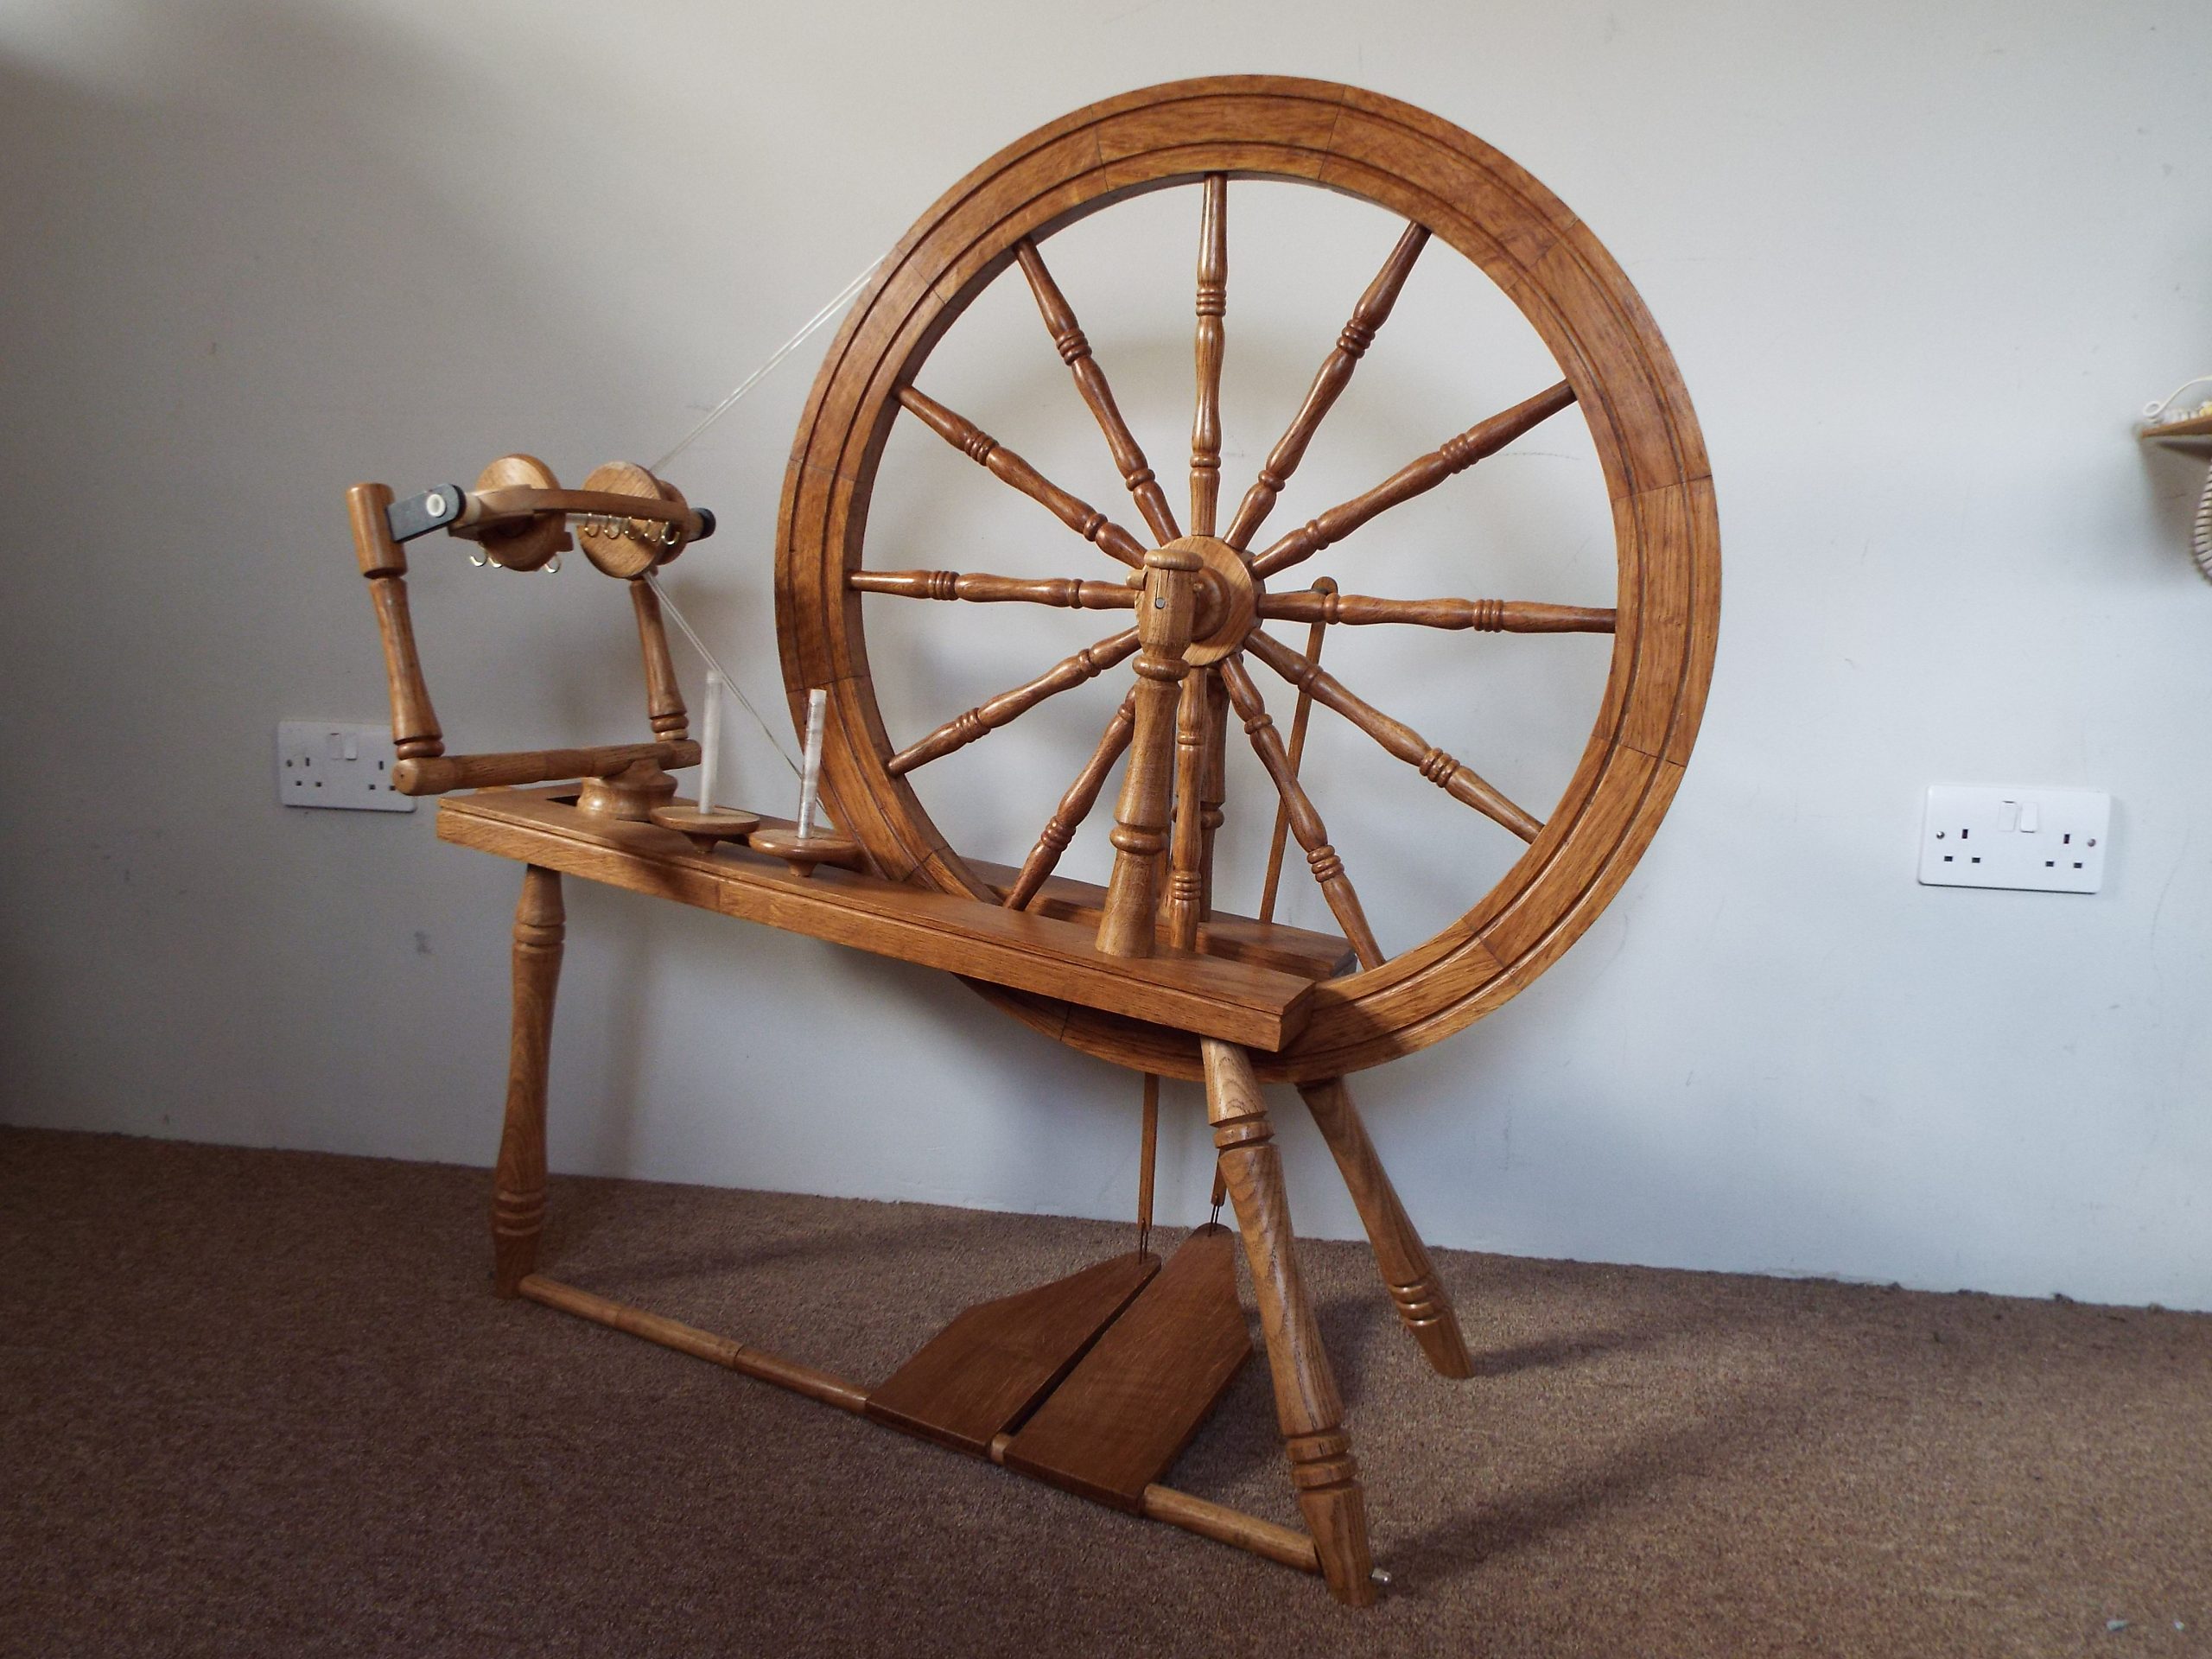
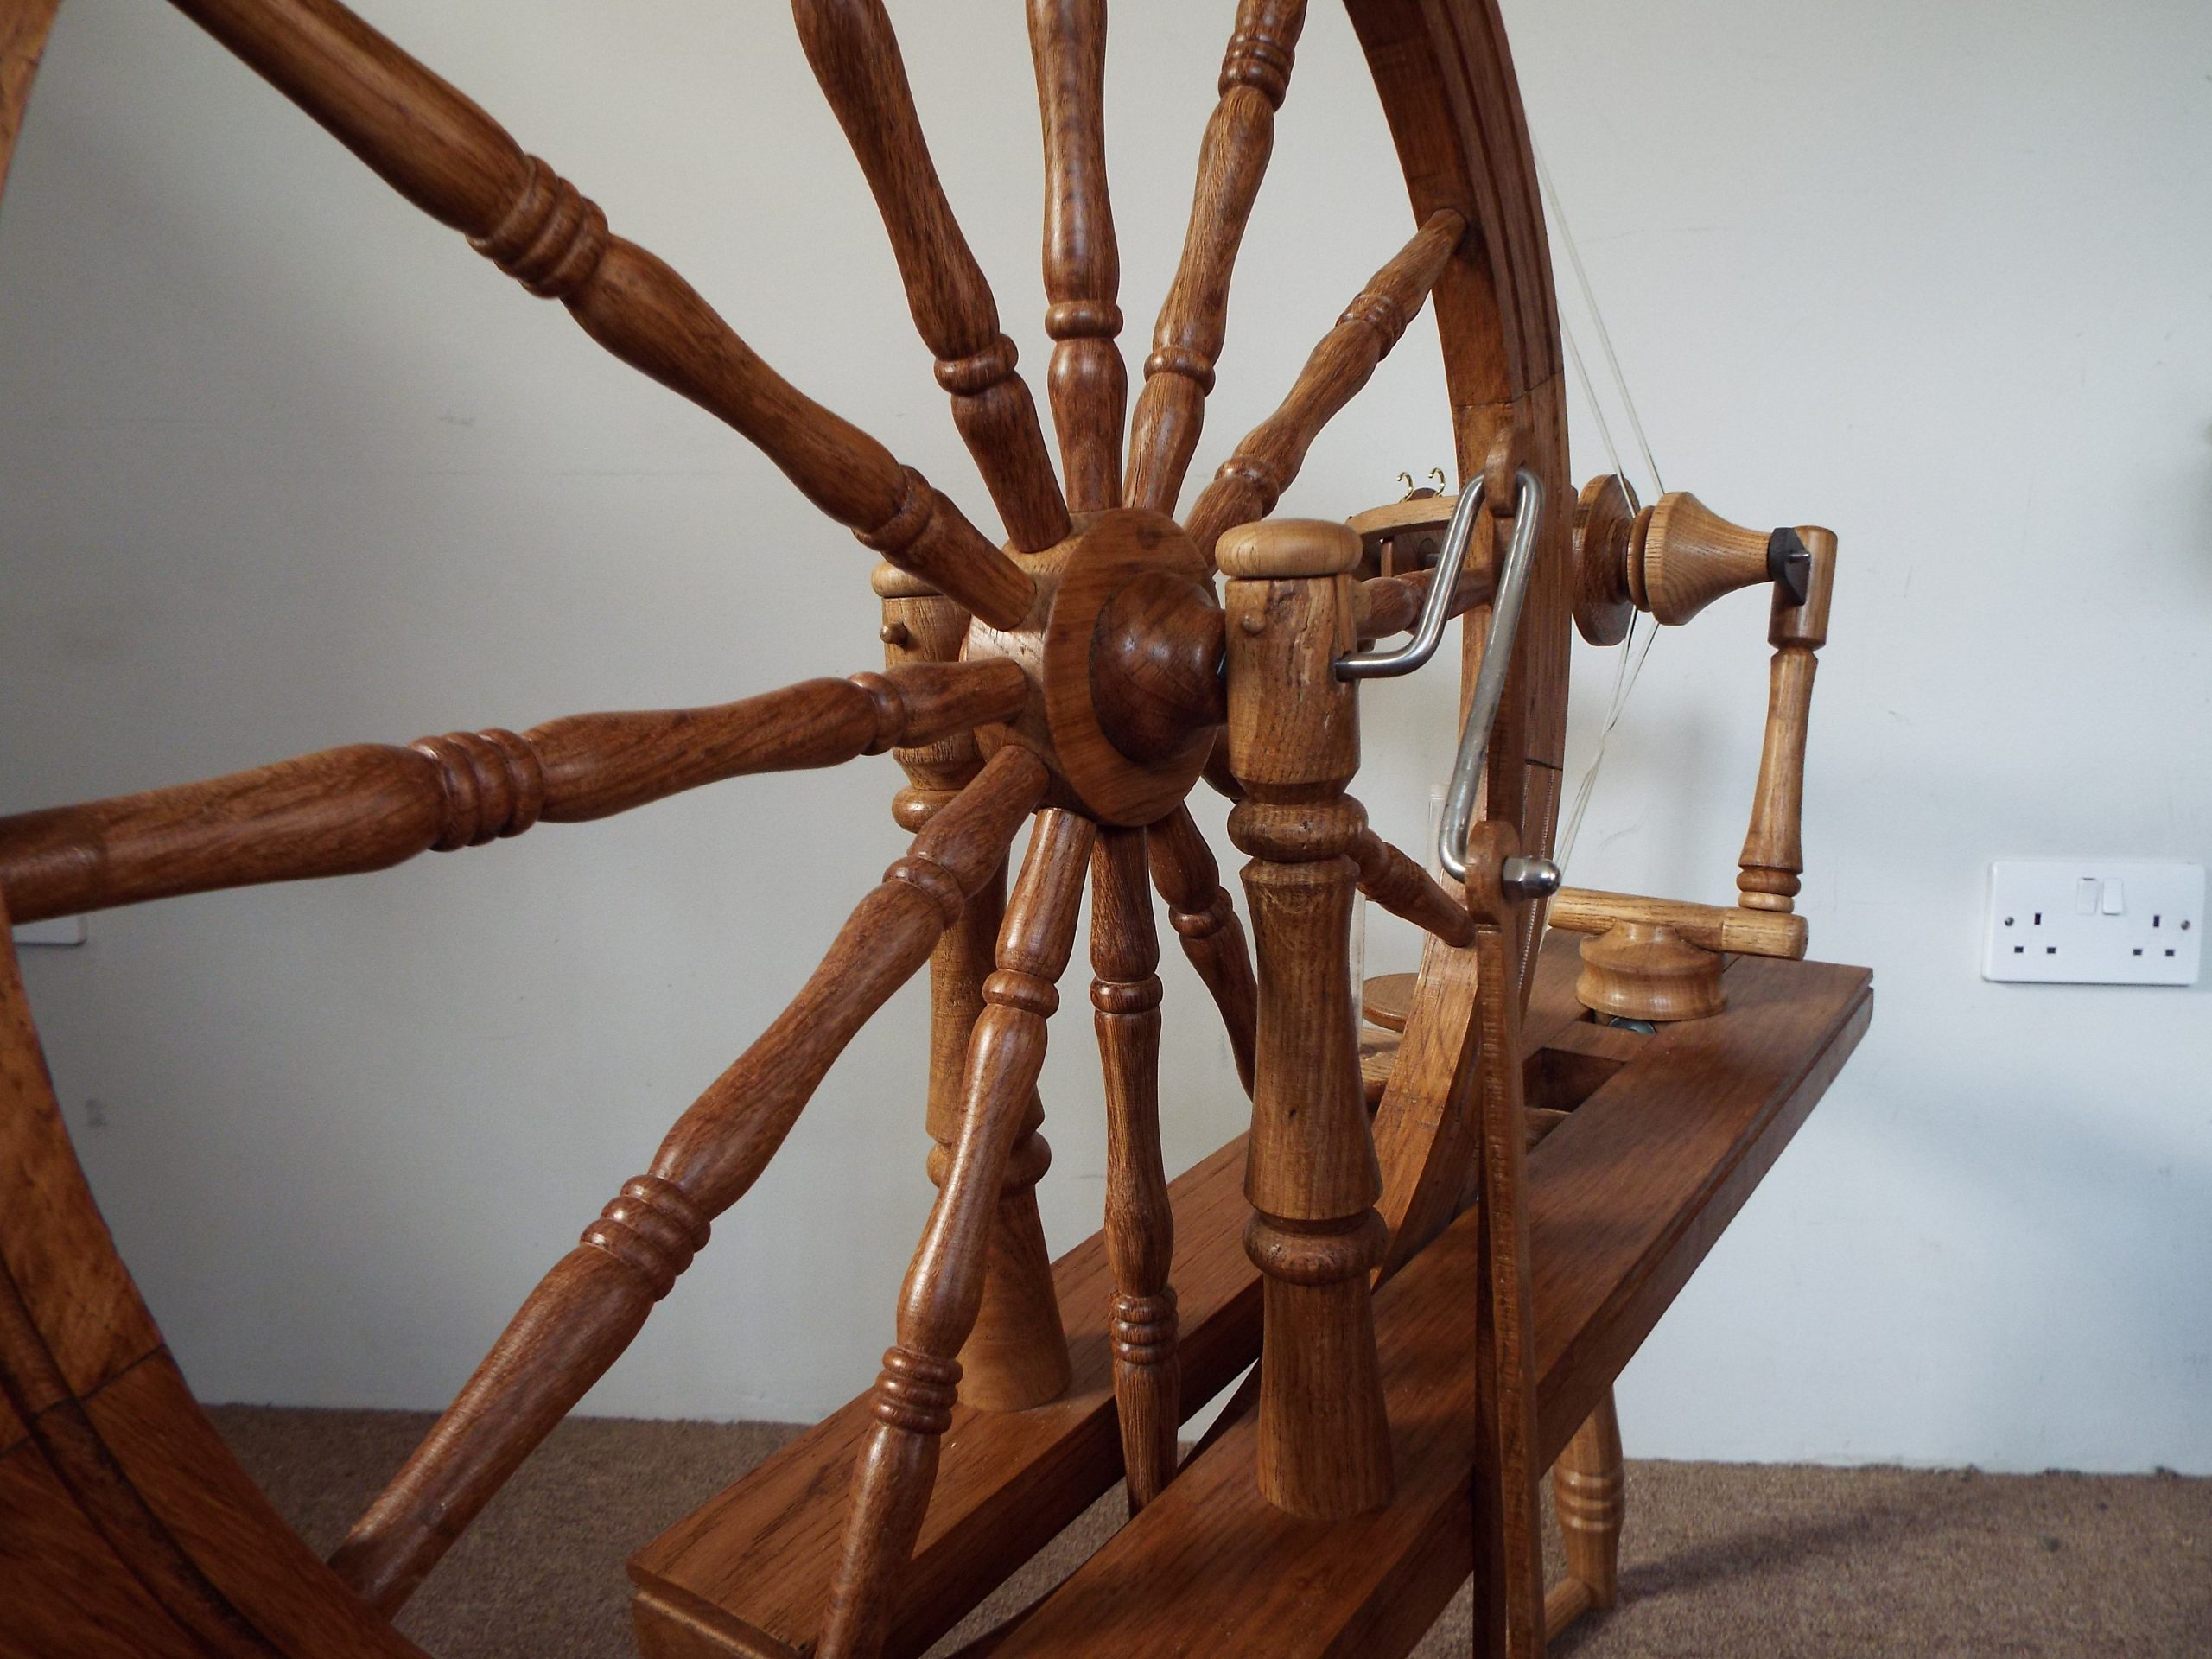
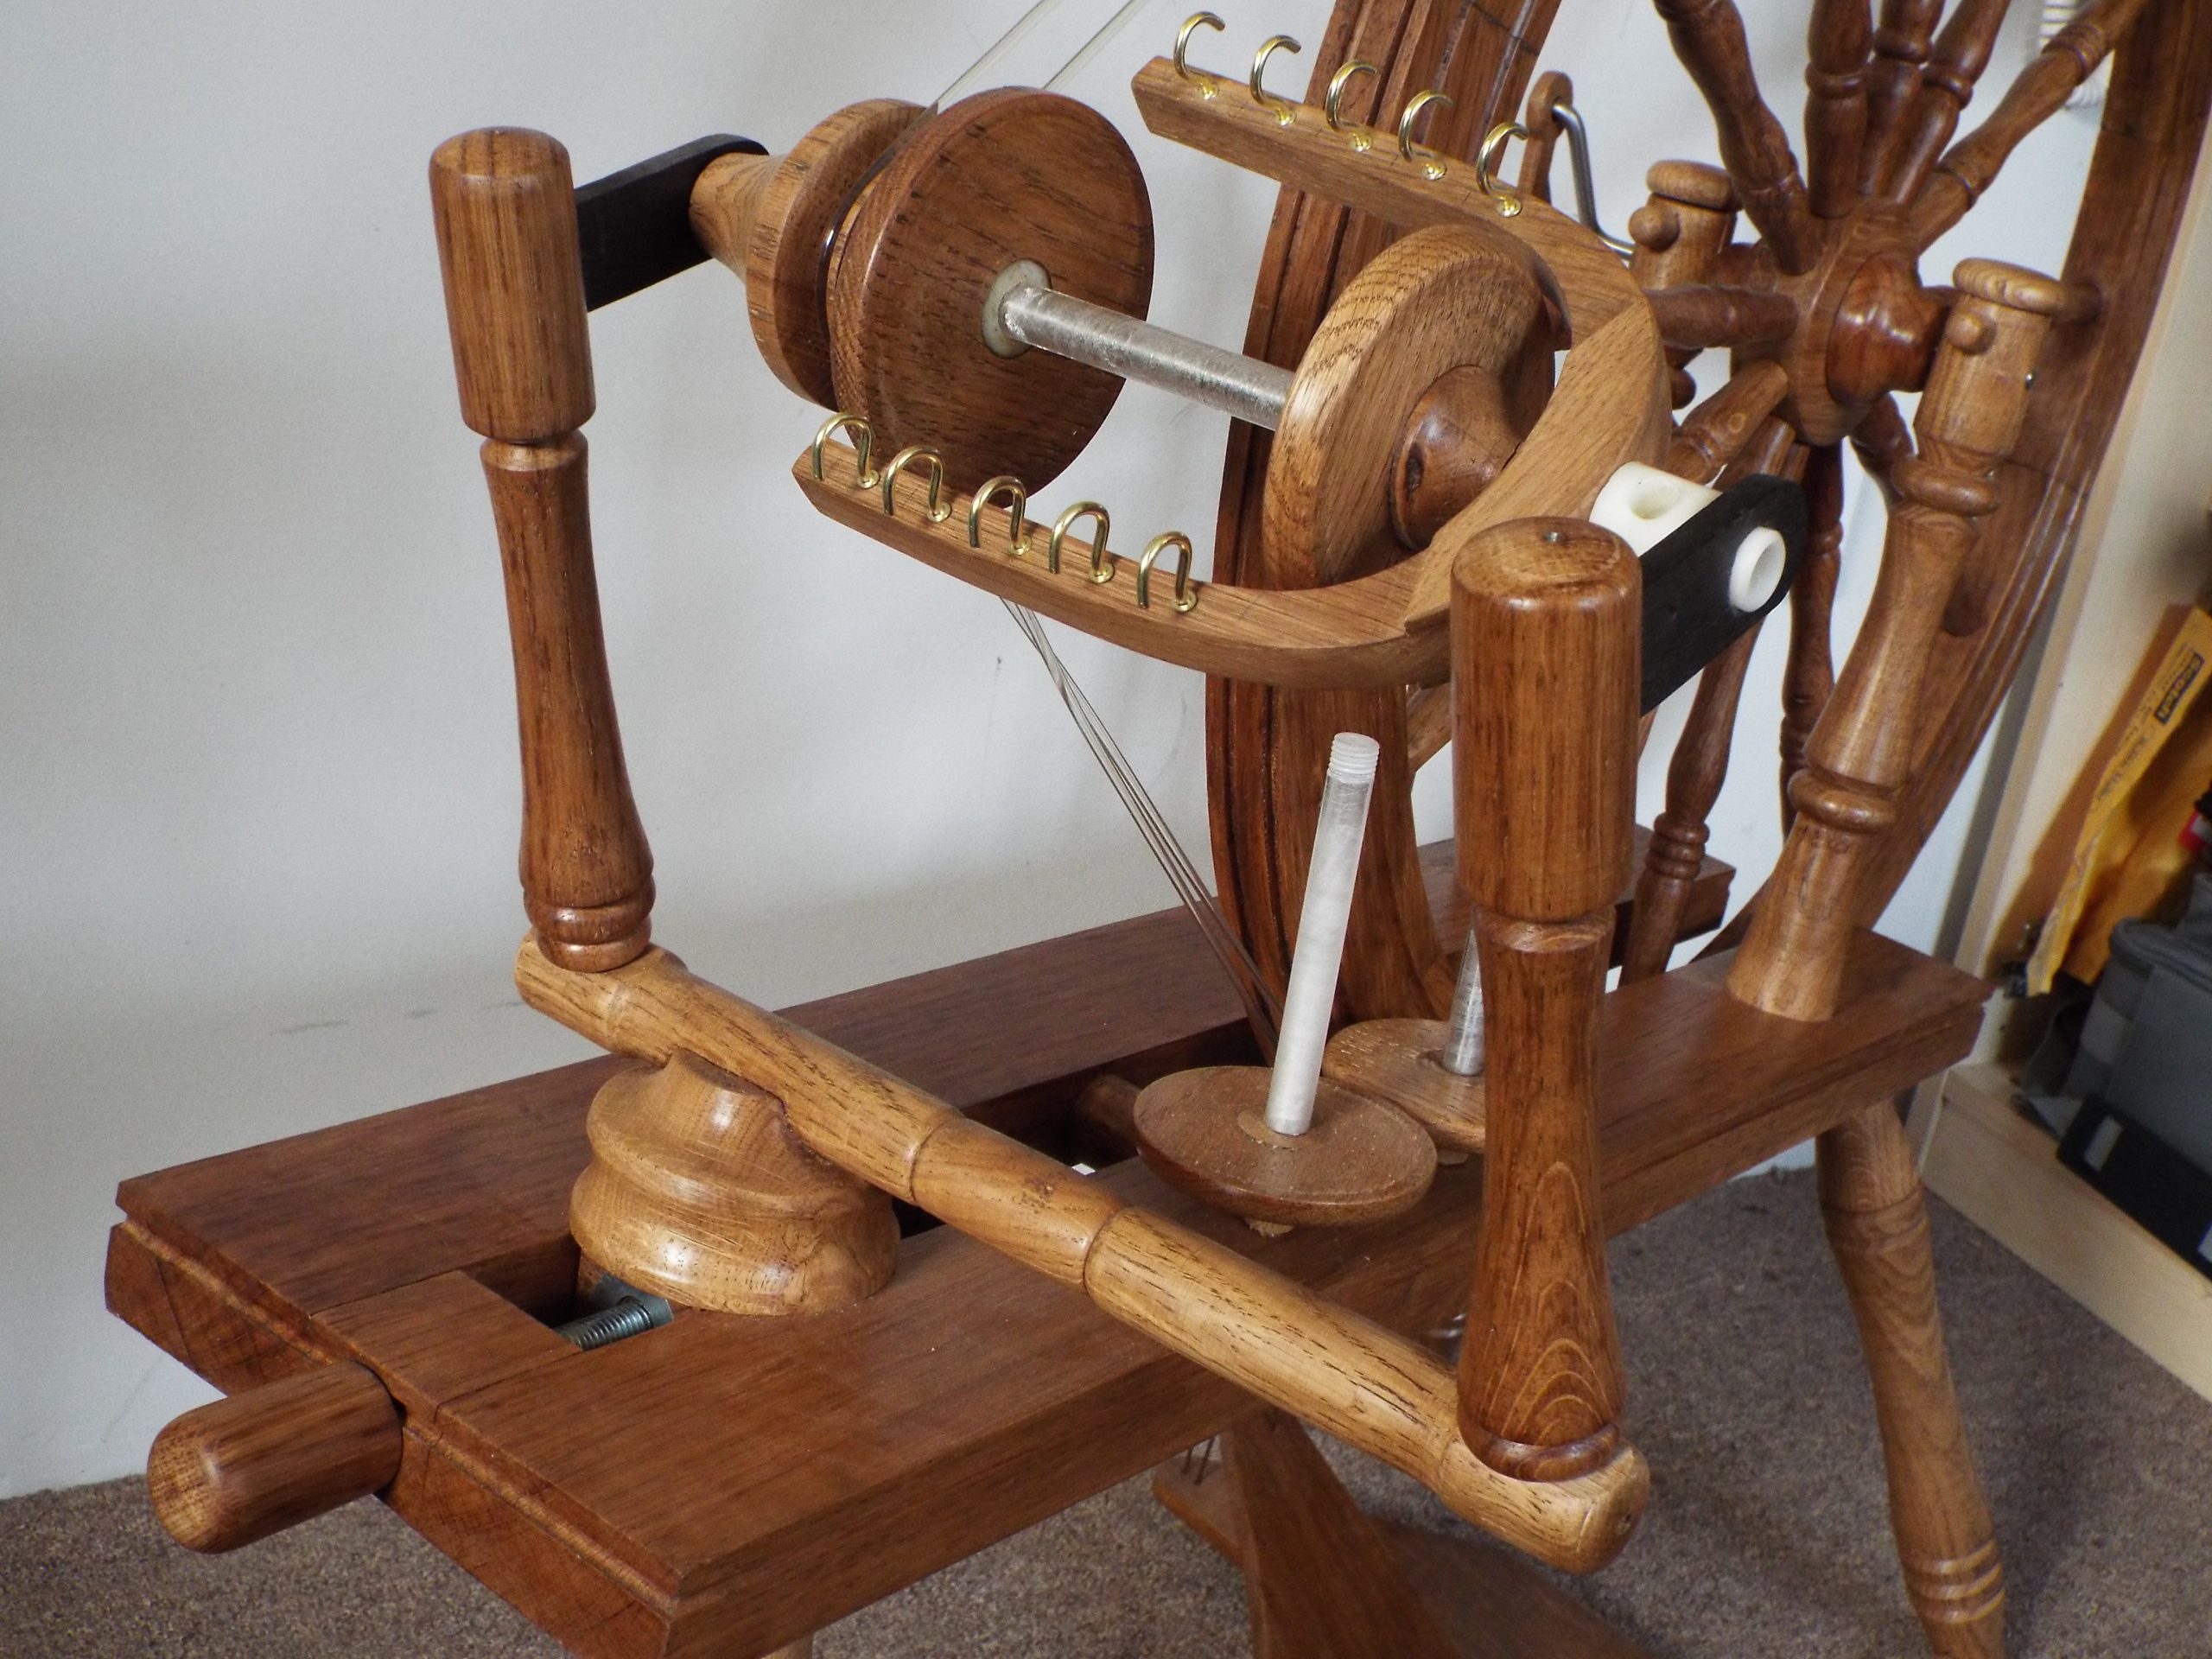
It was not long after that I found myself promising that one day I would make a spinning wheel. Lockdown came and following plans drawn up by Dave Bryant I completed a 2/3 size upright spinning wheel with a single treadle. This is now on show as an ornament. A full size one that works was requested so this what happened next. For smoothness of operation I decided that a double treadle was required and I settled on the ‘Saxony’ style with a 27 inch wheel.
What was I thinking?! My ‘Apollo Woodpecker’ lathe is only capable of a 12” bowl. The solution was to use a router. 12 segments were cut from an oak board, thicknessed to the size required and the spoke holes drilled. These were then biscuit jointed and pinned to a MDF board. The router was then used to ‘turn’ the inside of the wheel using a trammel bar. The hub was then produced on the lathe, with the spoke holes drilled using an indexing jig. 12 spokes turned and fitted by feeding the segments and pulling them back into the hub.
I had tried the split hub system before with out much success. The wheel was then completed by using the router and trammel bar for the outside edge. The parts, usually in metal, were turned using mock ivory resin with the axles 6mm steel. The project was completed in oak on the lathe by spindle turning the various parts needed and finished with a dark oak wax.

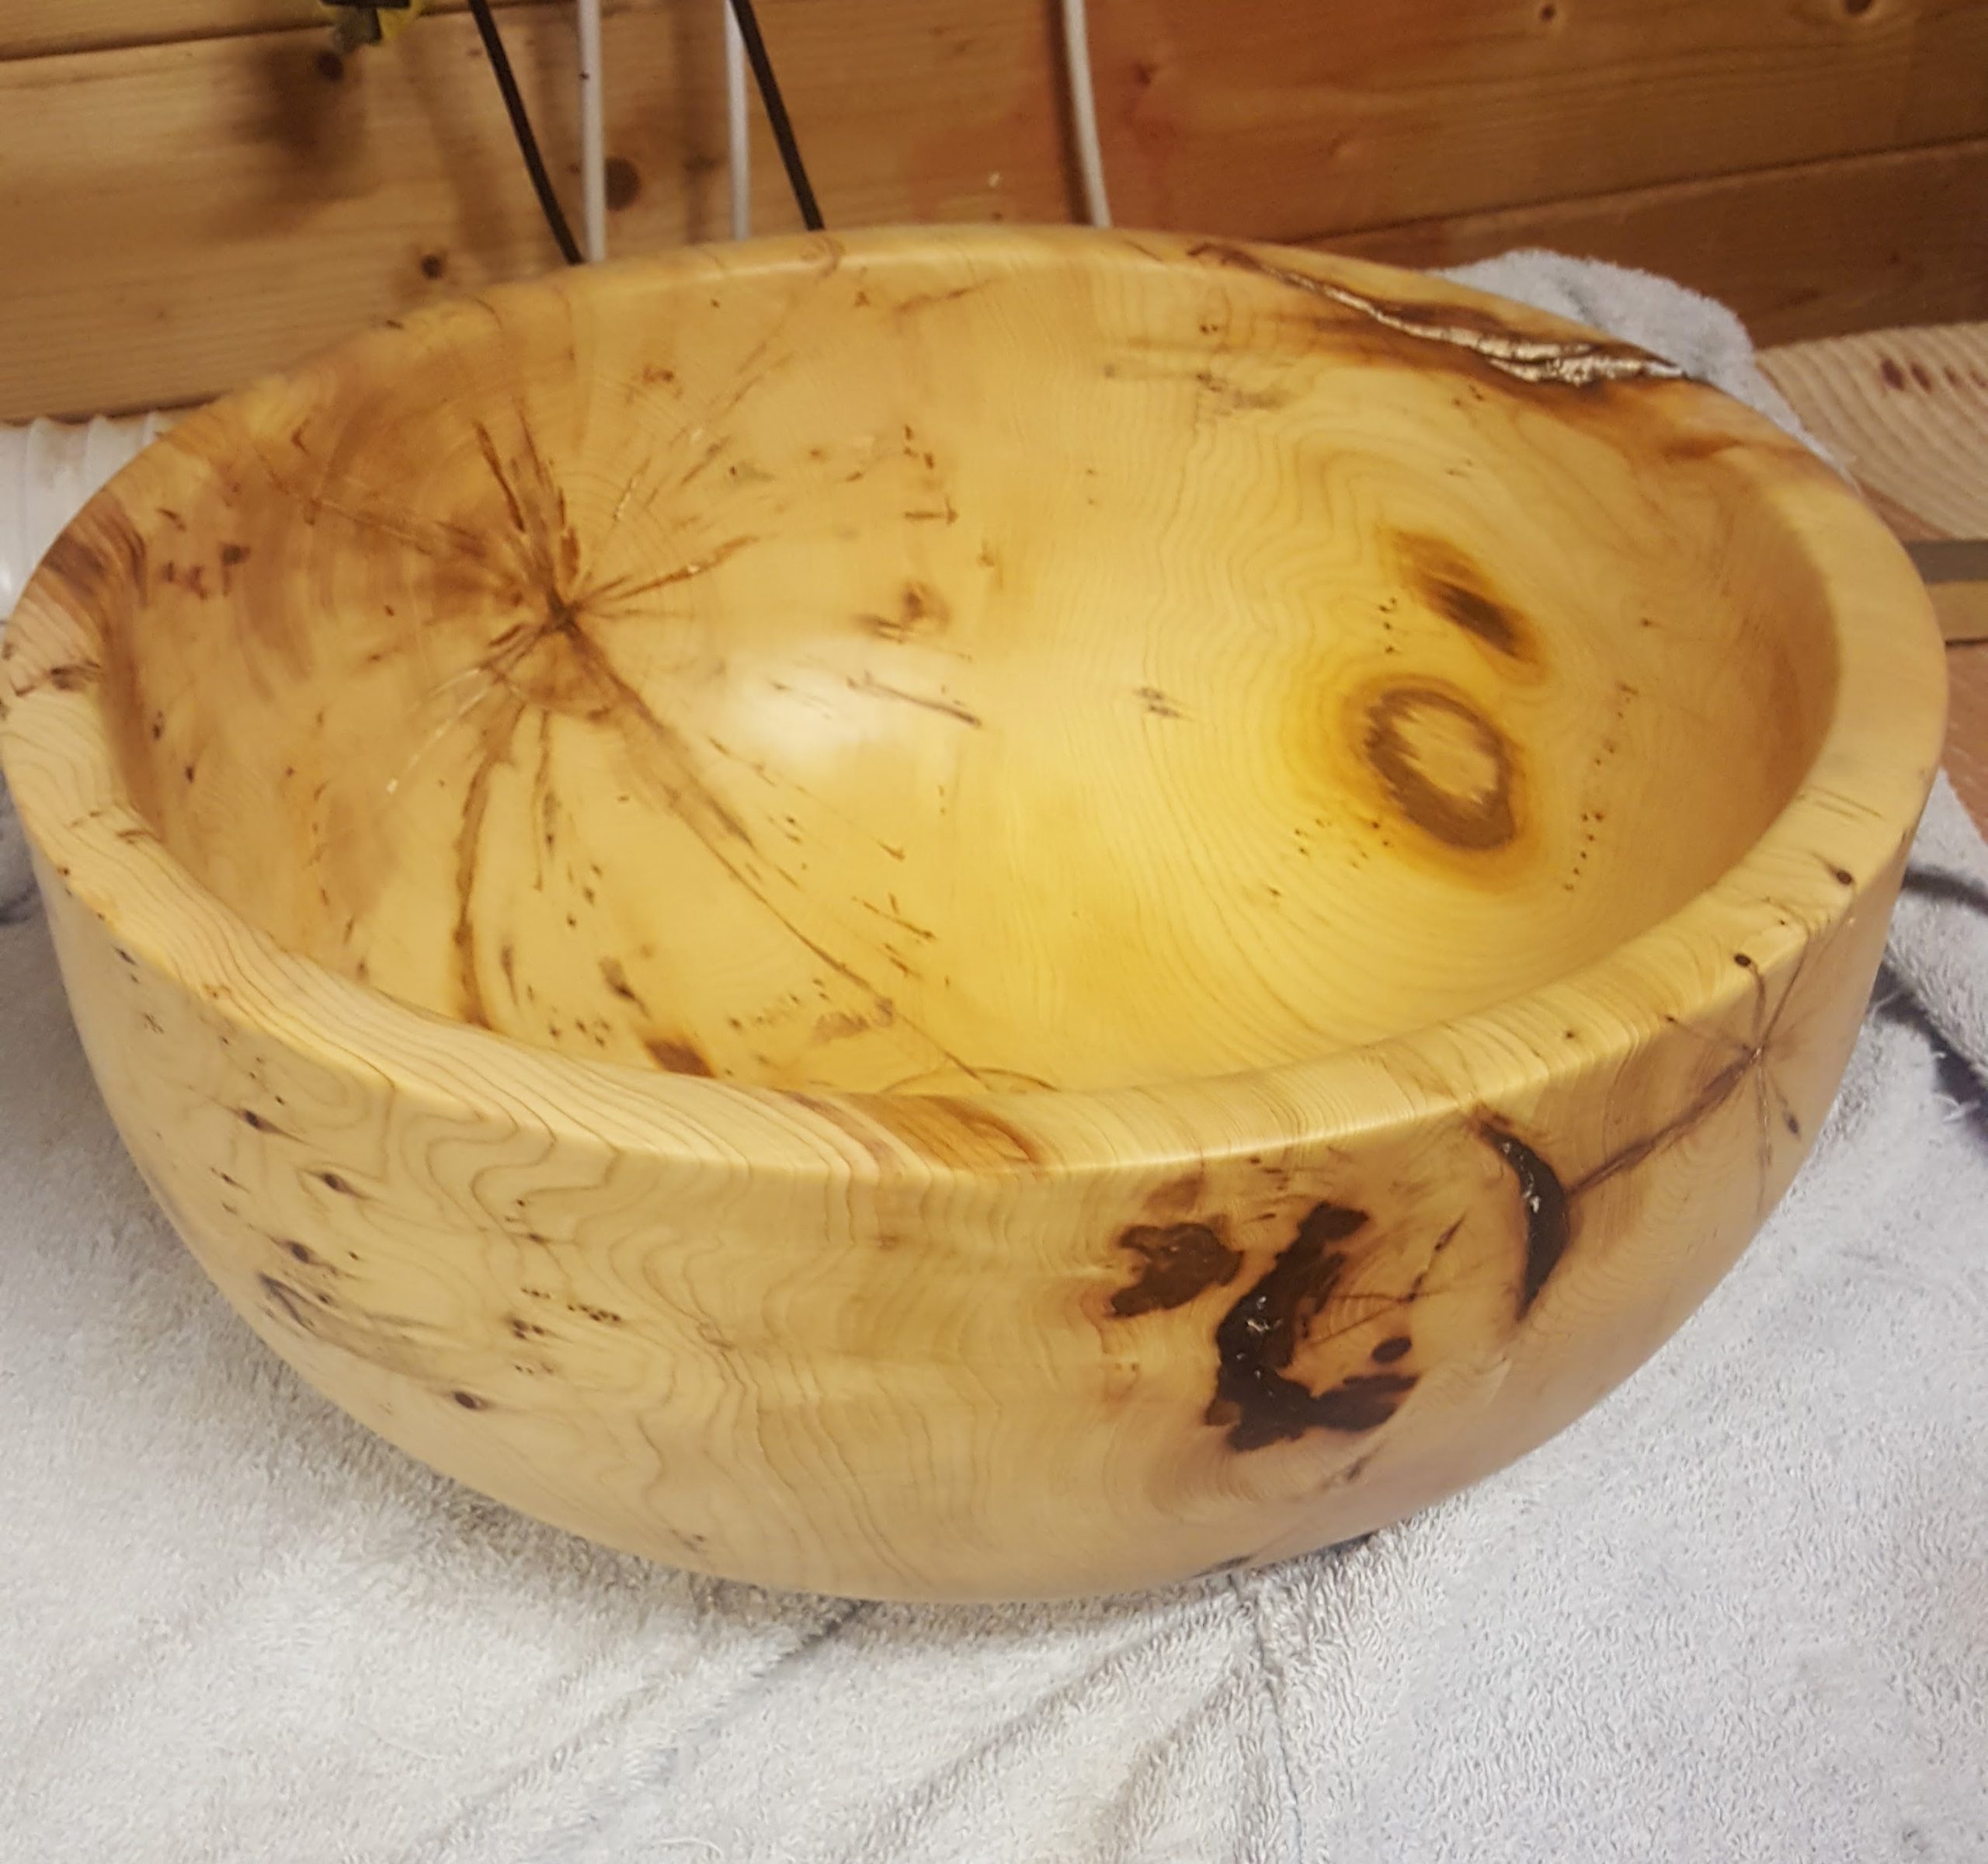
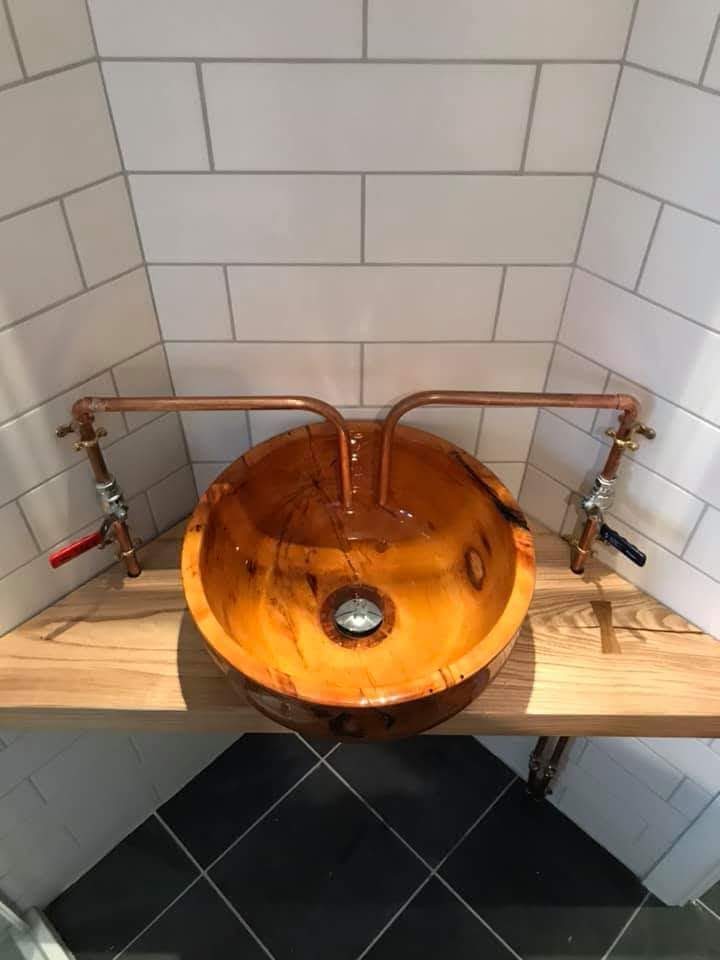
I ask myself is a sink furniture?
Steve Fearnley
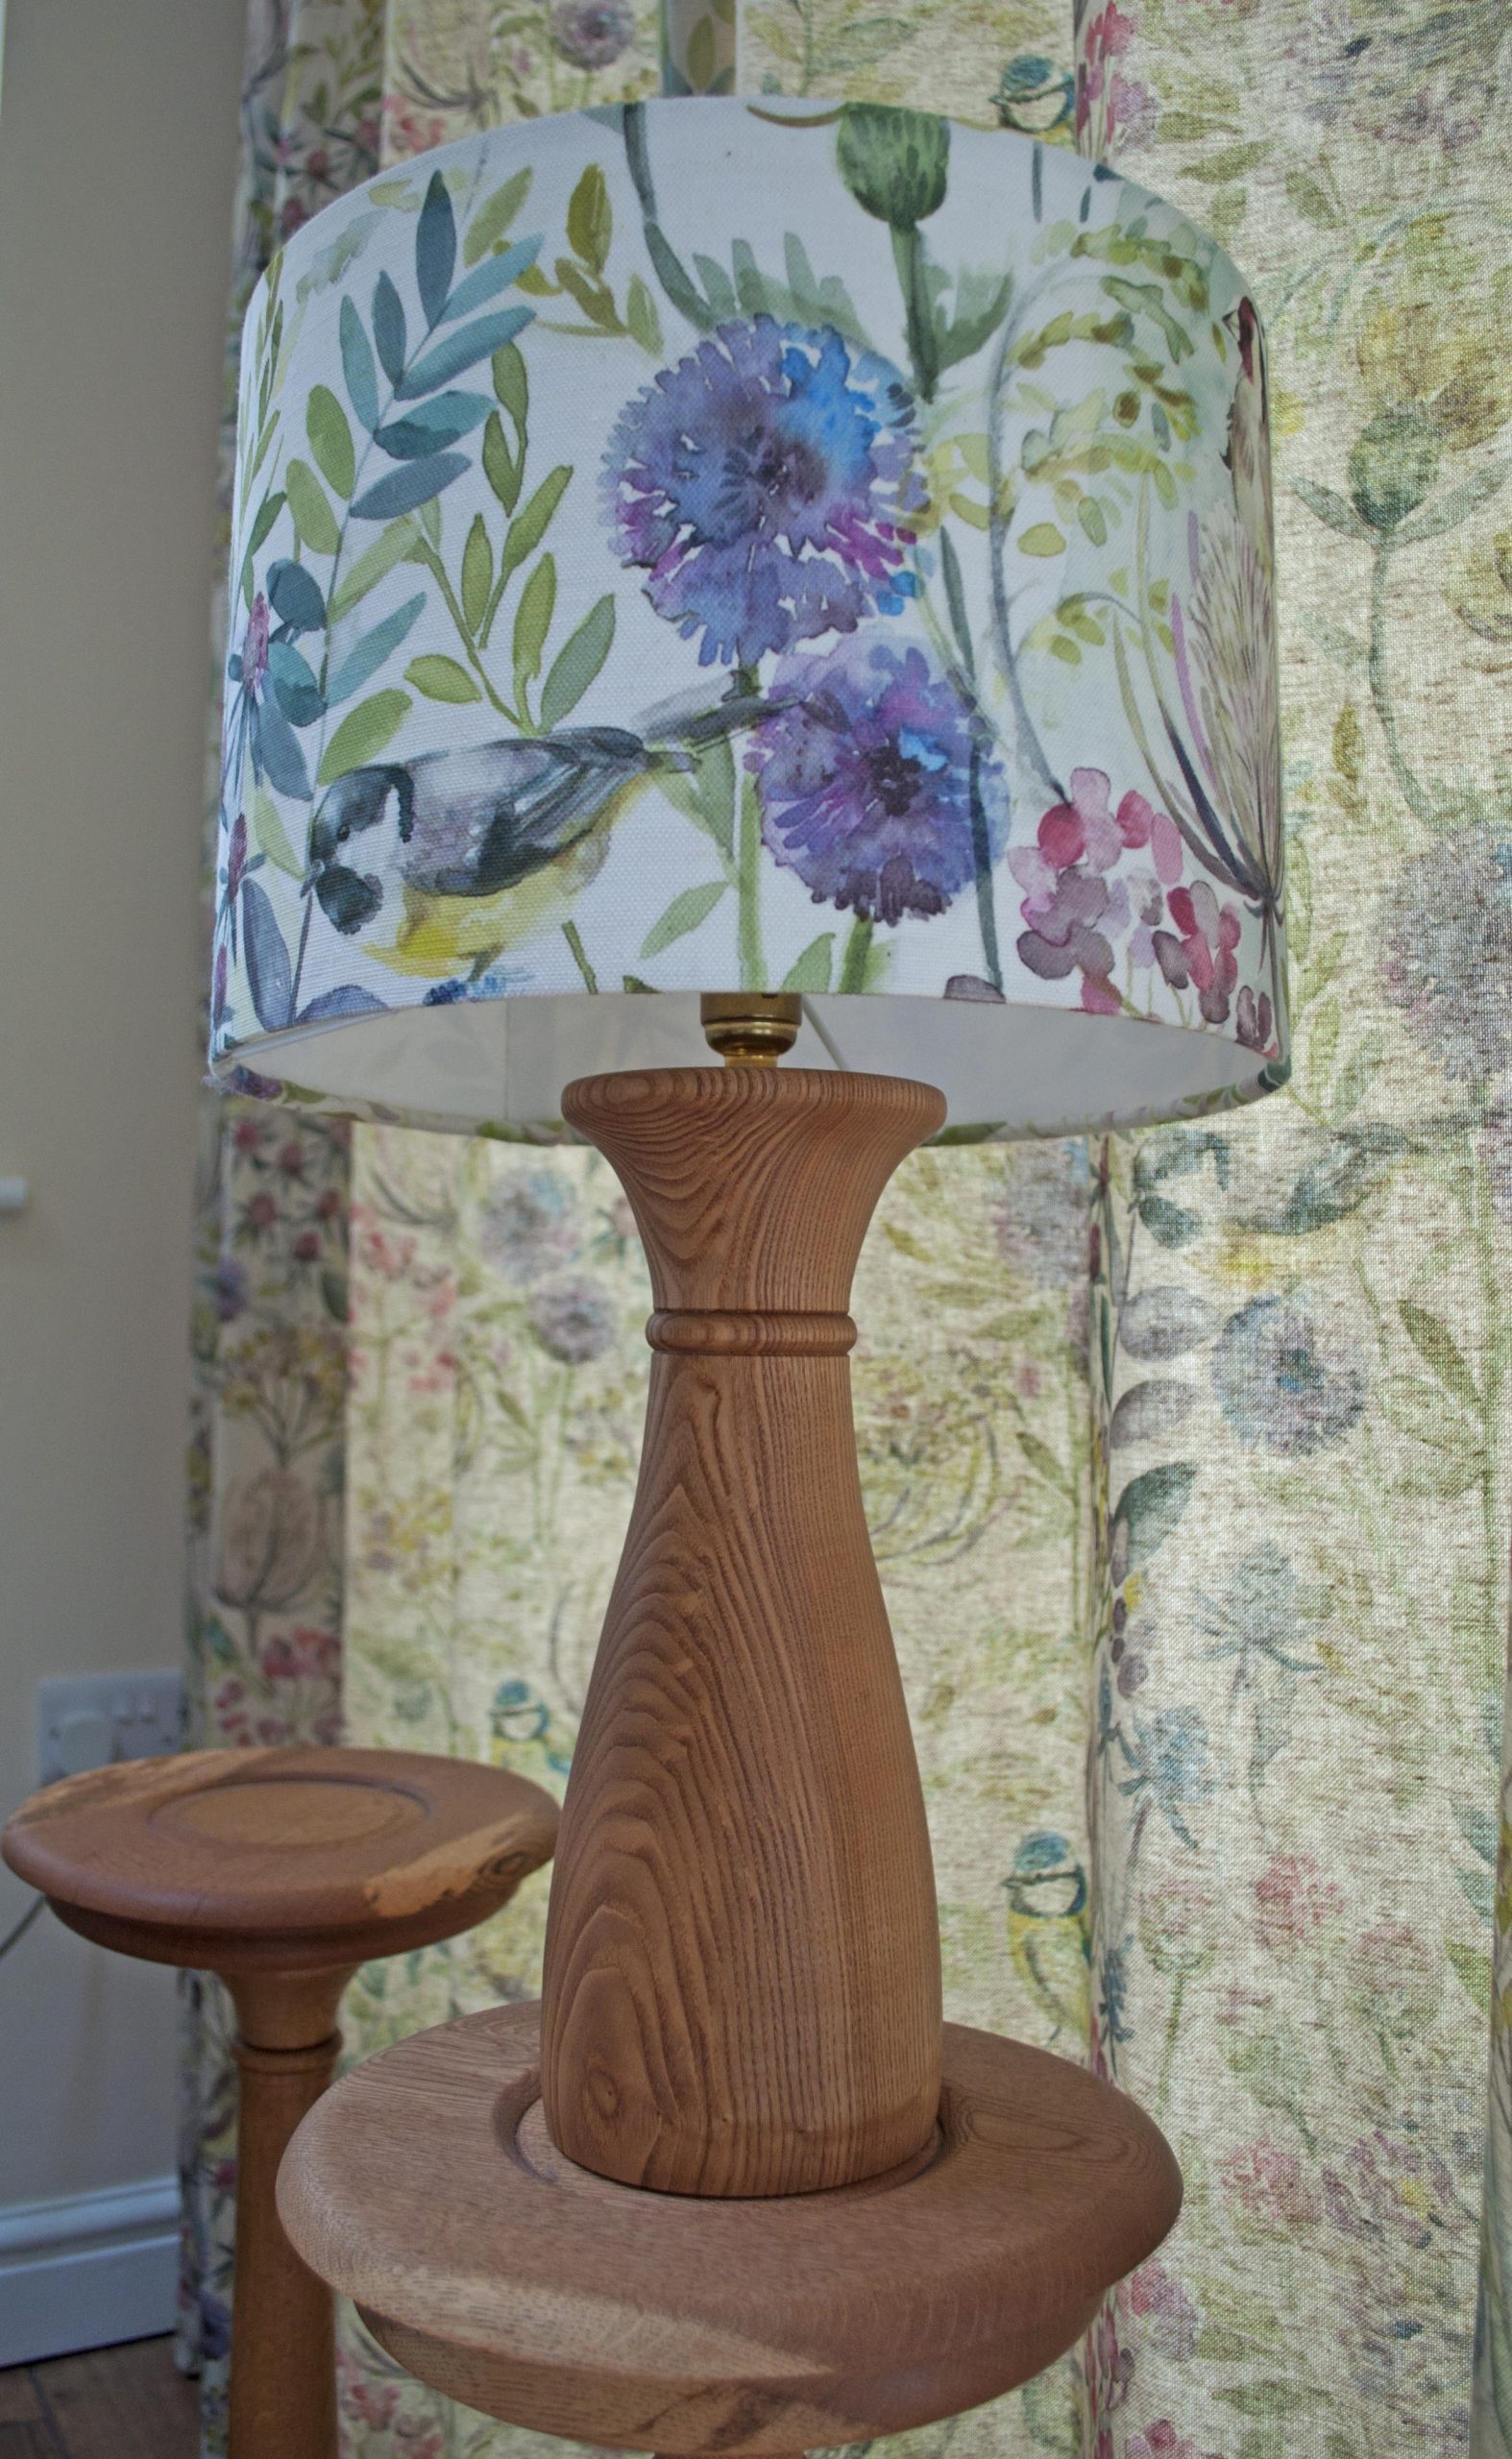
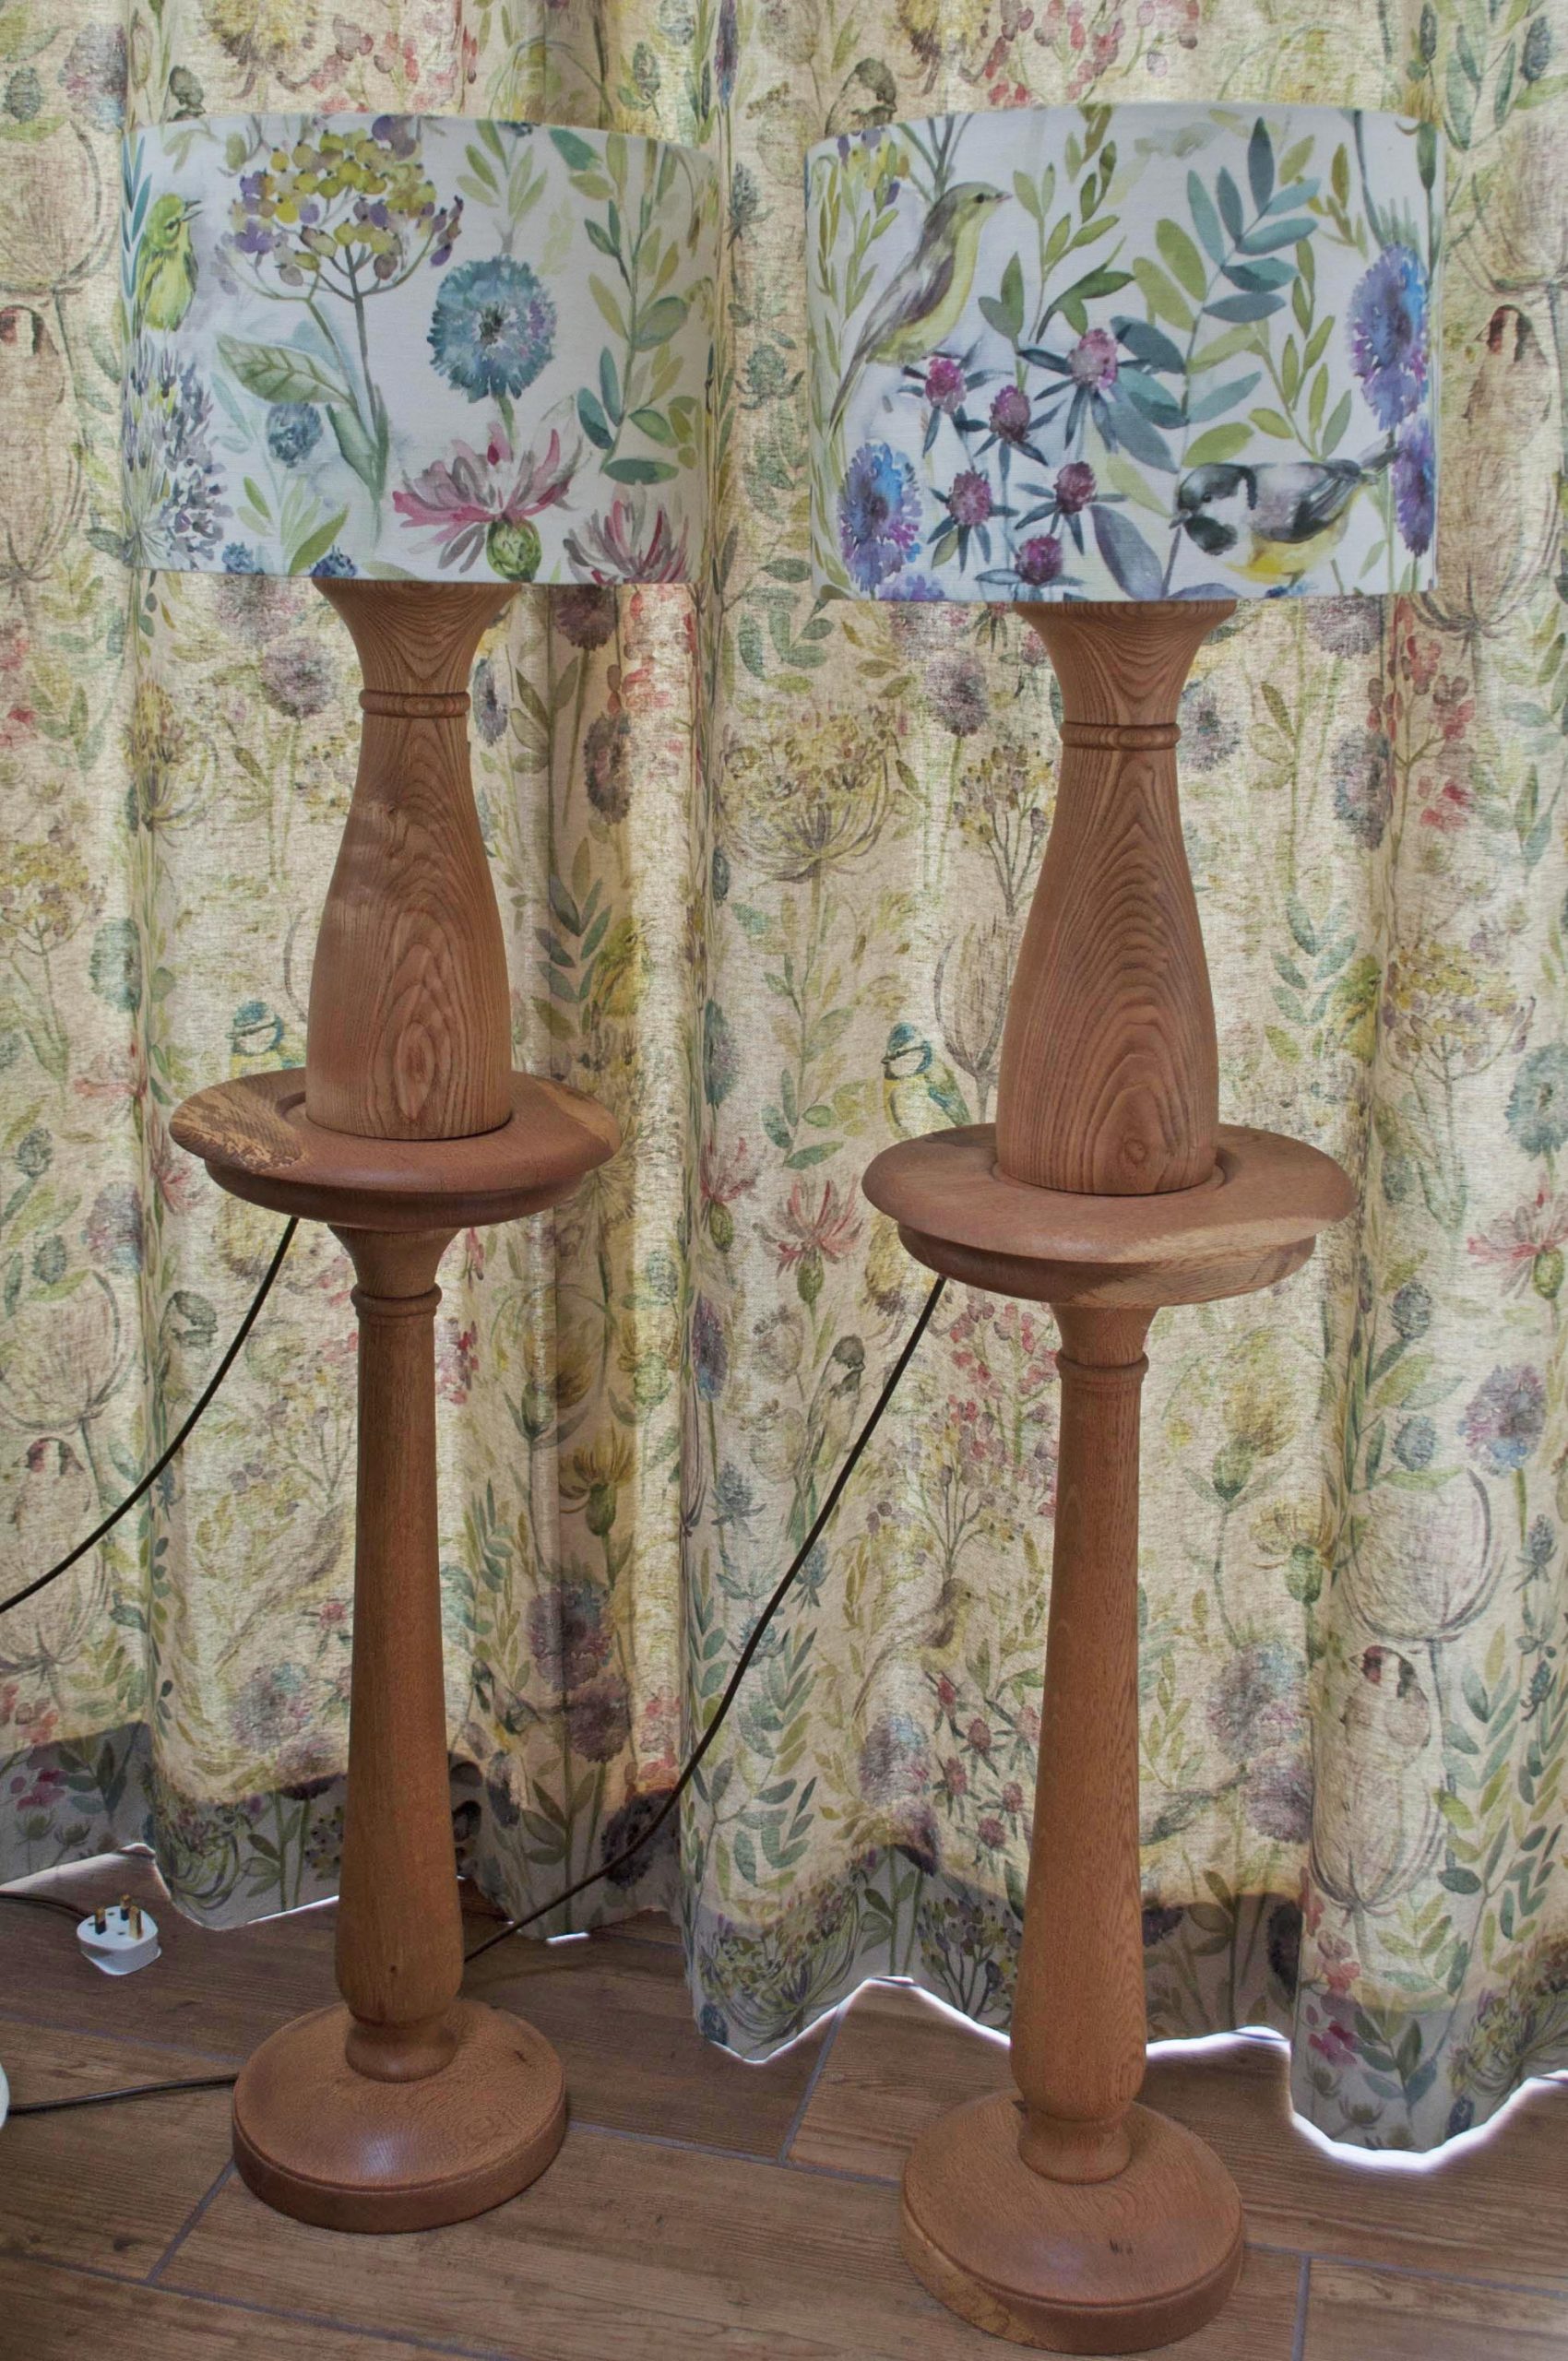
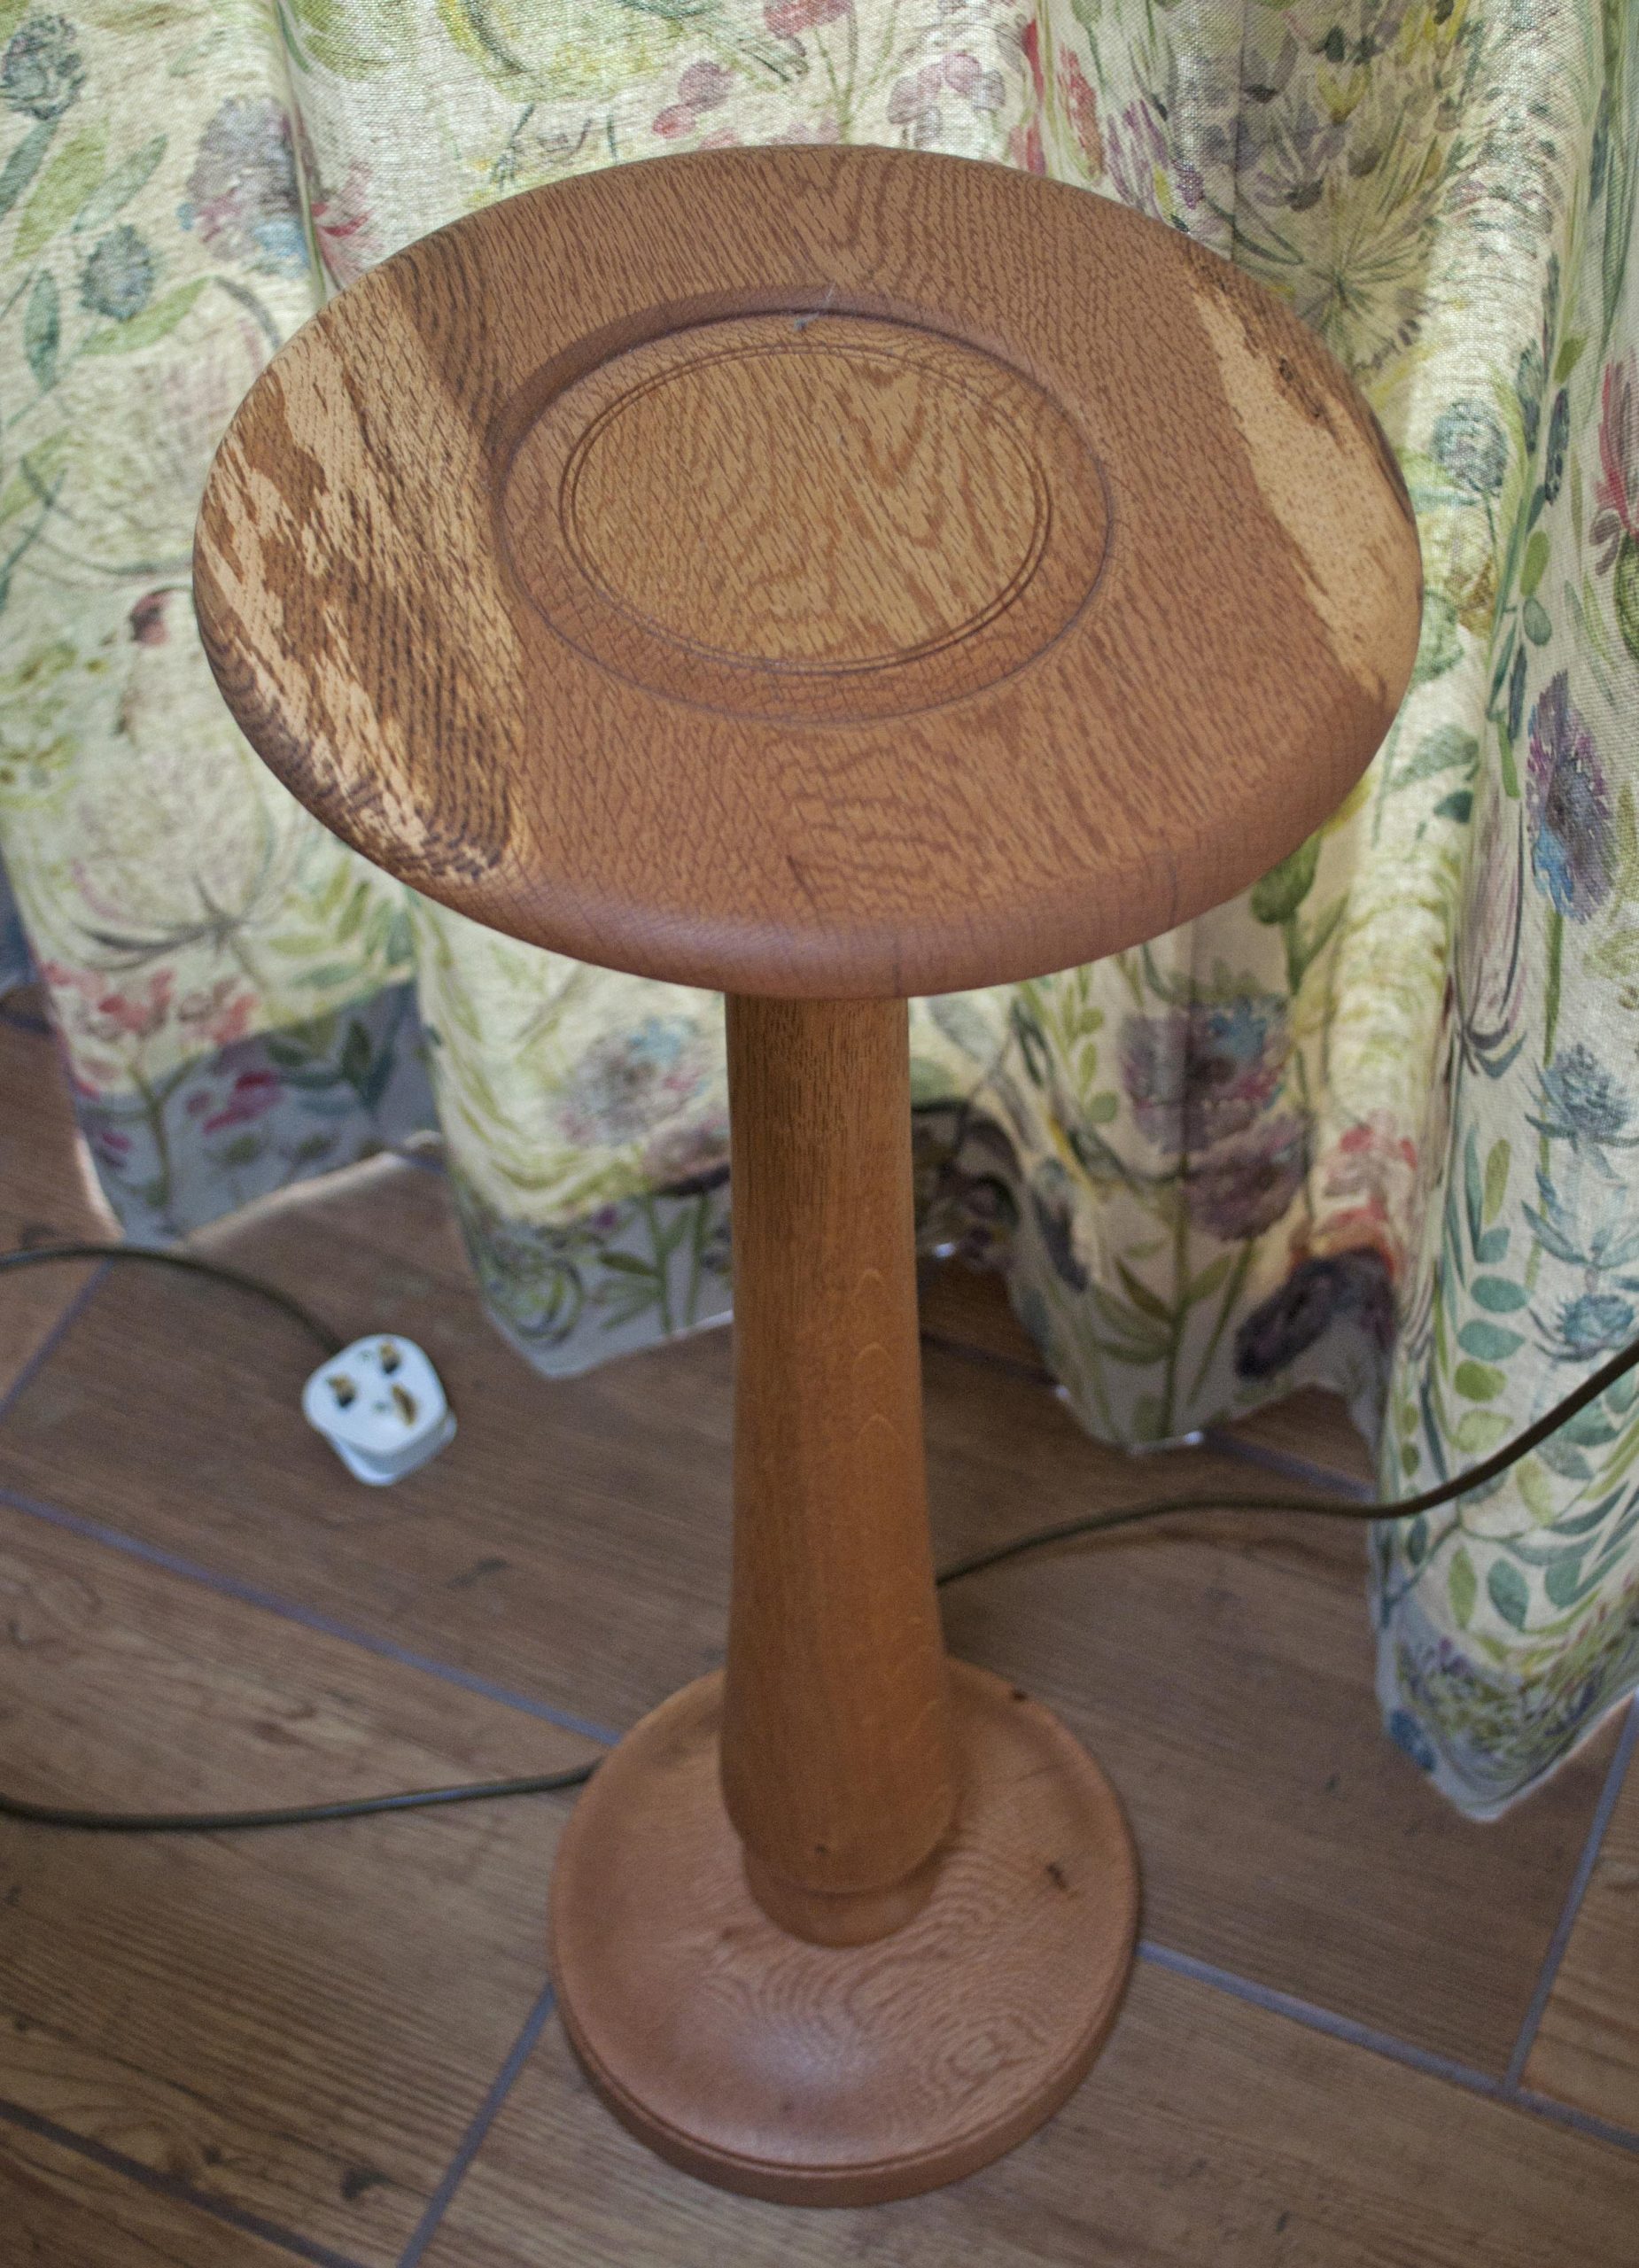
This pair of table lamps and pedestals to stand them on were made for a garden room, to stand either side of a Lloyd loom sofa.
The pedestals are 25 inches tall, with a 7 inch diameter base and 9 inch diameter table. The stems are turned from reclaimed oak – two table legs from a school’s science bench which had been discarded in favour of modern composite board fittings (where I used to teach some years ago – I was always happy to help dispose of old wood!). The bases and tables were from a 2 inch thick oak board, with some creamy sapwood left showing. The stem has a spigot on both ends, which after serving as a chucking point, then became tenons to locate into recesses in the base and the table. These in turn served to provide chucking points for turning the base and the table. The three pieces were screwed together using 70 mm M8 dowel screws, avoiding the need for glue. This fixing method has the advantage of allowing disassembly, something that proved useful when the bases warped slightly due to being positioned on a tiled floor with underfloor heating – they were put back on the lathe and re-turned to true.
The template for the pedestals came from Stuart Dyas’ excellent book, Classic Forms. A treasure trove of line drawings covering classic shapes for columns, pedestals, vases, balusters and much more, together with some history of their development.
The lamps are turned from two 4 x 12 inch blocks of ash, both cut from the same piece of wood, and hence providing matching grain patterns. A plain “wheatsheaf” design was used, with just one bead turned on the neck, which gathers in the shape before it expands out again. “Nothing too fancy” was the instruction from the customer (my wife!) A hole for the flex was drilled through the centre using a Record long hole boring kit: an unusual grind on the gouge which doesn’t look like it should work, but it does. And it stays accurately centred. Brass fittings and Voyage fabric shades to match the curtains completed the lamps.
The lamps and pedestals were given a couple of coats of mineral oil, and then finished with a beeswax paste I make up myself, made from a mix of mineral oil and beeswax in proportions as recommended by Mick Hanbury. It leaves a pleasant matt finish, which I think is preferable to a hard gloss on this kind of furnishing.

Graham Brooks
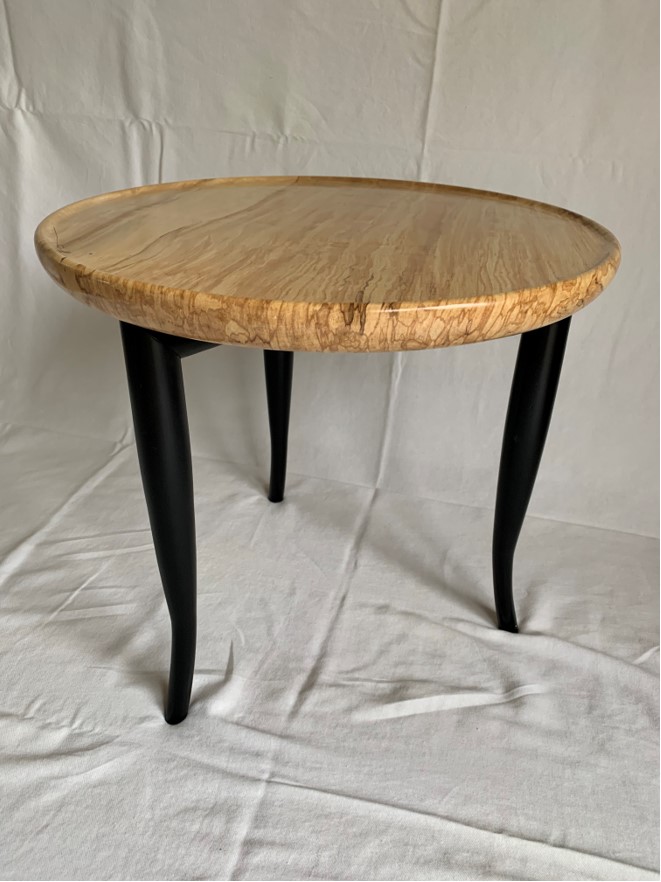
After some thought I decided to tackle an occasional / side table for my submission. Earlier this year I turned a suspended bowl which incorporated legs inspired by Rebecca DeGroot’s work and decided to expand on the theme. The dimensions are 500mm diameter and 450mm high
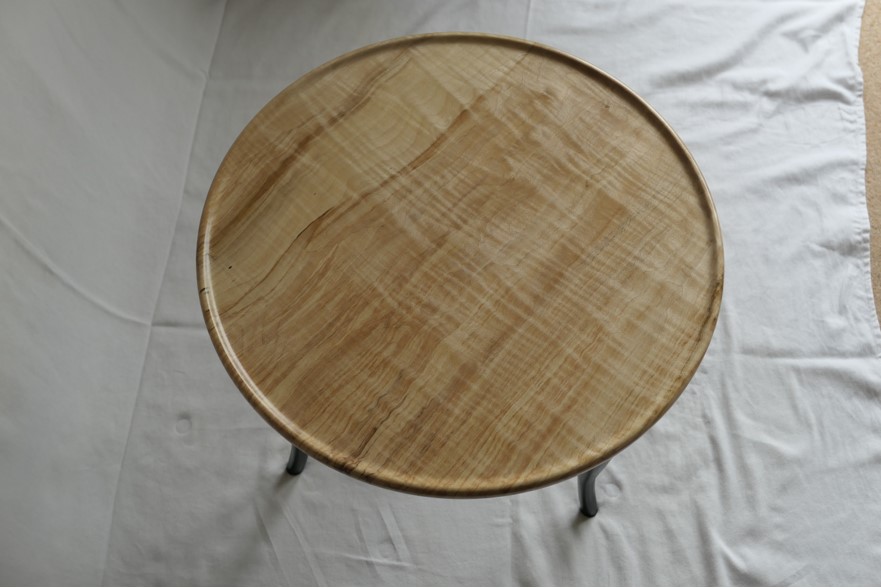
I have had a plank of rippled / slightly spalted sycamore in my workshop for about four years and being hardly 50mm thick was quite dry and had not cupped or split. Although being about 500mm wide its thickness would only allow it to be used for a thin platter. I decided part of this would make an interesting top for the table. I managed to locate a plank of 63mm beech from which the legs and the ‘hub’ could be cut.
The top has been finished in three coats of satin hard wax oil which claims to be resistant to wines and spirits etc. The legs ‘spokes’ and central ‘hub’ are finished in Chestnuts ebonising lacquer.
I was concerned that such a wide solid top would be prone to considerable moisture movement with changes in seasons and location. I firstly cut the blank and brought it into the house for a few days to see if there was excessive movement before starting to turn. I have then just used two screws to secure the leg/spoke/hub structure to the underside of the top. These are positioned along the grain allowing the top to move across the grain without restraint.
Due to the thickness of the top I did not want to involve screws necessary for a face plate and so opted to friction drive the top between the face of large chuck jaws and the tailstock. A 6mm deep recess was the turned to take 130mm jaws in expansion, the top then being reversed onto the chuck which allowed the underside, another chuck recess (later used to loosely locate the hub) and the edge to be turned and sanded. The piece was then reversed and held in the bottom recess to allow the top surface and ‘lip ‘detail to be turned and sanded.
The leg /spoke pieces had to be mitre cut after being turned so a jig was made to hold the pieces on the mitre saw with double sided tape and cramps used to ensure stability. Once bonded together the mitre joints were reinforced with slips of veneer bonded into fine saw cuts. The spokes were fitted into the hub with mortice and tenon joints, the tenons being turned and the mortices being drilled in positions located with the aid of the indexing system and a purpose made guide in the banjo. The bottom of the legs were turned as a cone shape, excess being cut off with a combination of hand sawing and on the band saw (to ensure safety) and then sanded to shape using a disc on the late and hand sanding.
Katie Abbott – Winner for May
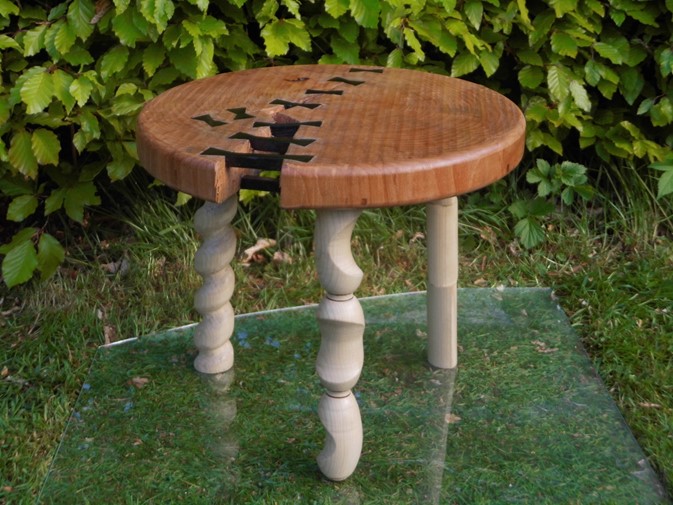
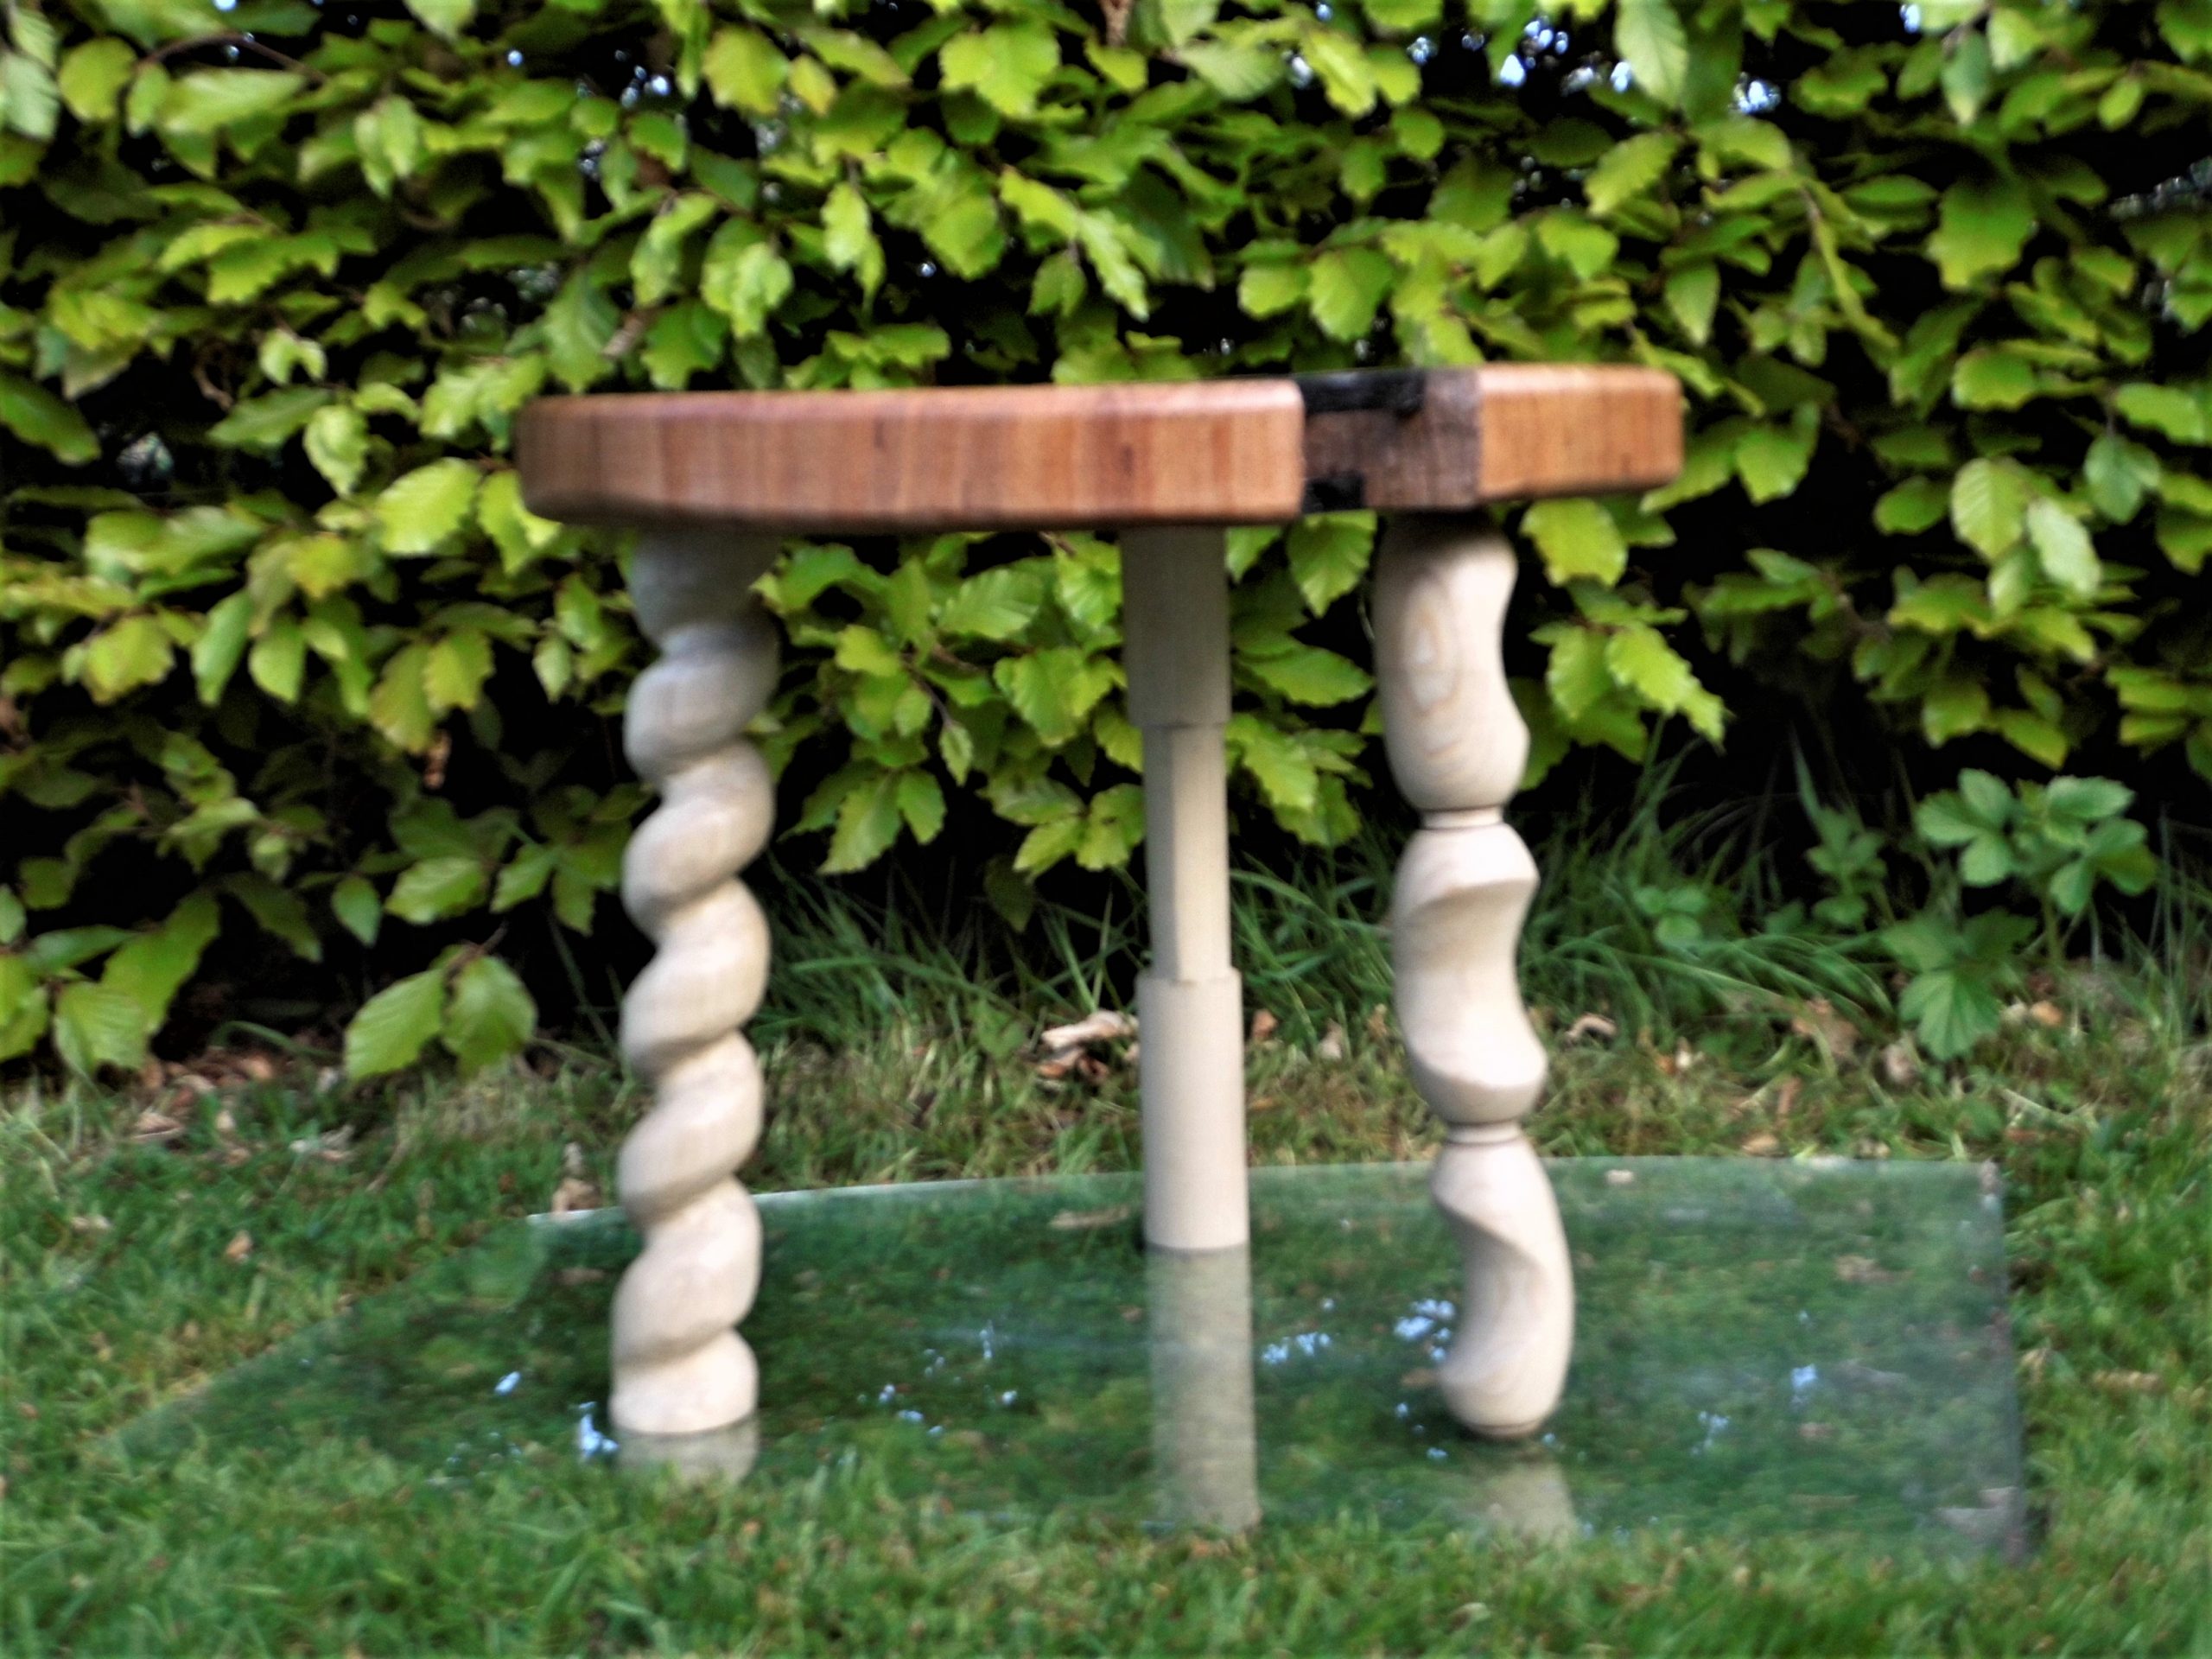
Ewan Dorward’s – Bowtie Stool Entry
My name is Ewan and I am 14 years old. I started wood turning last summer (2020) when my dad’s friend gave me his old Myford ML8 lathe.
I found out about this competition and decided it was about time I made a piece of furniture. I realised there was no time to order wood from the internet as it was Thursday night and I needed the weekend to work on my idea. My mum drove me to the nearest timber yard after school on Friday 21st May giving me just over a week to finish.
I had originally hoped to use a variety of native woods for the legs, one being sycamore because it is soft and so is easier to hand turn a spiral, and one big blank for the top.
I can’t believe I was going to though because that’s incredibly plain and boring compared to what I have made. What we did find at the shop was no sycamore but a long length of even softer poplar that would do all three legs, and the only circular piece of wood was a split beech circle called a cookie that my mum thought was fun. The lady suggested I put bowties in to stabilise the split.
On Saturday I started. I marked out and made the spiral in one day-something you can see from the blisters caused by hand-turning the chuck. It is almost impossible to do a spiral without a chuck or leaving a square piece of wood that isn’t turned round because you just don’t have the leverage to turn it; sharp gouges are a must.
For the next leg I decided to try something different that I hadn’t tried before, based on an article about an off-set candlestick in the Woodturning magazine. I had wood almost the same length but didn’t need the base and candle holder part so made my version have three ‘blobs’. After turning a normal shape of three ovals on one axis I made 3 offset points 1cm out at 120° intervals so they could be seen from all sides. Lastly I burnt on some lines between each one with thin steel wire.
To make the third and final leg I didn’t really know what to do. We looked through lots of books for inspiration but to no avail. I wanted a design that blended with the spiral and the offset but was different again. After drawing lots of wiggly patterns on paper and deciding against them all I made the more geometric oval leg. This is another offset style that I had never done before and to make it stand out I wanted the change from one direction of oval to another to be sudden so I made the offset angles 1cm out, but at 90°.
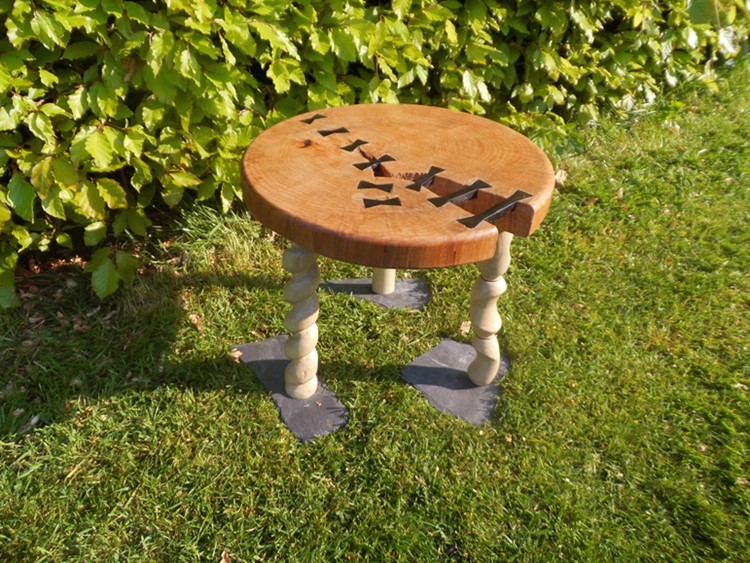
For the top of the stool I used a beech cookie with a big split; it measures 15½” diameter and 1½” thick. The whole stool is 13½” tall in total. To strengthen the wood across the split and cracks I inserted 9 bowties on the top and 6 on the bottom. Ideally I would have used something flash to make the bowties because I wanted them to be of contrasting wood but what ebony I did have was the wrong size or not big enough. Instead I used some scrap wood from the school tech department which I stained black then cut the bowties from it during my lunch hour!
Drilling the holes for the legs seemed simple but then I realised that they would need to be angled to make a stable seat and for the looks, although the more angled they are, the weaker they are. I chose an angle of about 5° because this meant that they were angled but there was still some force being transmitted straight down.
Completed in a week, all that was left to do was glue in the legs and apply a finish. For this I chose a hardwearing lacquer under coated with a sanding sealer and shined with friction polish. I had never used any of these before but I had used an acrylic sanding sealer at school and something similar to the polish. However, it proved to be easier than I had expected. I sanded for a whole 3½ hours before the hard beech wood top was smooth. I then discovered that you have to work like lightning to put on cellulose sanding sealer. After applying the lacquer it was much shinier but the friction polish made a really big difference – I will definitely use that again.
The photos are of the stool next to a beech hedge. The sheet of glass underneath was to stop the grass hiding the legs and show that it does sit straight and that the leg ends sit flat, because getting that right took me ages!
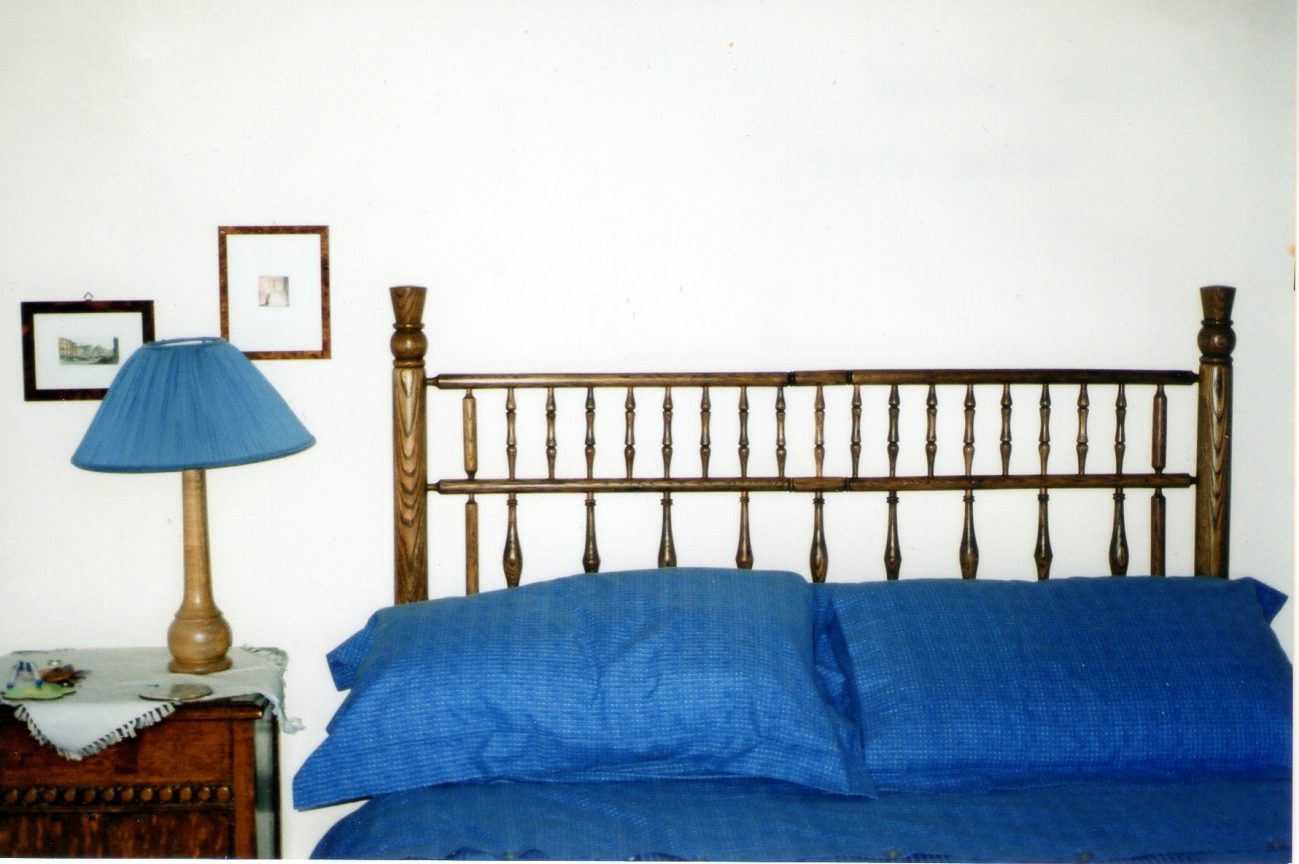
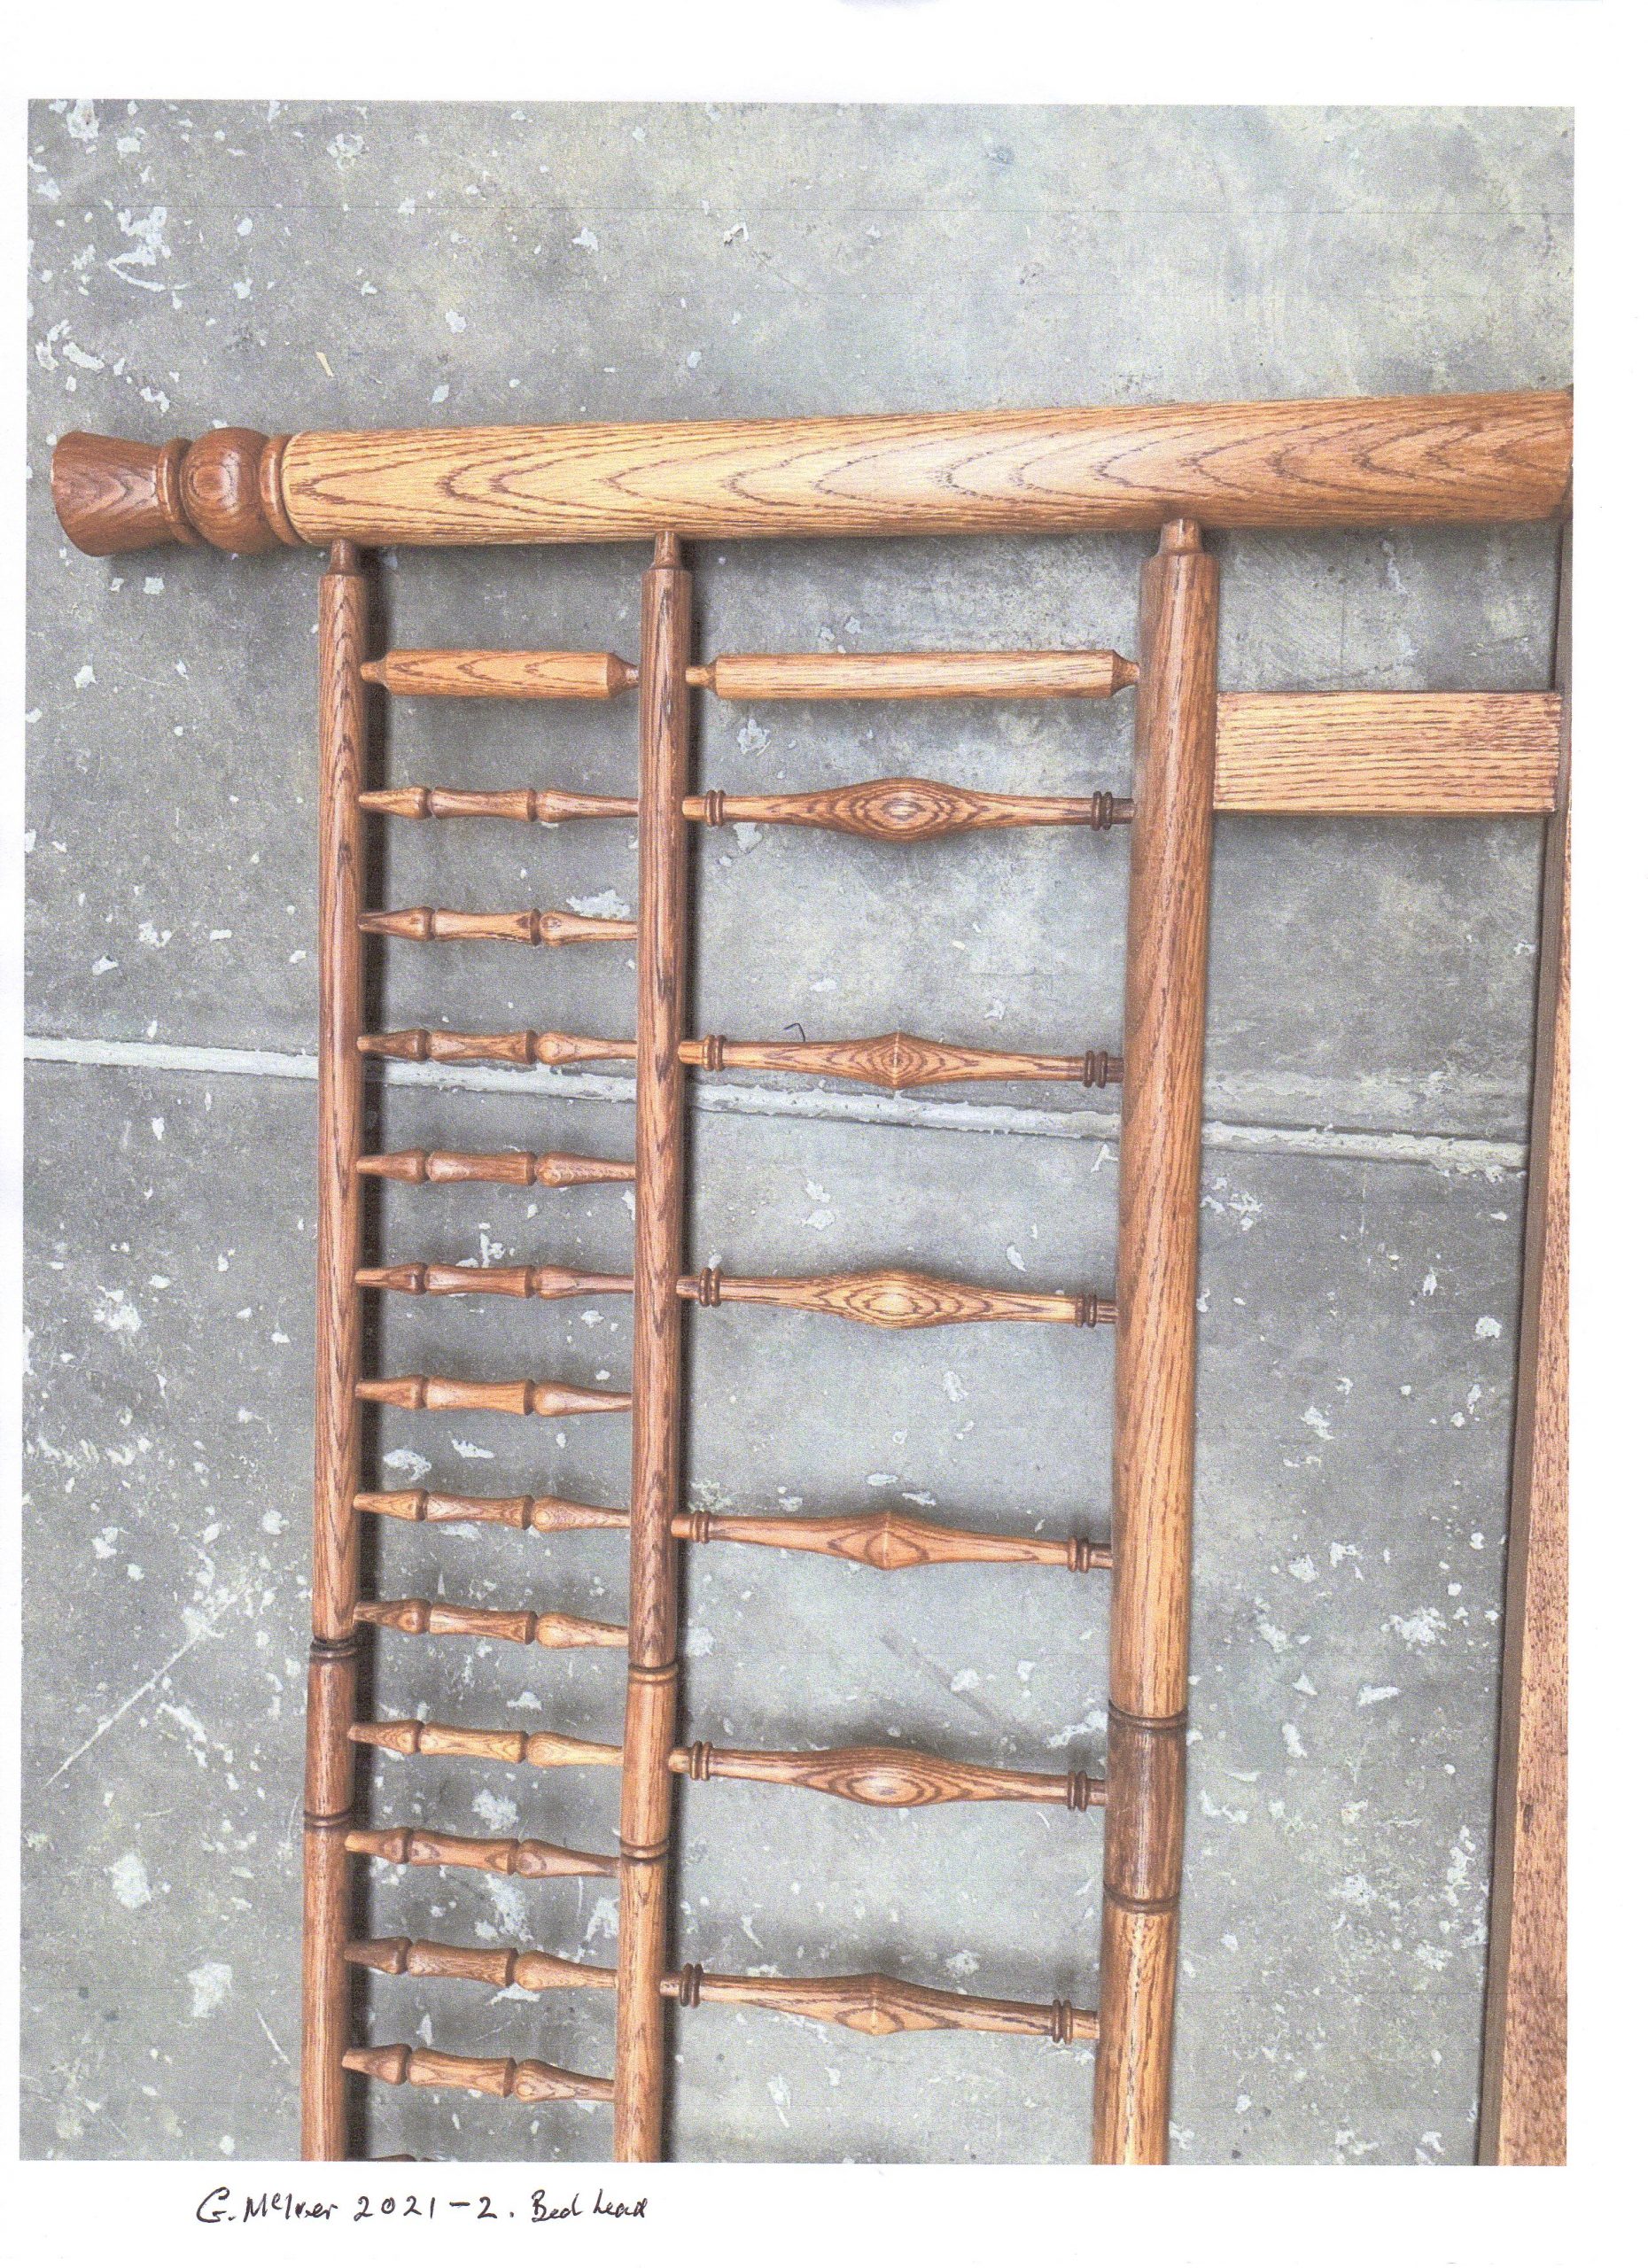
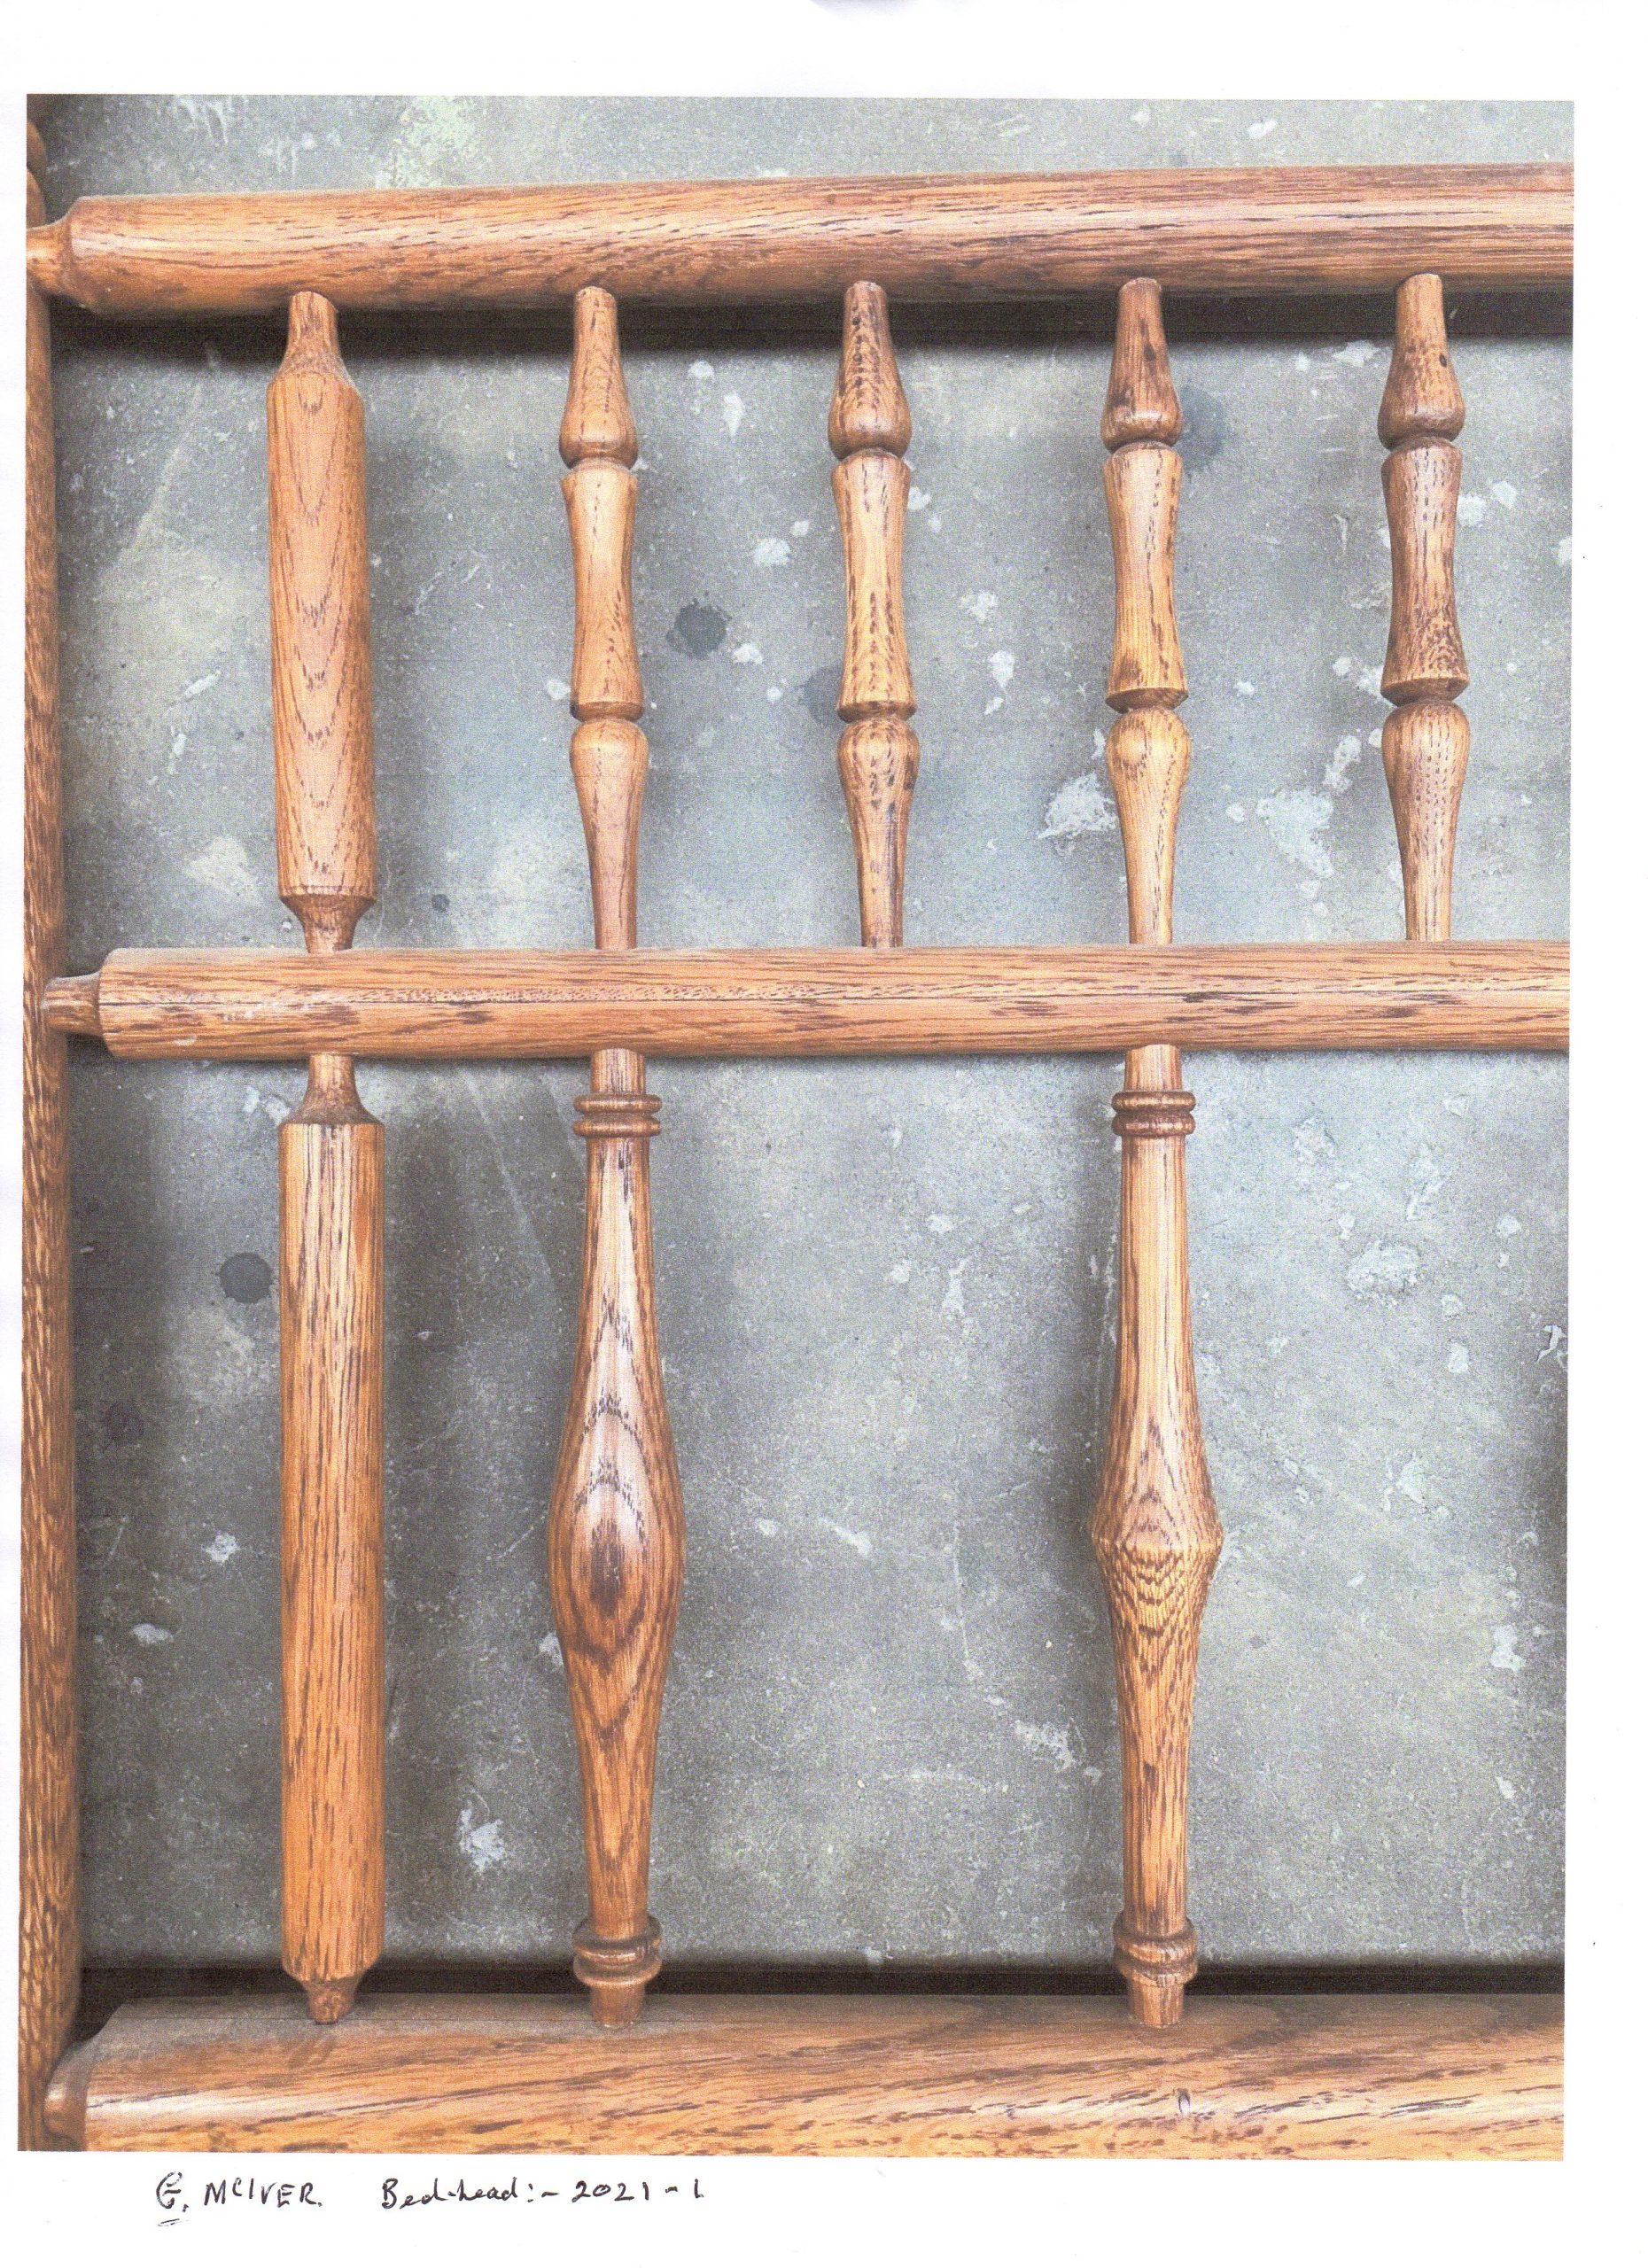
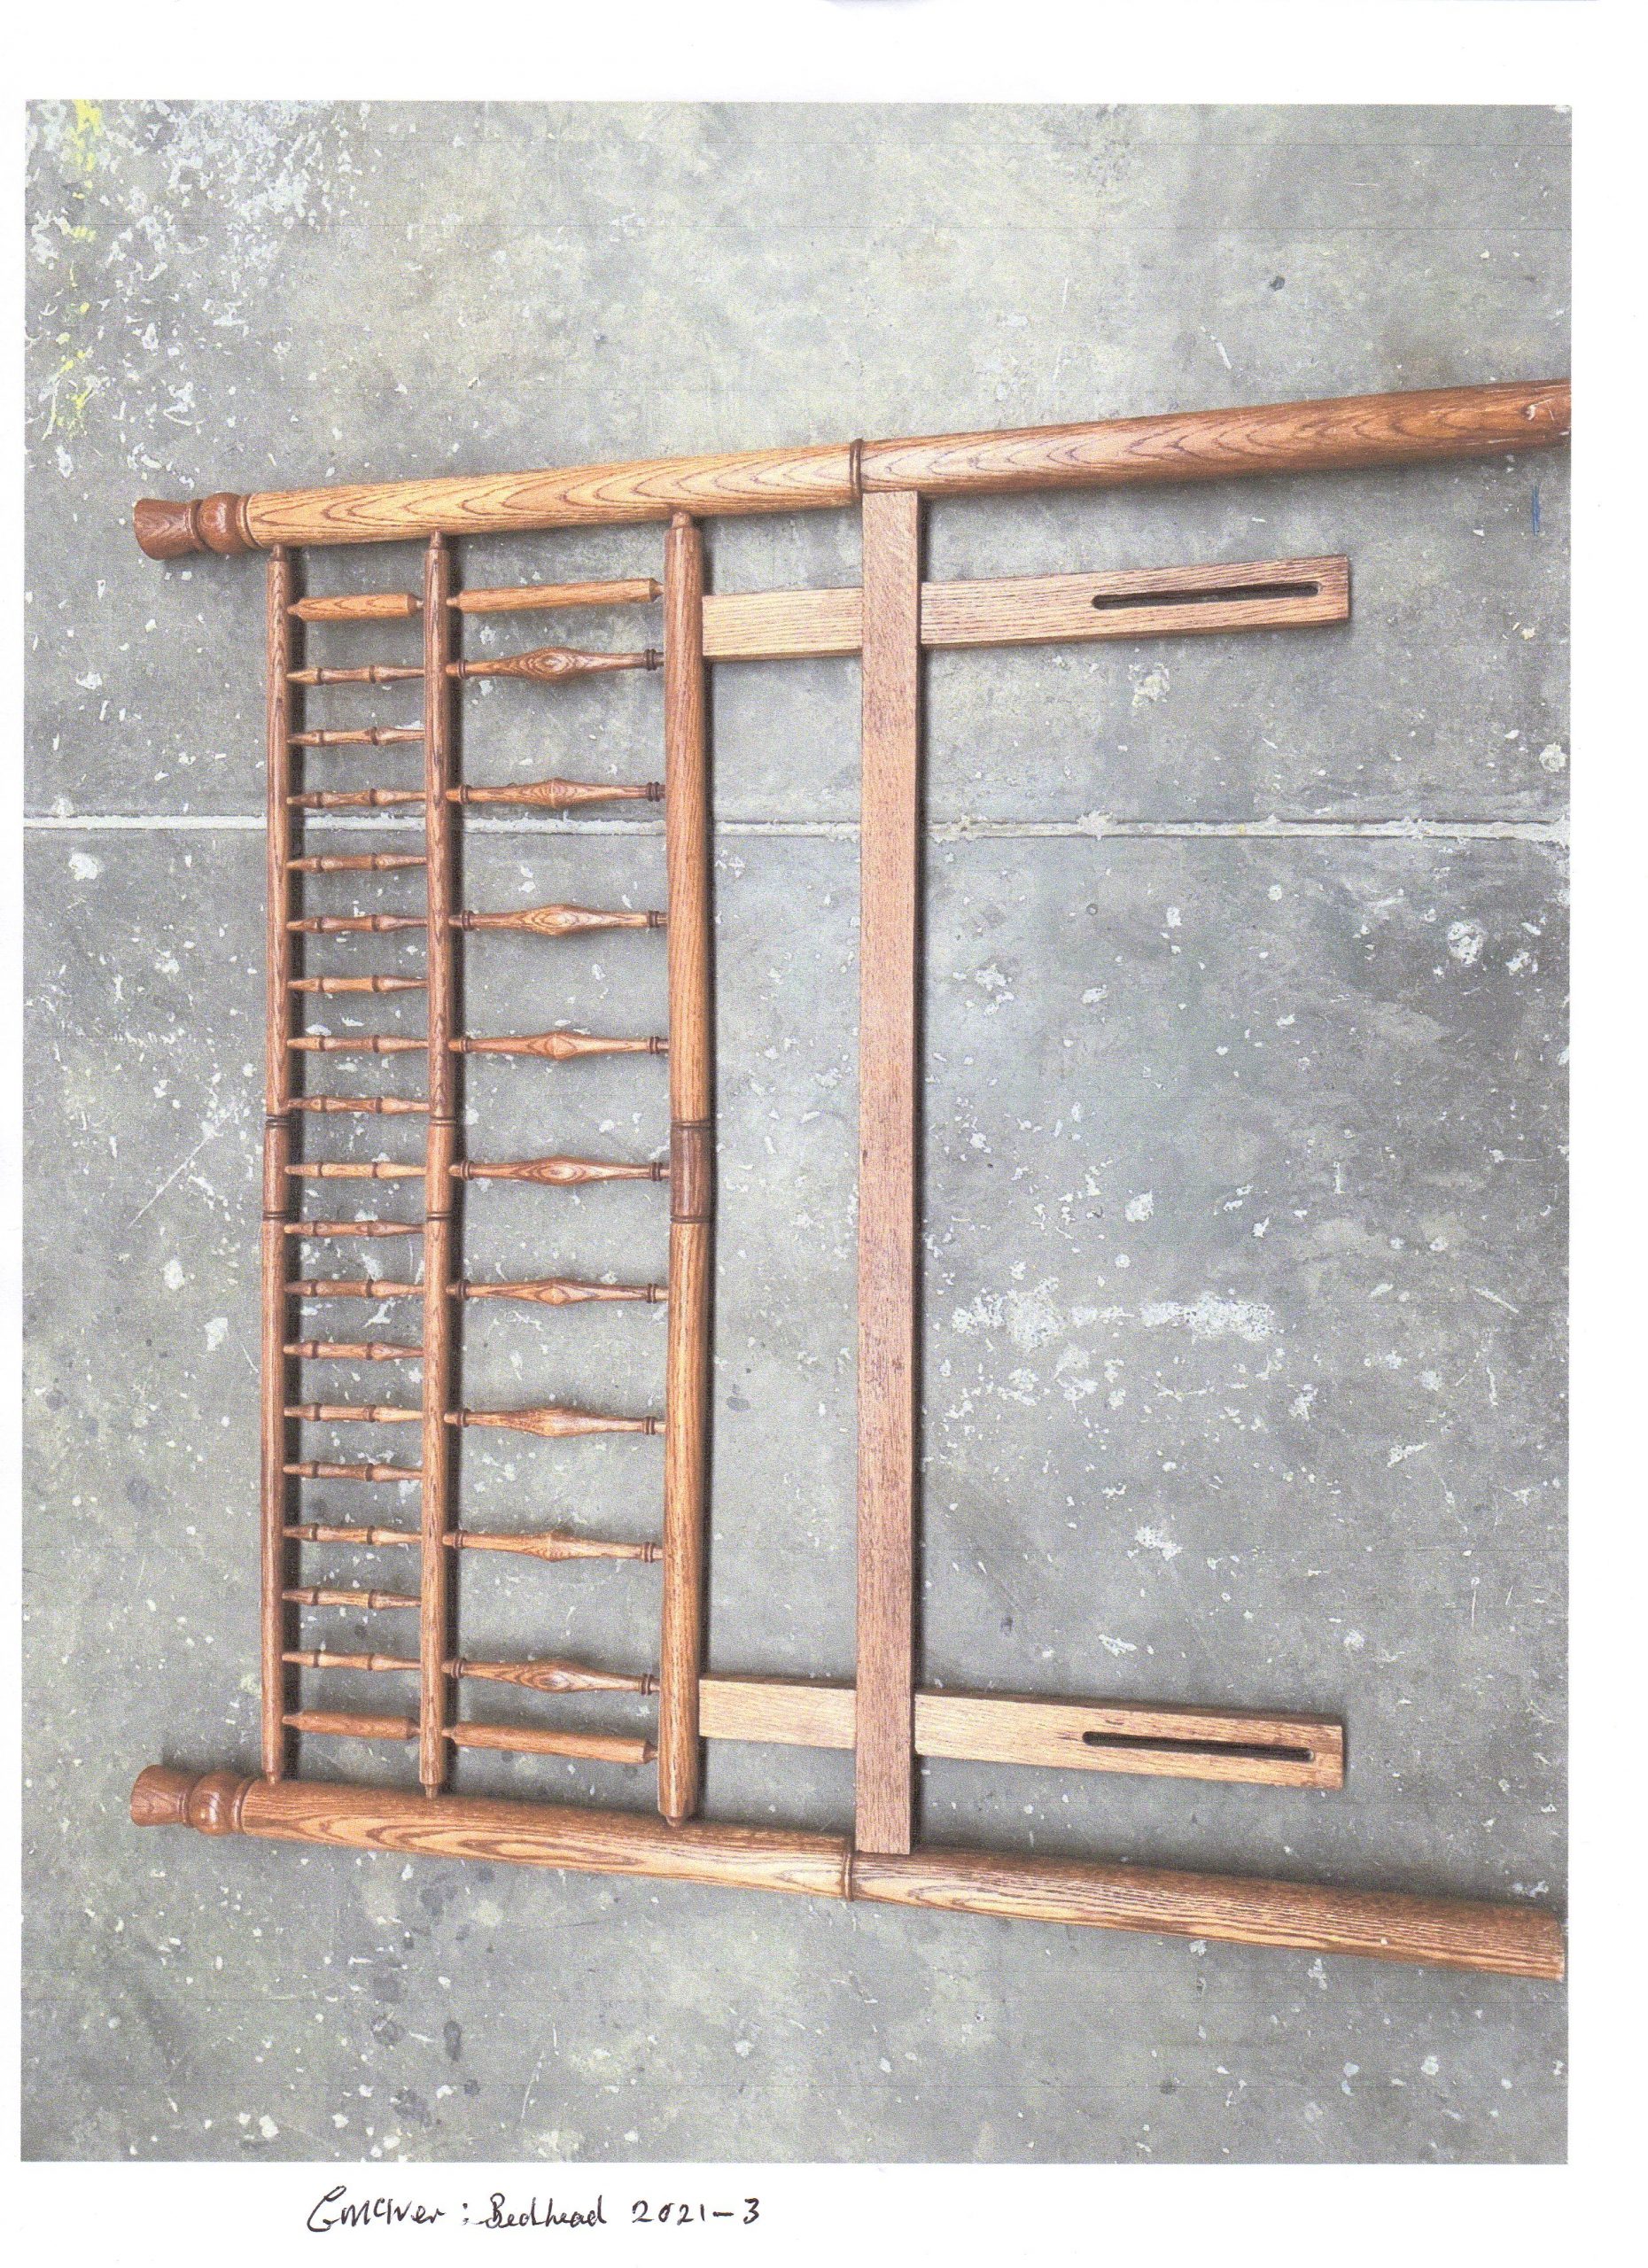
Gordon McIver
When we needed a new double bed I thought here is and opportunity to make the bed-head myself.