
Toys with moveable parts
We’re sure that you have all made something at some stage for a child and seen the joy that it brings. Whether that be a baby rattle, a toy car, a skittles set – the list goes on!
Deadline for entries is the 30th June.
Prize – £100 total voucher for Yandles. Yandles will add a £50 pound voucher in addition to the £50 voucher supplied by the AWGB.
See how to enter and the rules here – www.awgb.co.uk/show-tell/show-tell-rules/
Winner – Ewan Dorward
Katie Abbott
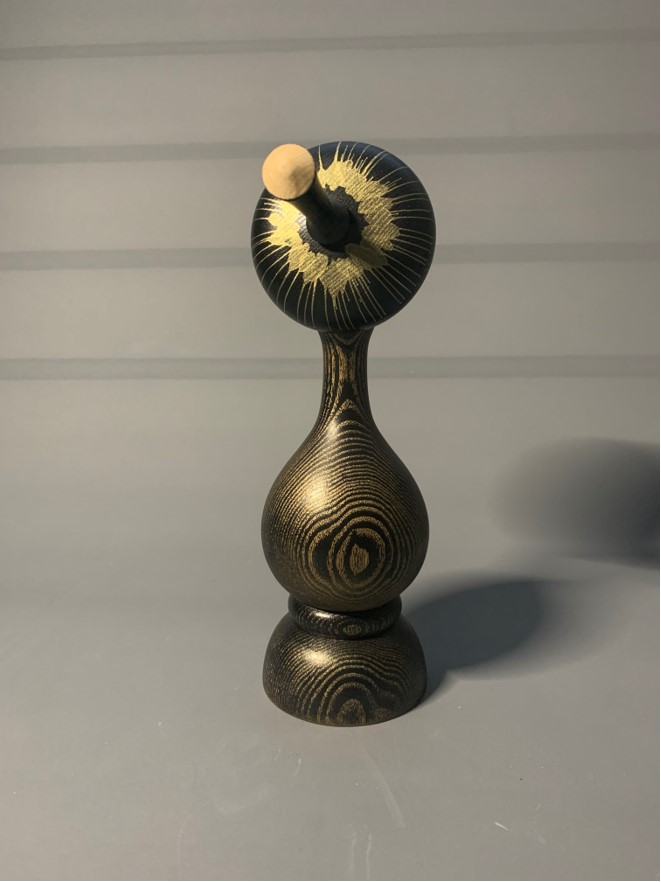
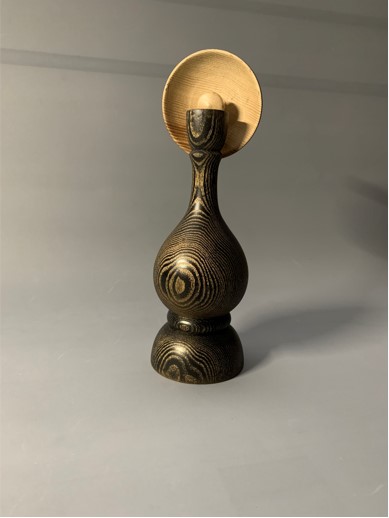
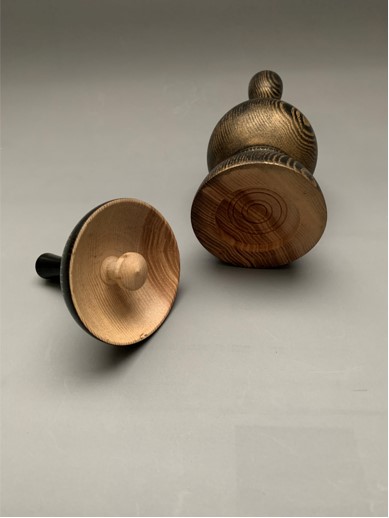
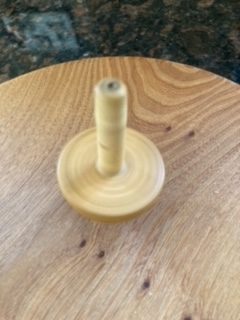
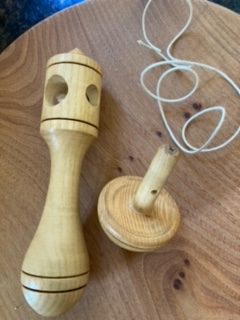
The spinning top was made to entertain a neighbour’s daughter during lockdown when we could only talk to each other over the hedge. A 10 inch length of ash 2 inches diameter was cut and rounded on the pole lathe. Half way along a five eighth hole was drilled through and then at right angles a half inch hole. The handle was then turned at one end and the top at the other, it was burnished taken off the lathe and the two parts divided. A three eighth hole was drilled halfway up the stem of the spinning top. The top was then inserted into the smaller hole of the handle and an 18 inch length of string inserted through the larger hole of the handle and the hole in the stem of the top and wound up. The spinning top was then ready to spin.
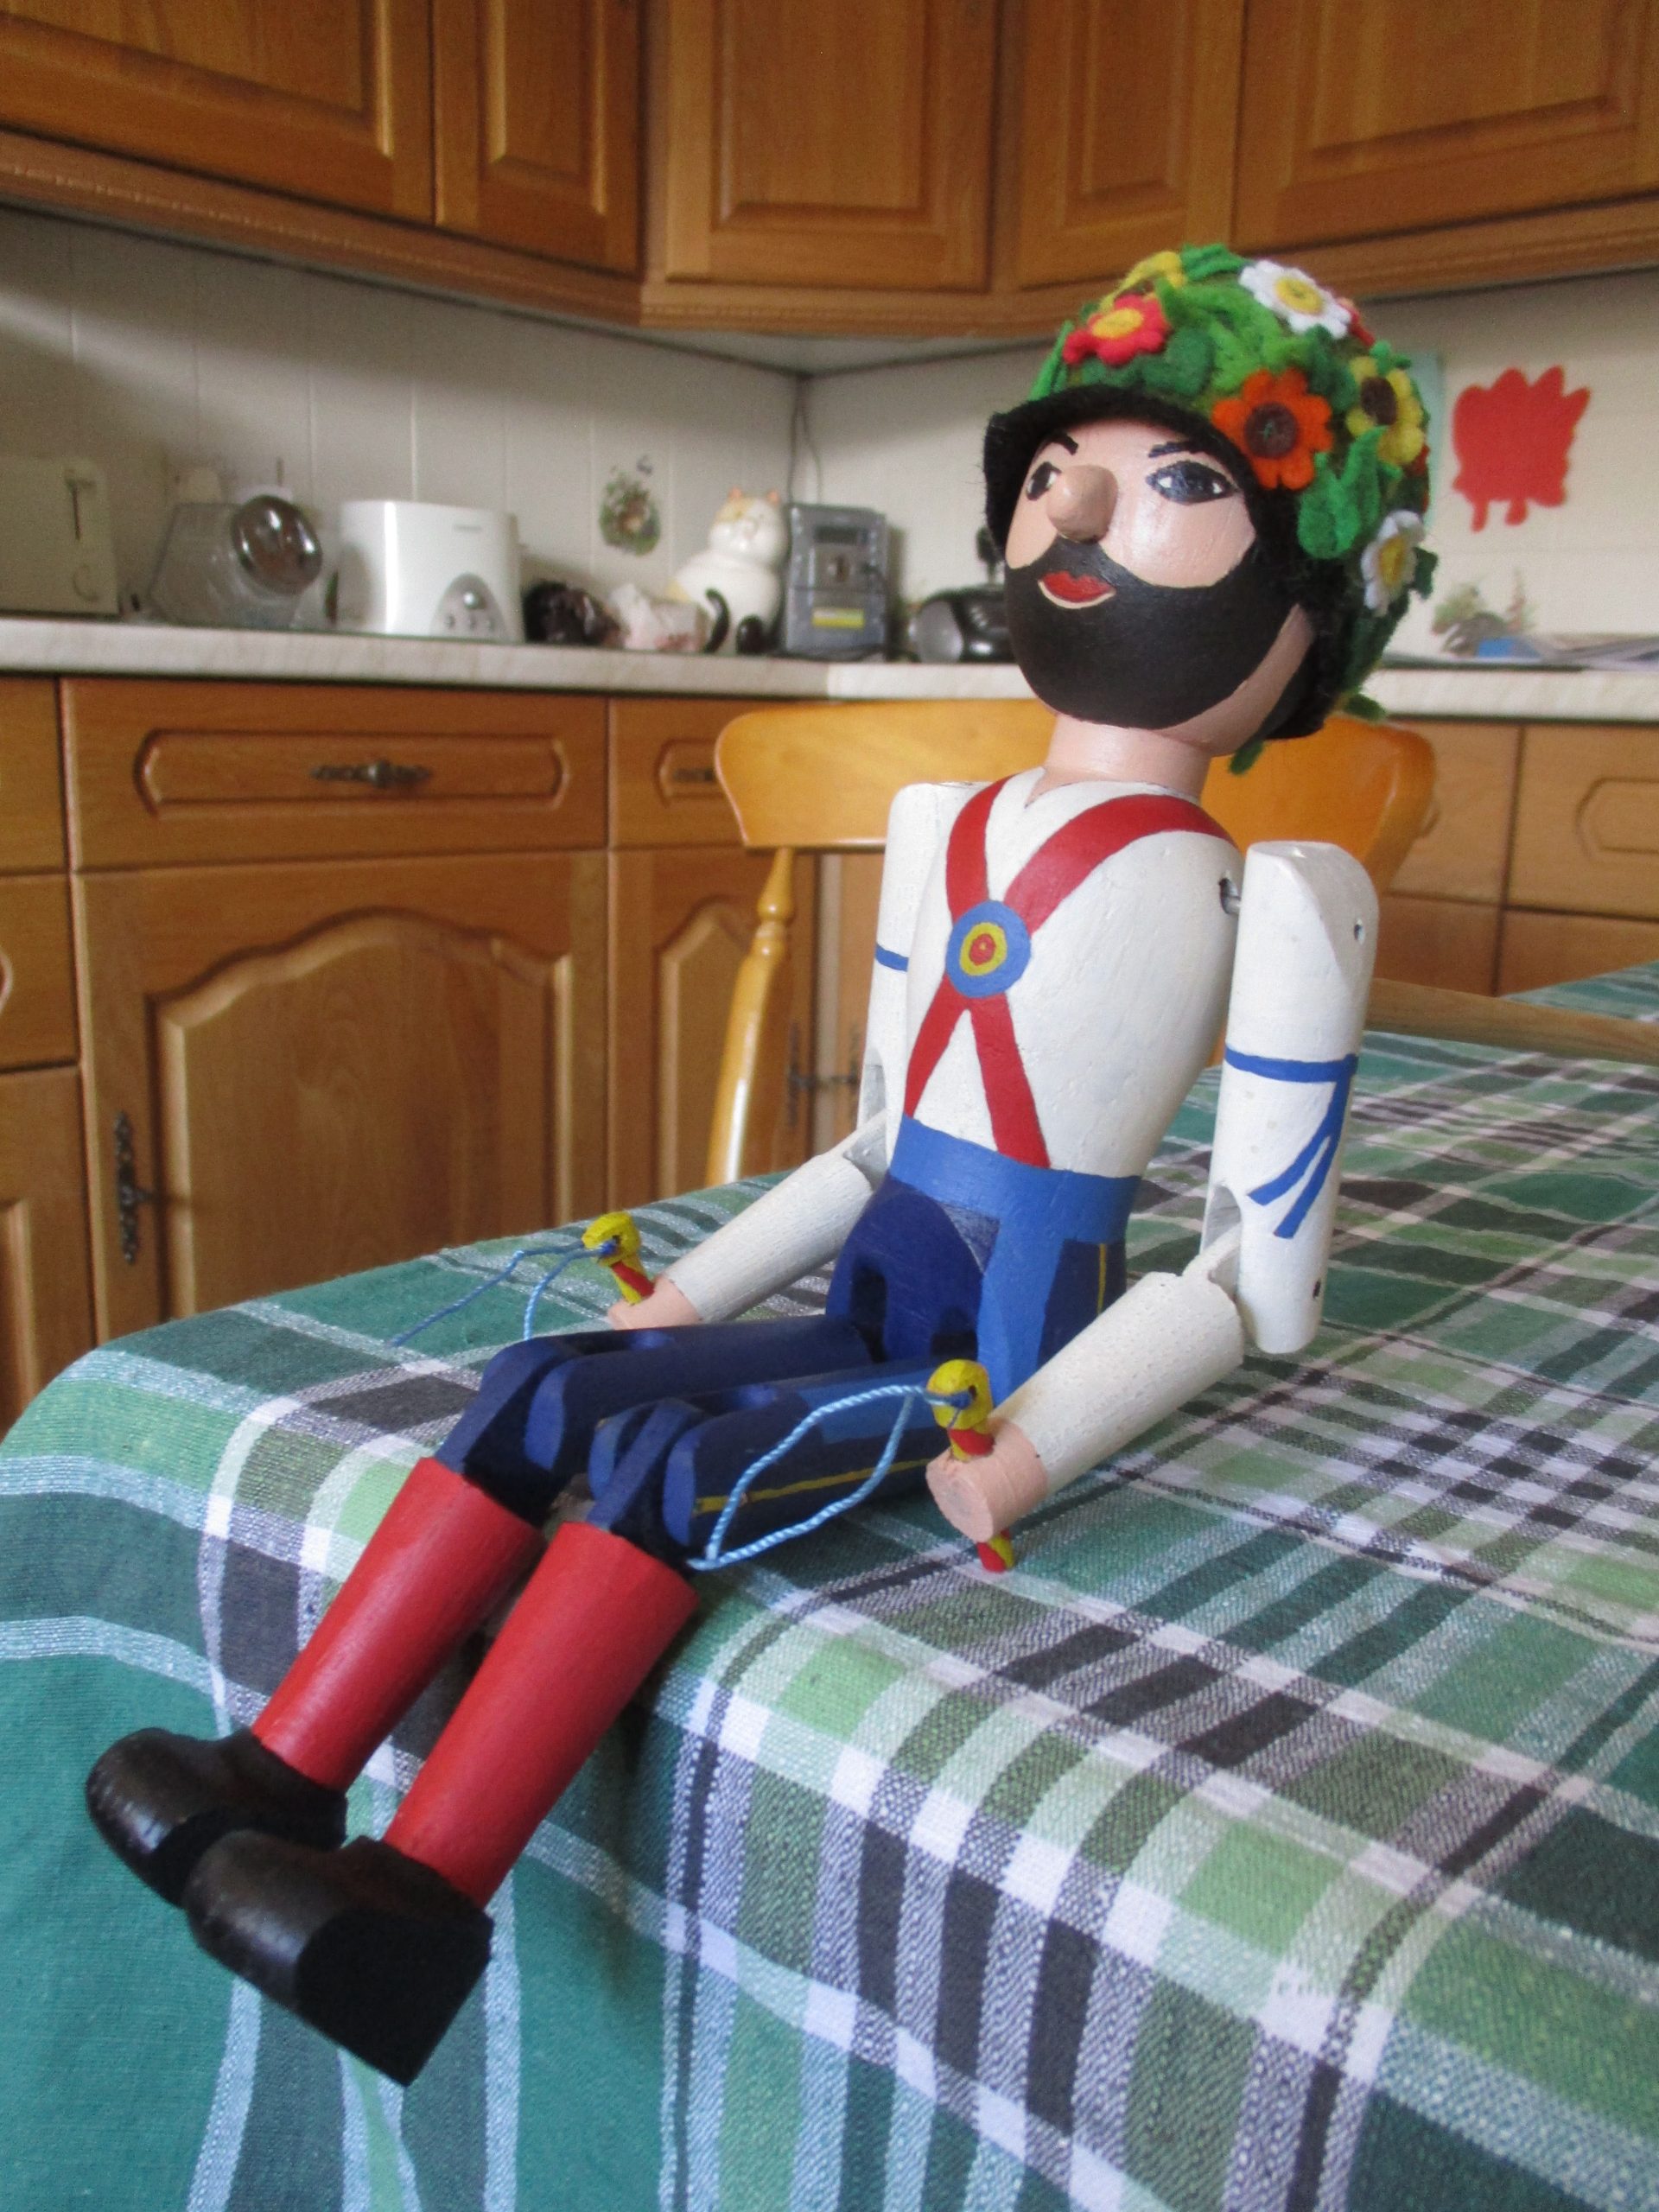

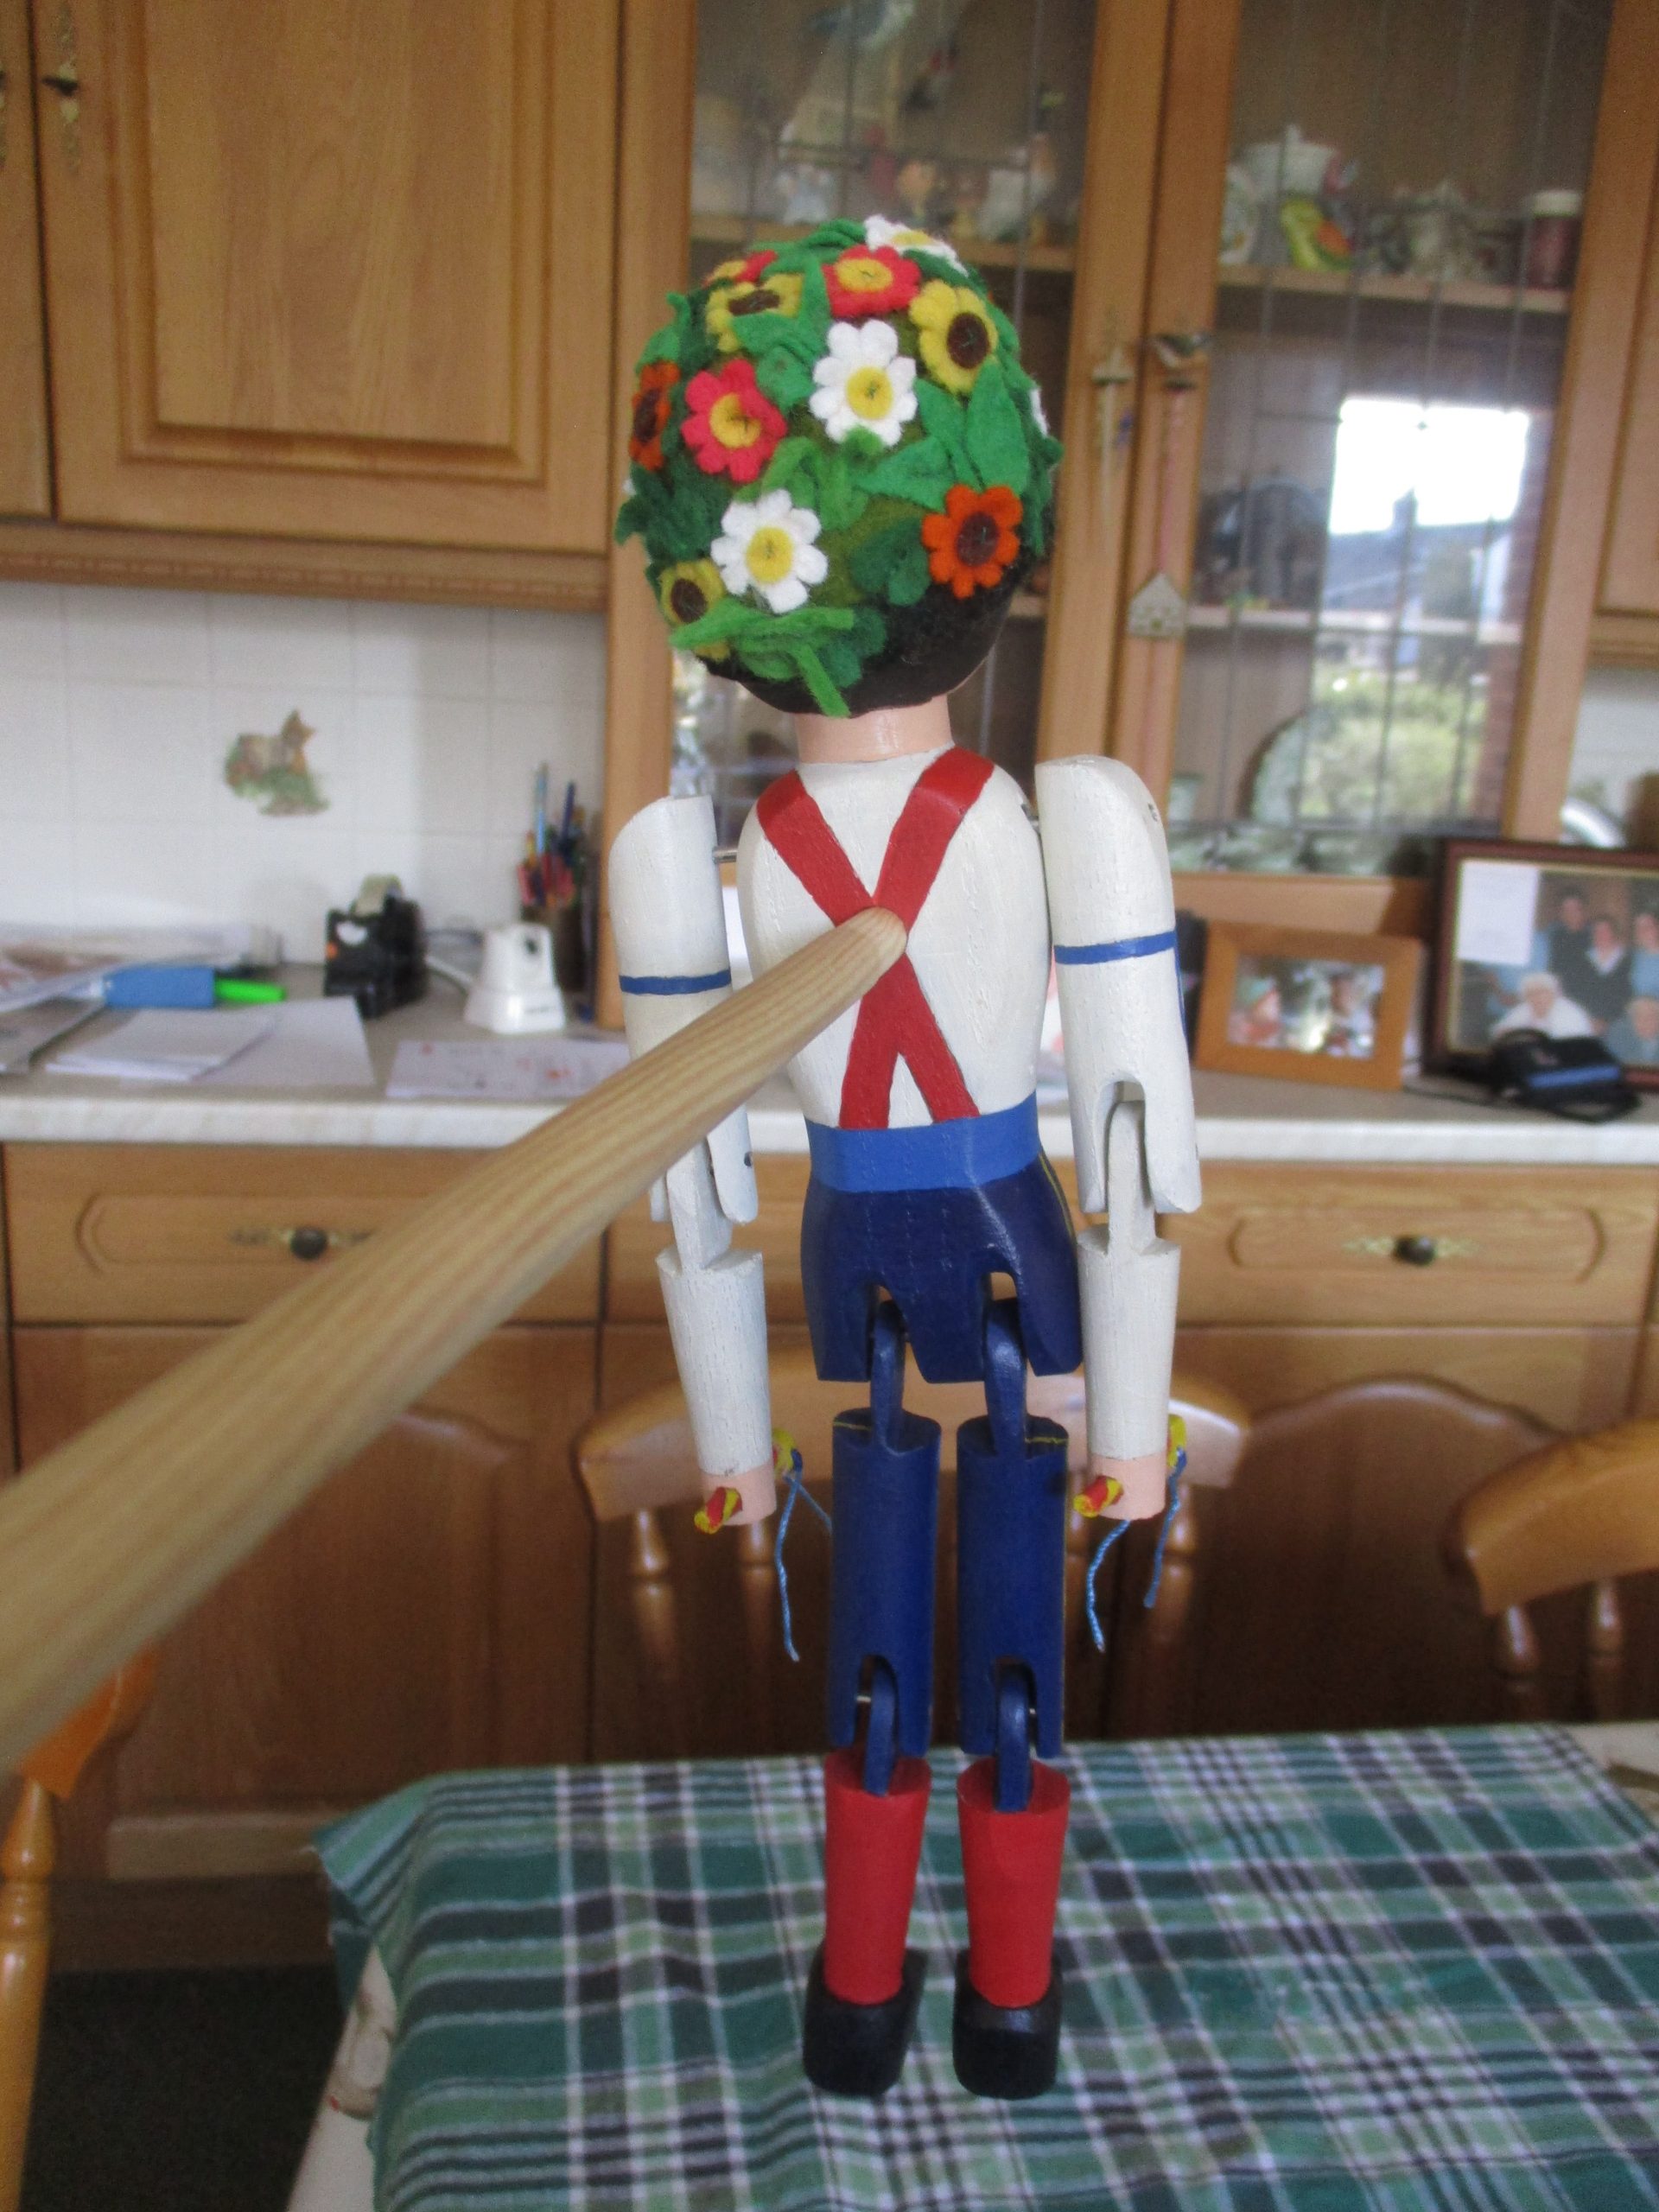
Before assembly the components are painted. I use acrylic paints with a final coat of acrylic lacquer. This particular jig doll is painted in the colours of Ripon Morris and he also sports a hat which is made of felt to complete the outfit.
Ewan Dorward
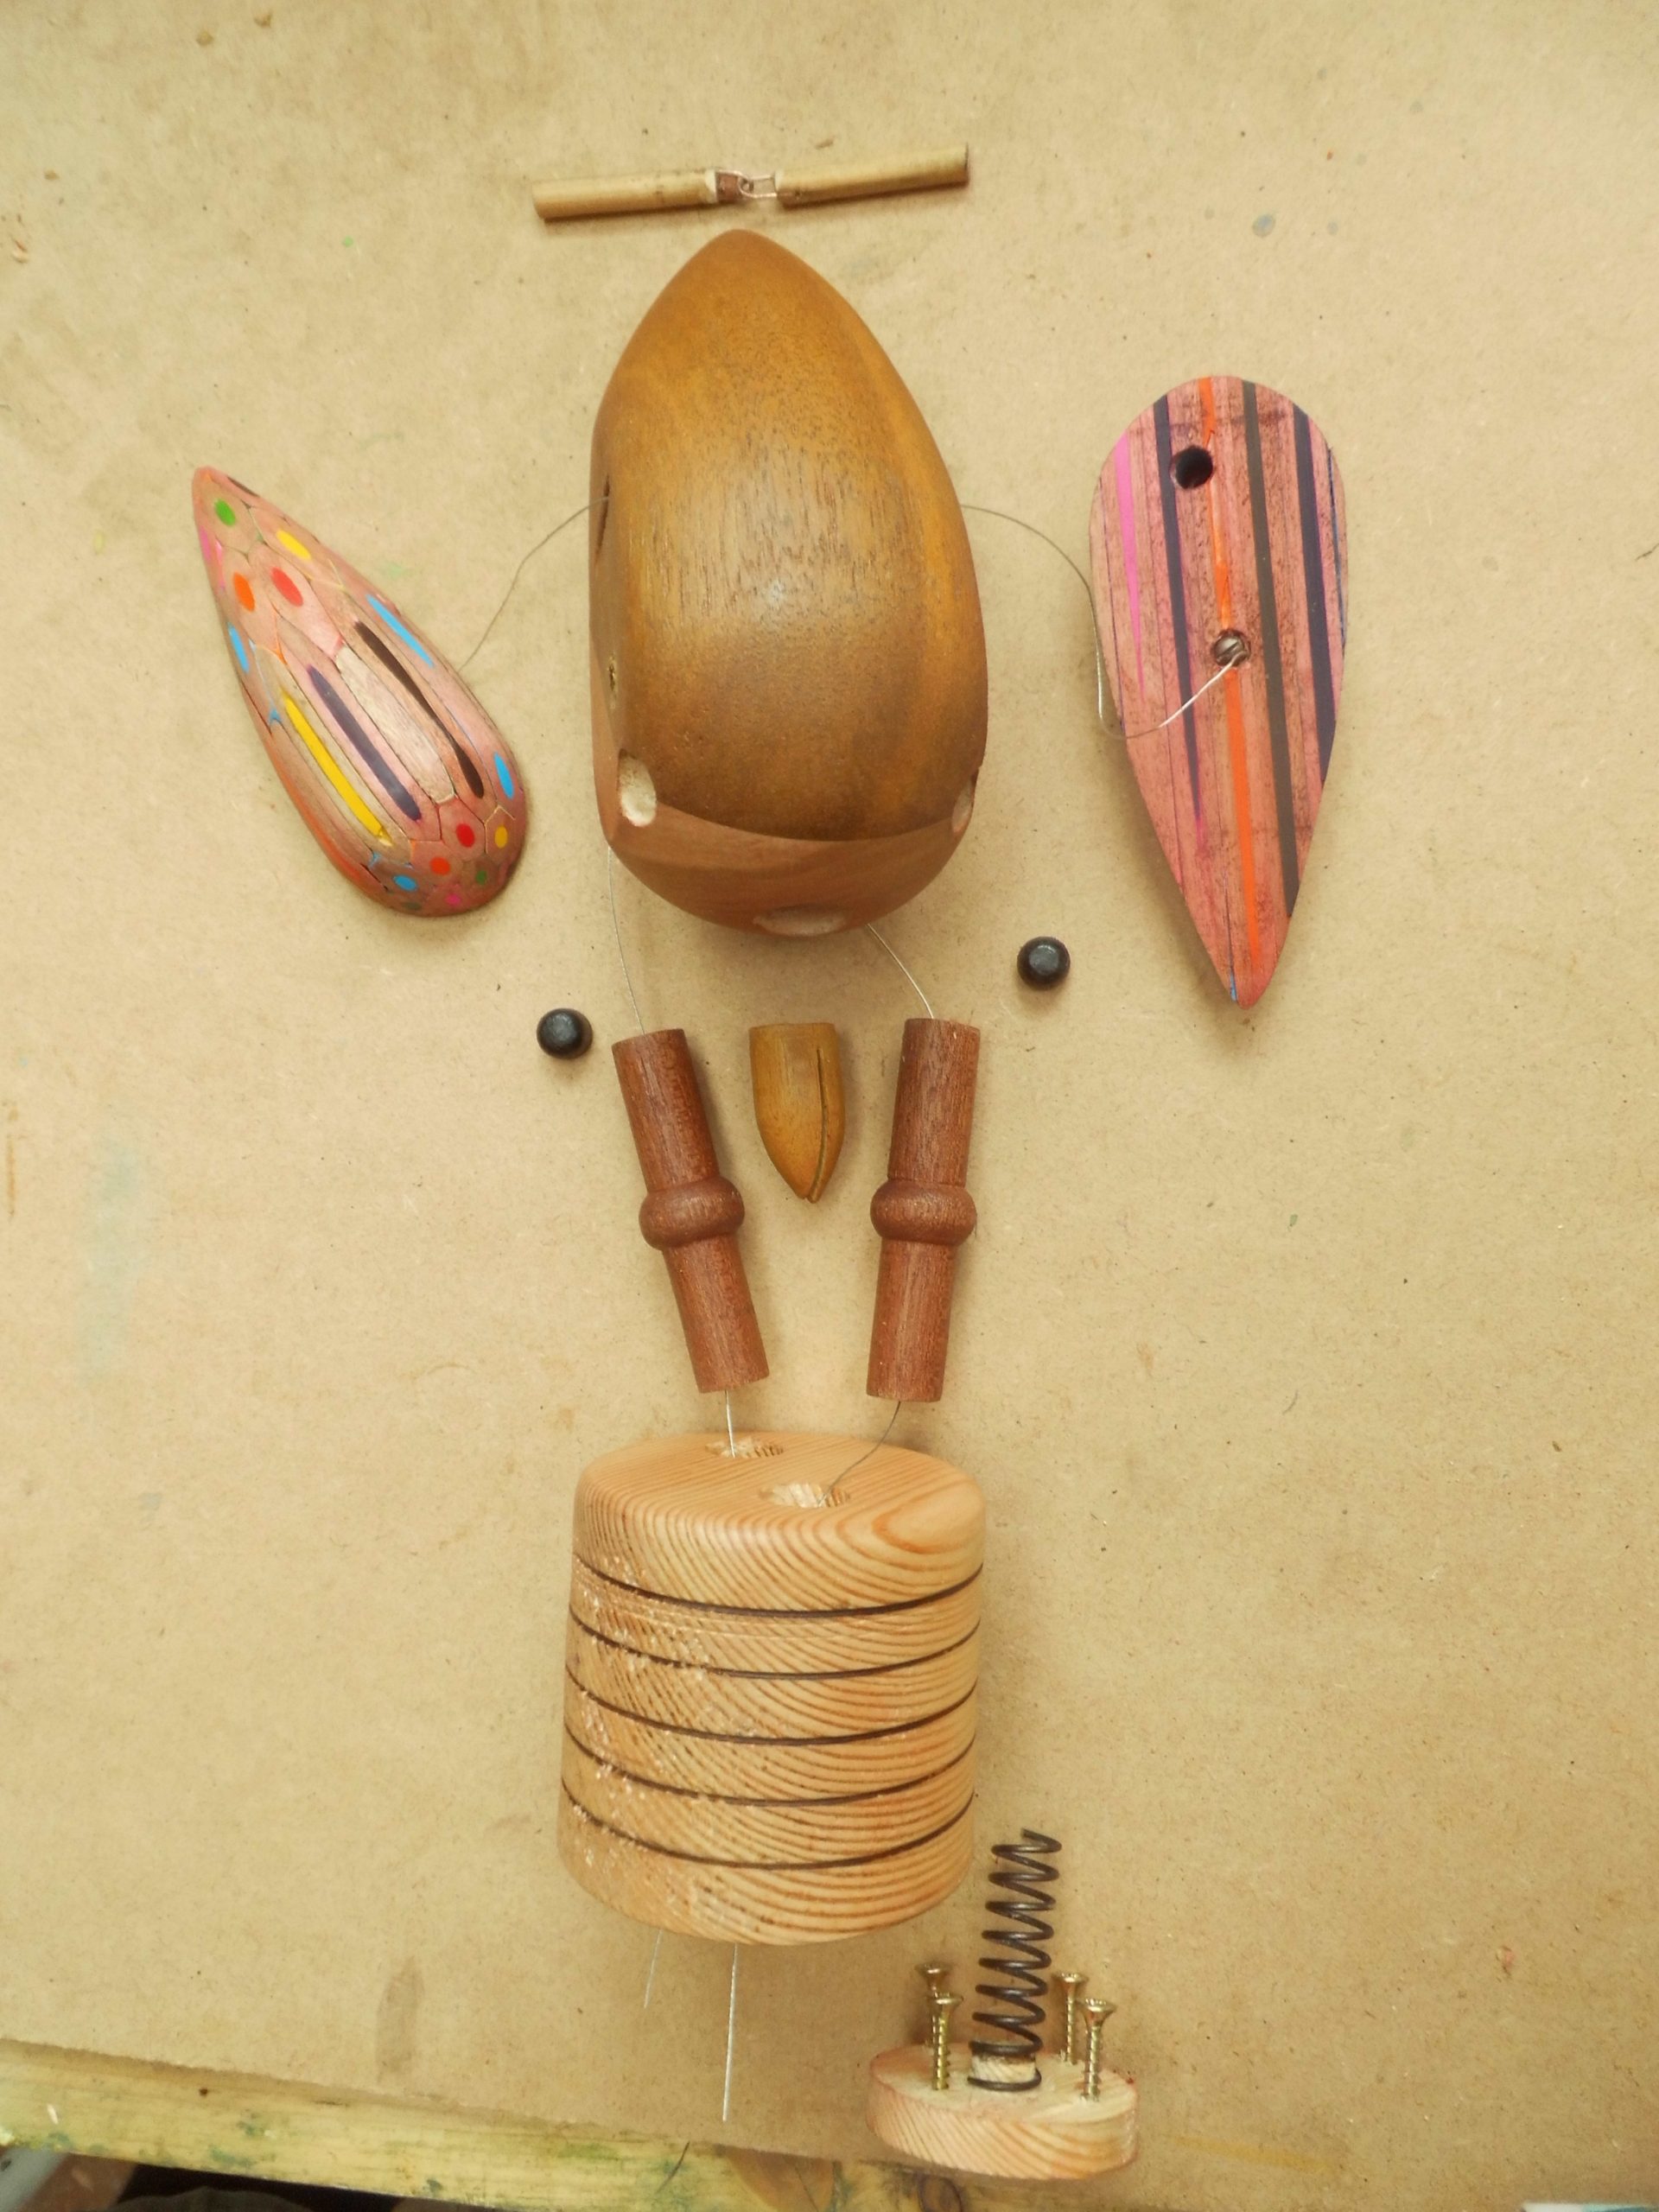
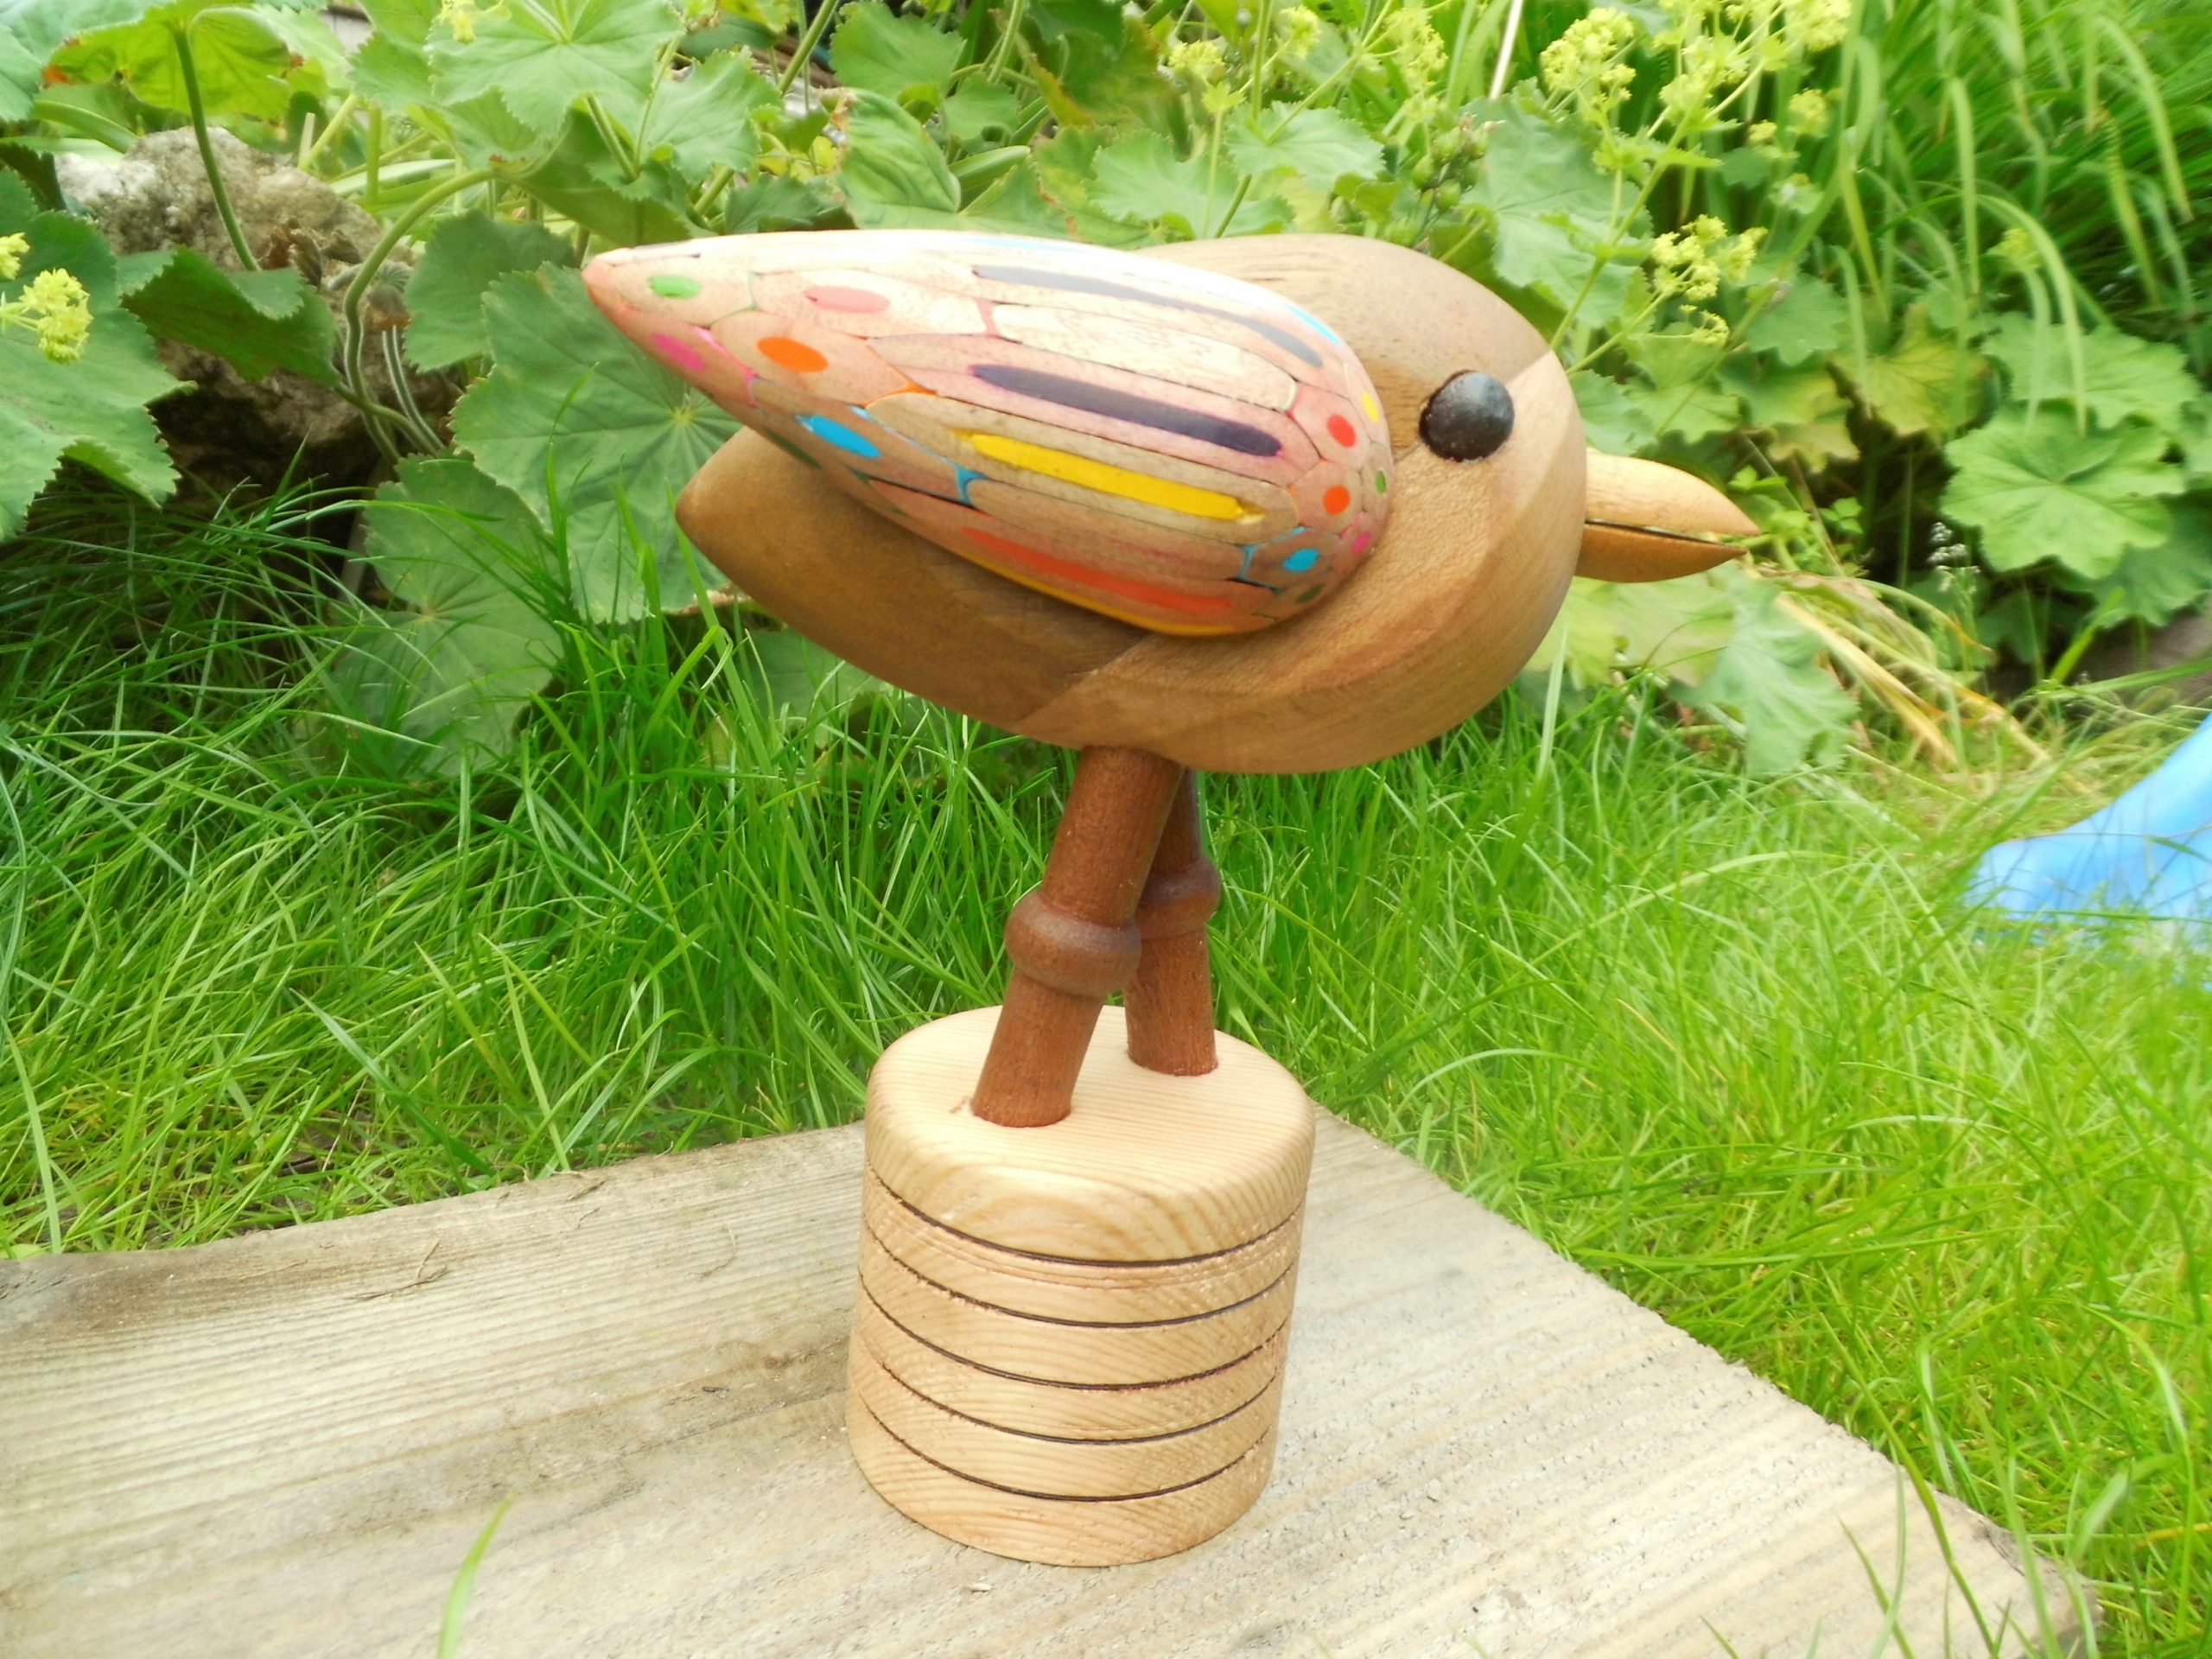
For this Show and Tell my first thought was obviously wheels – a cement truck with a turning drum rotated by lego technic driven from the axle or a bus with bouncing people sitting on eccentrics. Then I decided that wheels would be too simple. Instead, I have made a bird with flapping wings based on the collapsing animal toys that fall over when the base of the stand is pressed.
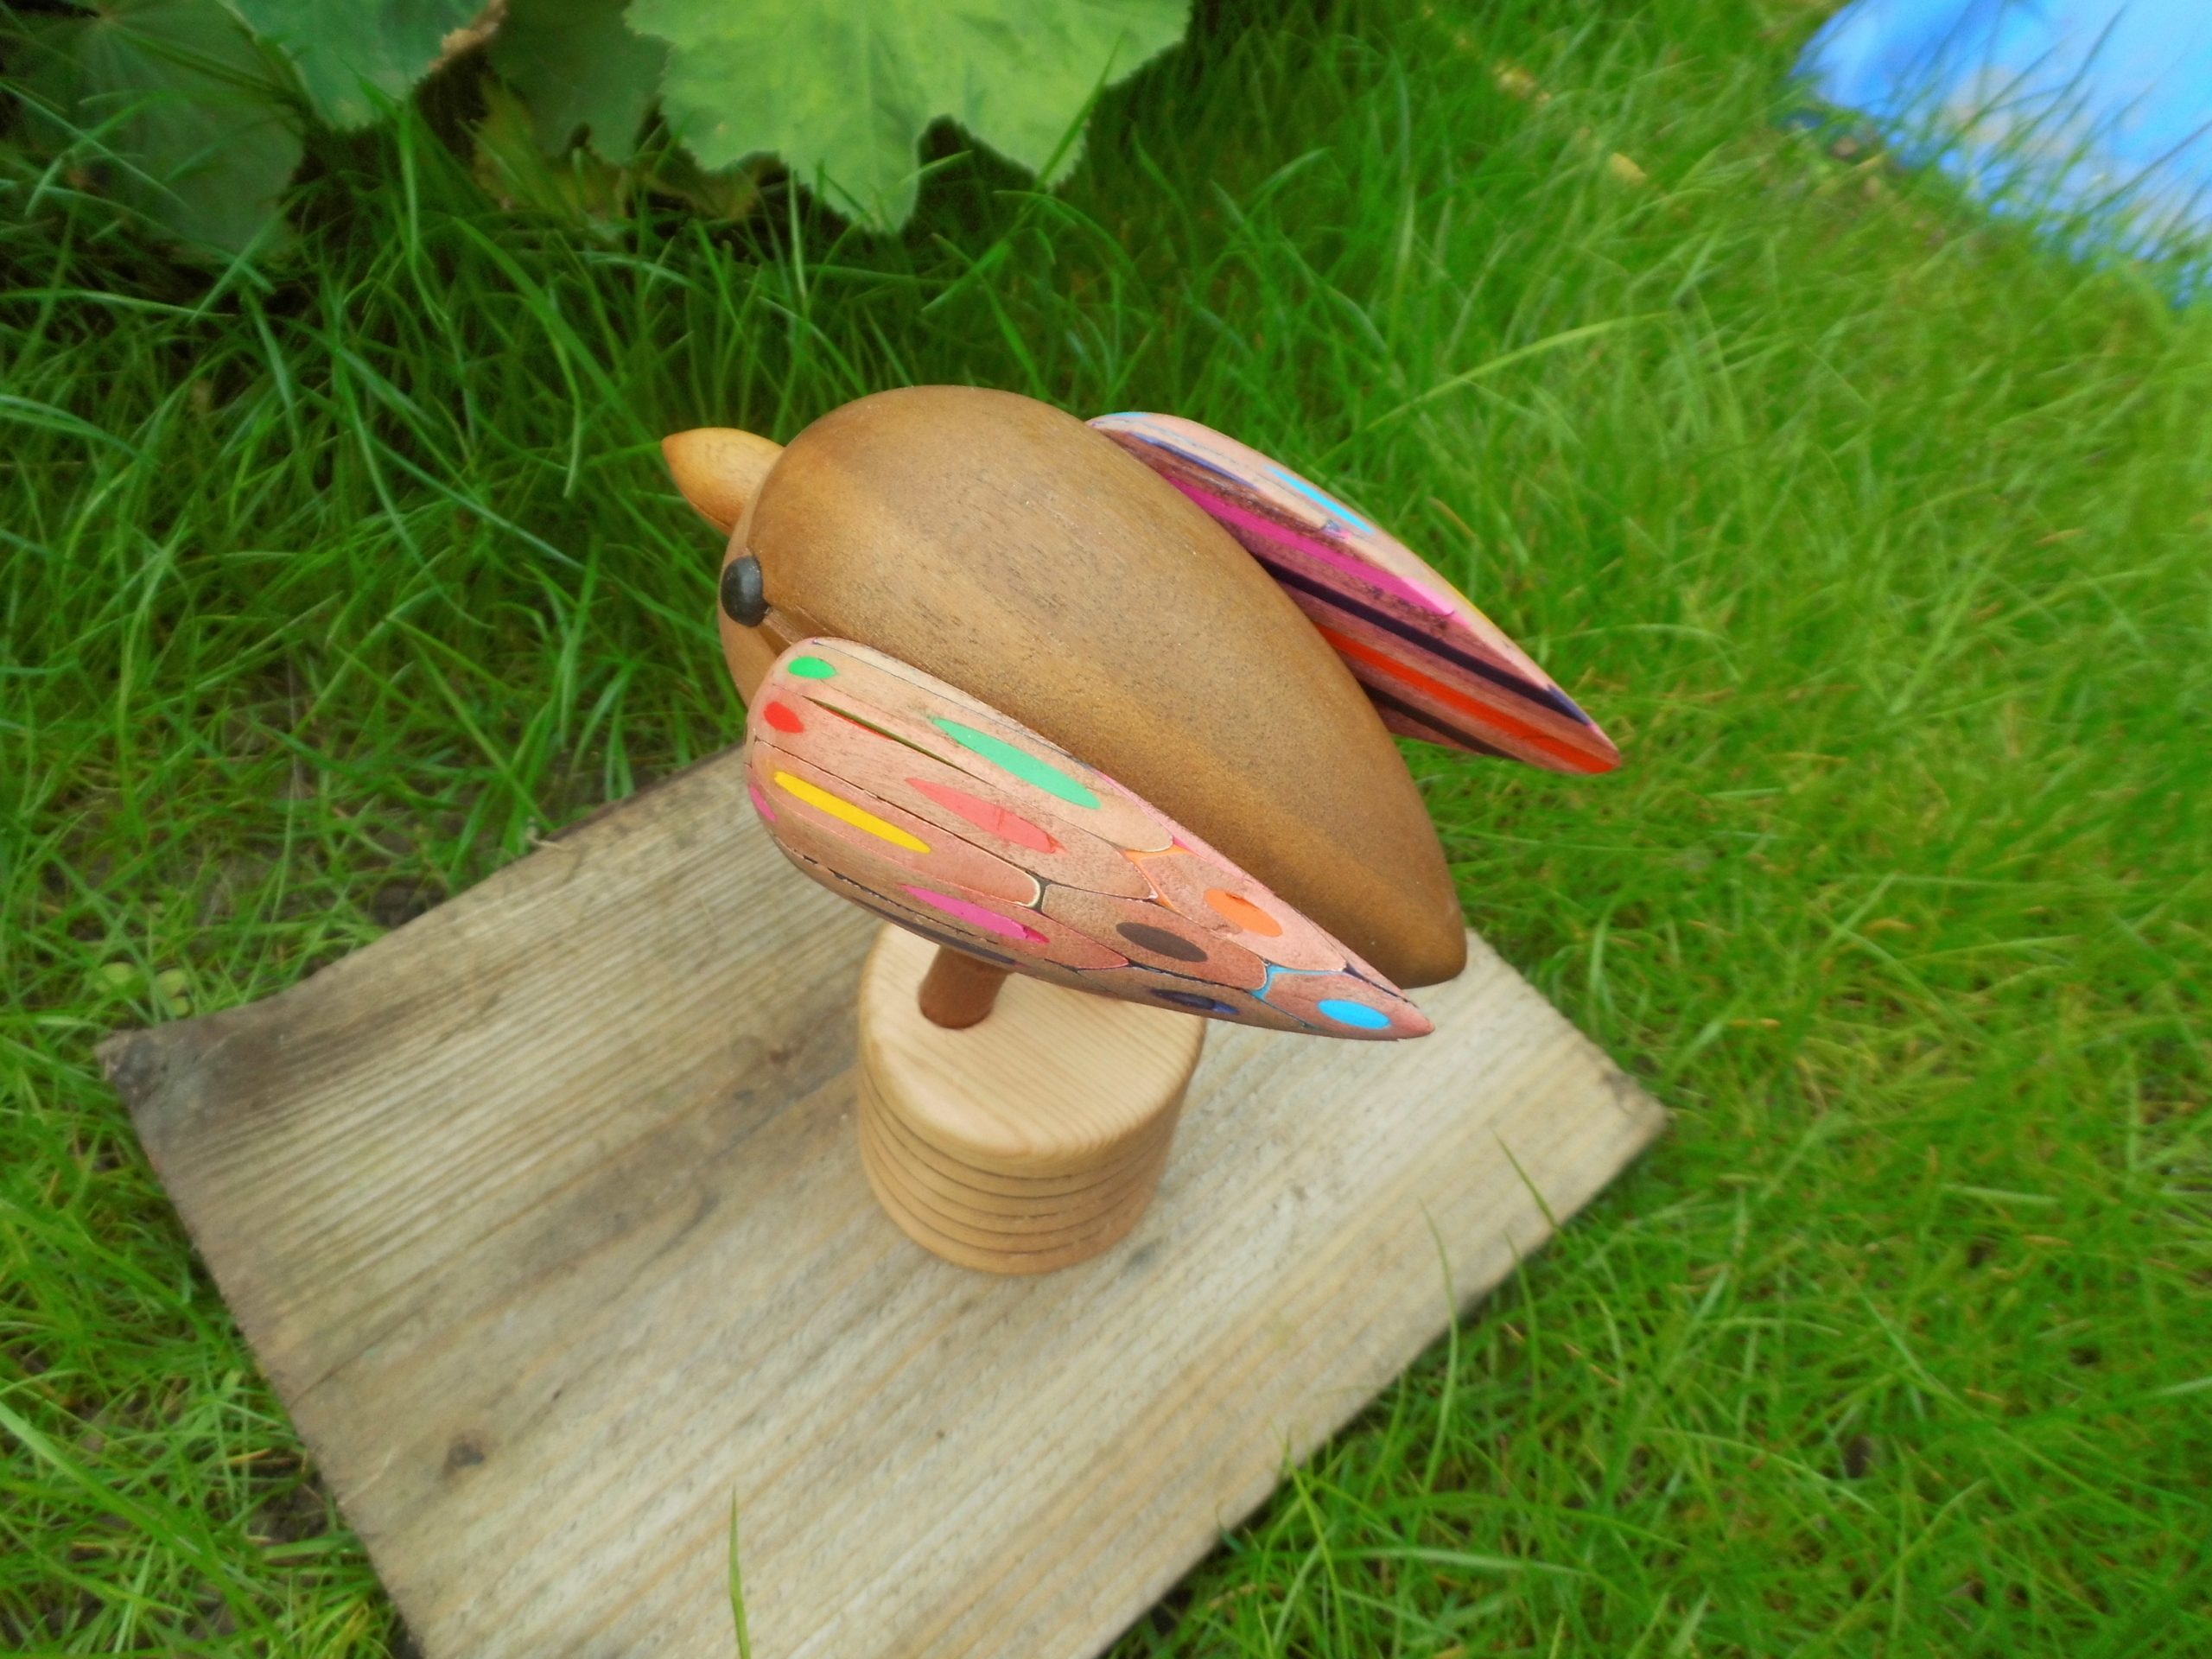
I made the colourful wings first and then all the rest of the bird was made to scale around their finished size. I glued lots of (37) coloured pencils together with superglue. This takes a long time, is very fiddly and very smelly – everyone online had used resin. I used hexagon shaped pencils to help with the gluing and left it to set overnight and for the stink to get out of my shed.
I turned the coloured pencils into a tear shape but didn’t want to use a hand saw to half it in case this tore it apart because of the sawing motion and being clamped in a vice. So, I made a special holder for it and took it to school so that the tech teacher could use a band saw to carefully cut it in half for me. Thank you Mr. Farrell, happy retirement!
Once I had the wings I was able to work out how big to make the body. I wanted the bird to have a different coloured front so I used some greenheart and cherry glued together. The shape of this was a rectangle, normally quite annoying for woodturning because of the huge amount of waste and time it takes to make a round but I was going to make another tear drop shape and plane off the sides to make space for the wings, so for the first time, I could actually use the rectangle shape. I just left the sides flat when making the bird shape.
I made the beak and eyes and legs next. The eyes are tiny turned bits of ebony, the legs are a brown wood called sapele and the beak is made of a yellow wood that had been lying in the 50p pen blank box for ages which the shopkeeper thought was obeche.
Lastly, I made the stand. This should have been quick and easy but was a big faff that took quite a while due to me being hampered by my chuck. I turned a big block of plain coloured pine to a cylinder then spent a long time sanding it by hand to remove the marks from turning. Next, I would hold it in my chuck and turn out the middle and round the corners. It didn’t fit. After doing all that again and measuring what size my chuck could hold… it still didn’t fit. After remounting and sanding again, I did manage to hold it in my chuck and complete the stand. It is about 2cm smaller than planned, but the legs of the bird still fit on which is good.
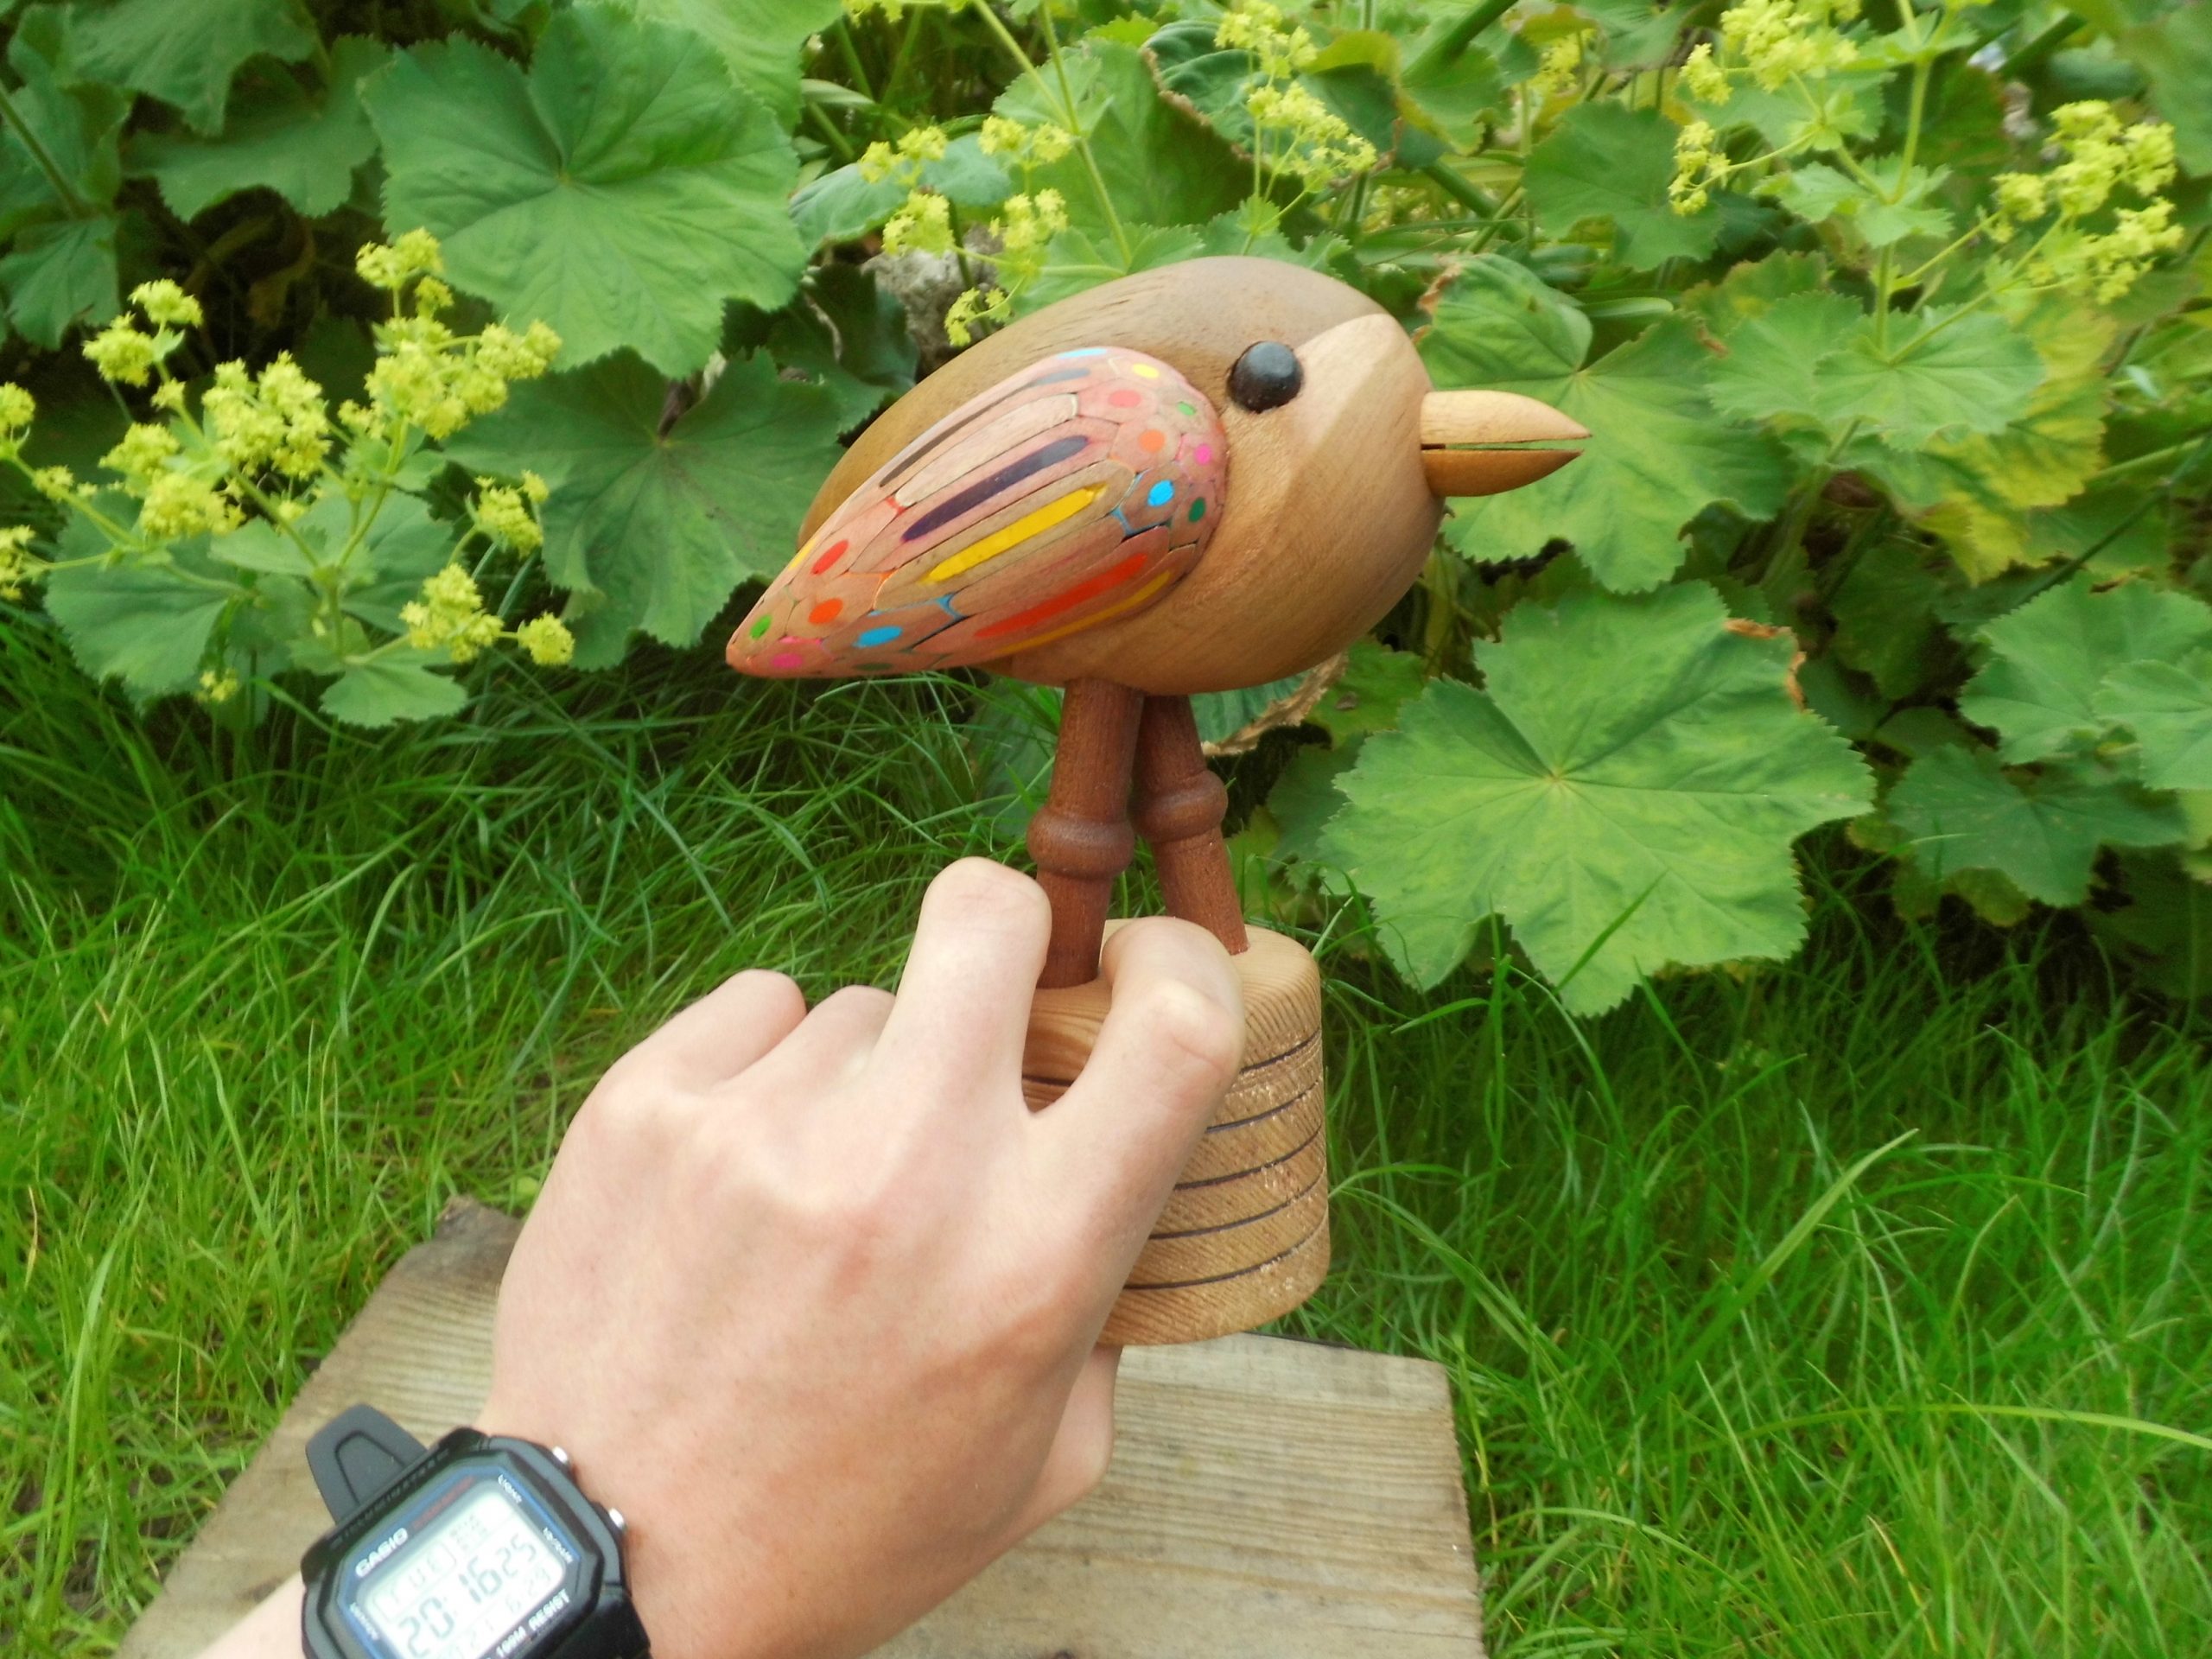
To make the mechanism I had to drill lots of holes all over my precious hard work. I started by drilling holes down both legs using the lathe then used a pillar drill for the main hinge straight through the bird to hold the wings on. The hard part was next- making tunnels for and threading the string. I drilled one long hole through the back of the bird where the string attaches to the wings and went from the holes where the legs tie on, to the long hole using the pillar drill. The 90° angle inside where the string will rub was worrying but drilling a shallower one would have left marks on the outside of the bird so I stuck with 90. Thinking of a suitable string was hard. Butchers string was our best idea but even this could be heard fraying when rubbed. After a night pondering we realised that fishing line would be perfect, but I don’t fish. I nearly phoned a friend who does to ask if they had some spare but then we found some sheathed wire for threading beads. Posting it through the bird was much easier than string, but still took a while. Recessed screws hold it to the wings and there is a carved groove on the bird to allow the string to curve up to the hole without pushing the wing off the bird.
I then decided that having the wings move as one was not as good as it could be. To make them independent I chopped a small section out of the middle of the dowel hinge and made two little hoops of steel wire that go through each other and tied them to the end of each piece of dowel by posting one side through a little hole on the dowels end. I now had two attached, twistable bits of dowel the same length as before. The push mechanism (spring inside base) slackens the string and makes the wings fall, so moving it up and down makes them flap. The strings are tied to opposite sides of the push base so the wings can be controlled independently or together.
Before I assembled it all I gave everything a finish, not of my new polish though because I didn’t want to rub the wings, so I used two coats of hard-wax oil. Six different types of wood, seven including the pencils, have been used to make this bird for all their different colours.