Author Topic: Yew beast, yew!  (Read 2699 times)

Offline Les Symonds

  • platinum
  • *****
  • Posts: 3273
    • Pren
Yew beast, yew!
« on: January 11, 2016, 04:26:38 PM »


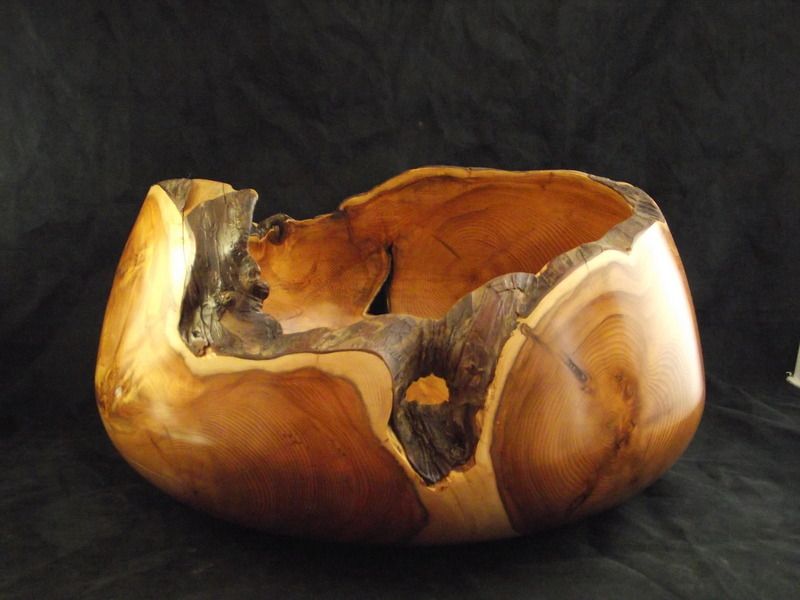
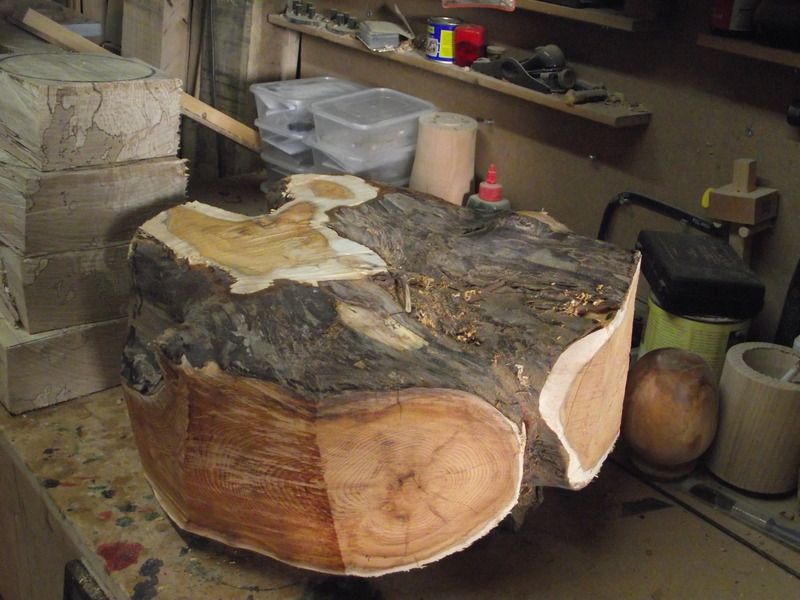
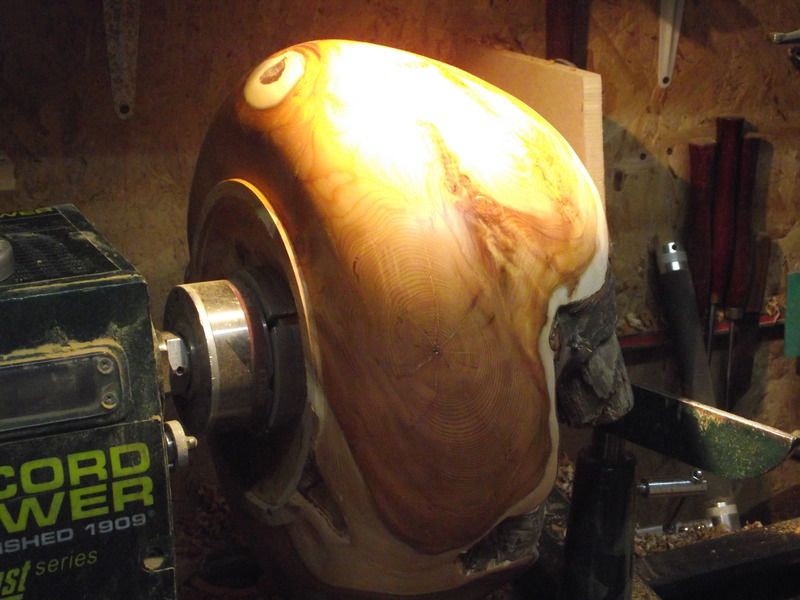
This was a commission from my local pharmacist, who supplied his own piece of timber - a 27" long x 22" wide x 9" thick intersection of three trunks, and it had been sat in his shed for 15years getting drier and harder. The largest blank that I was able to cut from it was 19" diameter x 9" thick, but the surface chosen to be the top of the bowl was far too uneven to accept a faceplate, so work started by fixing a 6" faceplate to the base, with four 2"x1/4" coach screws. This allowed me to get a bit of weight off the blank by truing up the outside, and then to sink a socket into the top of it. I had to cut into the bowl for a good few inches before I found a surface free of voids to form the socket, and my chuck had to be lined up with one of the voids in the side so that a chuck key could reach the chuck.


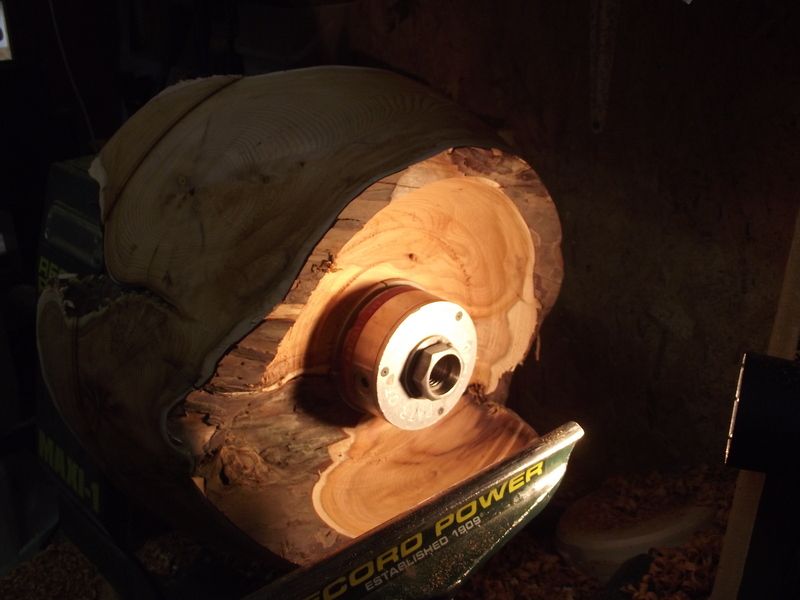
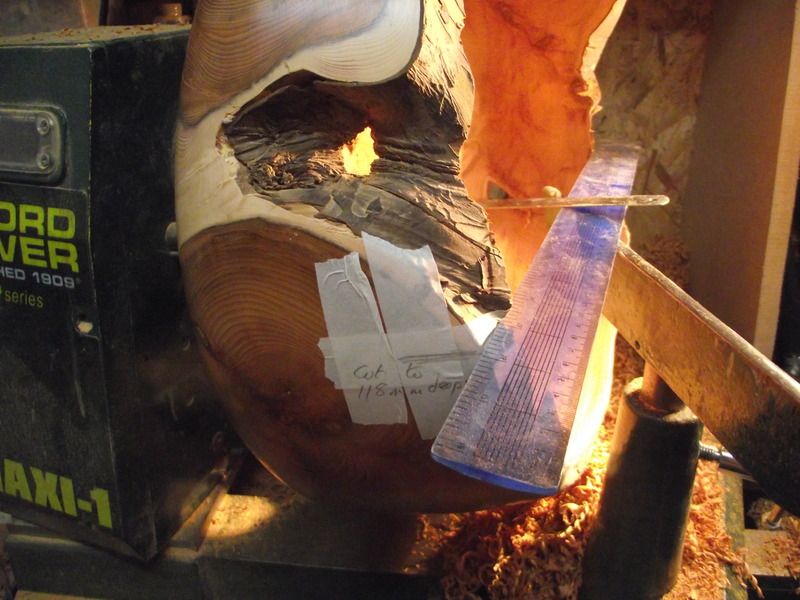
Cutting the depth was tricky, as how the heck do you measure depth with such an uneven rim? I settled for calculating the depth of the coach-screw holes in relation to the foot of the bowl, then added 5/8" for the thickness of the bottom - this came to a tad over 2". Next I put the bowl the right way up on my bench and put a house-brick either side of it with a wooden beam going across the top. I took a measurement from the beam to the bench-top (9"), deducted a tad over 2" and the difference (7") was how deep the inside of the bowl should be below the beam. At that point I'd cut down into the bowl to 4" deep, so there was another 3" to go, but obviously, once the bowl was back on the lathe I wasn't going to be able to use the bricks-and-beam. The crucial thing was to know that I still had 3" to go! I simply chose two depressions in the rim of the bowl and put a 2ft rule across, which effectively marked the diameter and from this I was able to measure depth at the bowl's centre. I put masking tape on these depressions and pencil-marked the exact positions for the rule, so that each time I checked the depth I was measuring from exactly the same position....it worked perfectly!


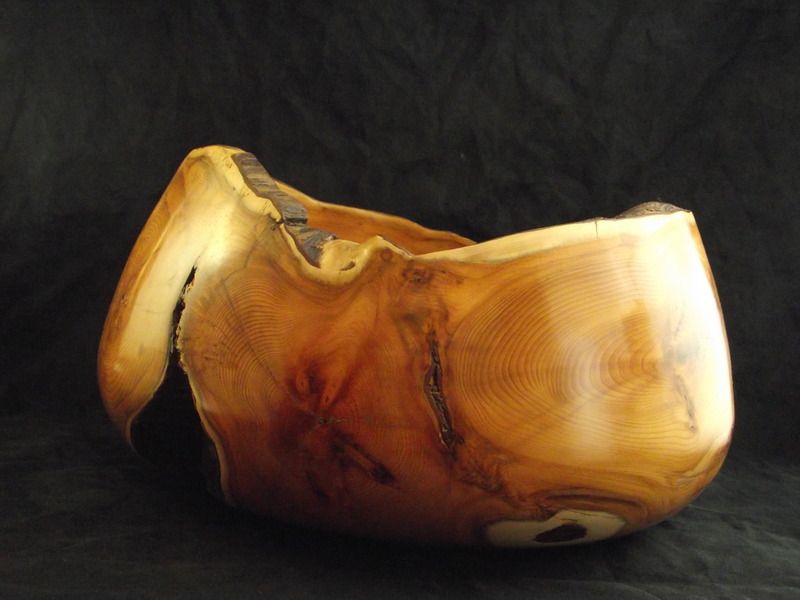
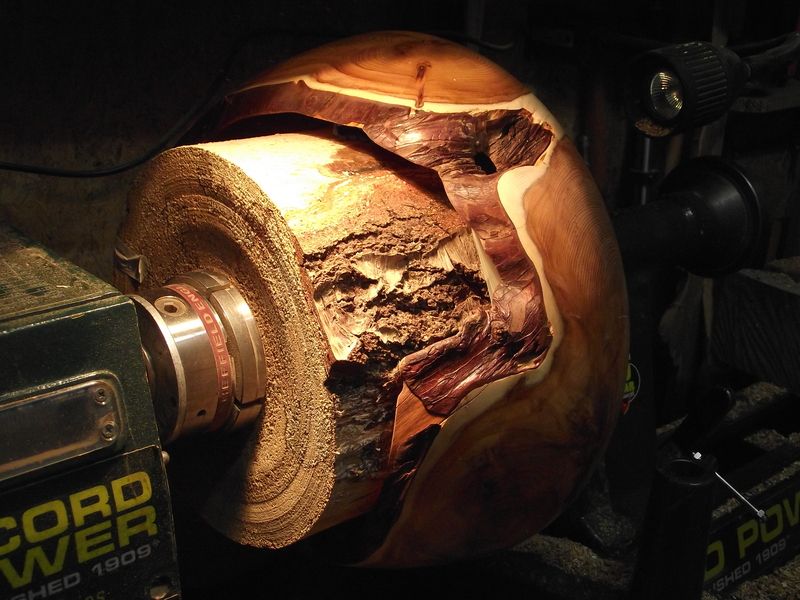
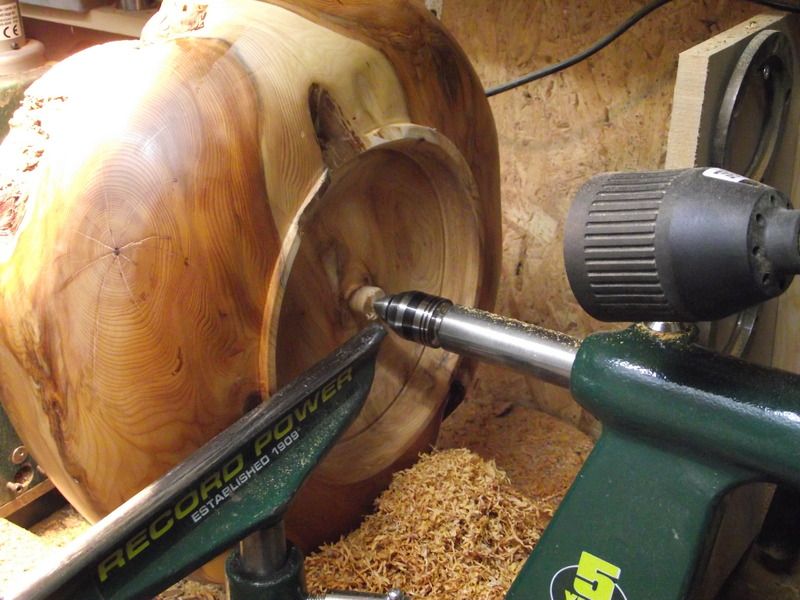
With the inside cut and sanded, the bowl was reversed onto a 12" diameter log with its end rounded over and clad in non-slip fabric, the bowl being pushed into place with the tailstock. I cleaned up the bottom of the bowl to the bottom of the original faceplate holes and left a 3/4" stub to be later cut away and sanded.


The finish is 1 coat of wax oil and (so far) one coat of micro-crystaline wax....a few more coats of wax will follow.

C&C always welcome.

Education is important, but wood turning is importanter.

Offline Nick Simpson

  • bronze
  • ***
  • Posts: 138
    • Boglecraft
Re: Yew beast, yew!
« Reply #1 on: January 11, 2016, 07:02:21 PM »
Thank you for this post. The explanation is particularly valuable to me. Well done
Kind regards
Nick
See me at Boglecraft  https://www.Boglecraft.co.uk

Offline TWiG

  • gold
  • ****
  • Posts: 349
Re: Yew beast, yew!
« Reply #2 on: January 11, 2016, 07:37:49 PM »
This was obviously very  hard work !!   very dry/ hard Yew must of been horrible to turn and shift the required volume of wood , especially from the interior , great effort Les but I personally do not like the shape at all  ( was it clients choice or yours ? ) , and undercutting the rim must have been a nightmare for tool control and sanding,so  well done .....Terry ..

Offline Derek

  • platinum
  • *****
  • Posts: 1369
Re: Yew beast, yew!
« Reply #3 on: January 11, 2016, 09:06:15 PM »
Well done on this piece I like the chunkiness(if there is a word) to this one.

Offline bodrighywood

  • platinum
  • *****
  • Posts: 3631
    • Bodrighy Wood
Re: Yew beast, yew!
« Reply #4 on: January 11, 2016, 10:13:03 PM »
I was told to help myself to a stump of yew onec and blunted two chainsaw bladses trying to cut it so I sympathise. So much for you being technically a 'soft wood'  I measure depth from the tool rest when the rim is not even. When you want to mount an uneven piece of wood on a face plate make up a wooden plate and use hot glue and wedges. Don't do this on bark mind, just on the actual wood.

Pete
Turners don't make mistakes, they have design opportunities

Offline Les Symonds

  • platinum
  • *****
  • Posts: 3273
    • Pren
Re: Yew beast, yew!
« Reply #5 on: January 12, 2016, 06:03:45 AM »
...I measure depth from the tool rest when the rim is not even.
Yep....I've done that in the past and I know that my picture shows a 12" straight tool rest in use, but once I started hollowing in earnest, I was using a curved rest.


When you want to mount an uneven piece of wood on a face plate make up a wooden plate and use hot glue and wedges. Don't do this on bark mind, just on the actual wood.

Pete
....I was a bit wary of relying on hot-melt glue with a 60lb lump of wood, especially given that it was so out of balance!

Les
Education is important, but wood turning is importanter.

Offline Bryan Milham

  • Administrator
  • platinum
  • *****
  • Posts: 4500
  • I’ve had my patience tested; I’m negative
Re: Yew beast, yew!
« Reply #6 on: January 13, 2016, 07:50:43 PM »
Les,

What a stunning bowl, it just screams 'Look at me, pick me up, stroke me'.

I make and sell yew bowls of this shape, but far smaller, not of these dimensions, it is a big lump. Did you get to keep the off cuts?

It's also interesting to see and read some of your techniques to hold it at various time of the work progression.
Oh Lord, Lead me not into temptation…

...Oh who am I kidding, follow me, I know a shortcut!

Offline edbanger

  • platinum
  • *****
  • Posts: 1719
    • Olivers Woodturning
Re: Yew beast, yew!
« Reply #7 on: January 14, 2016, 08:08:15 AM »
Another very nice looking piece Les

With the detail of this post it could be something for FB.

All the best

Ed